About Zimbra Collaboration Suite (ZCS)
Zimbra Collaboration Suite, shortly ZCS, is an Open Source, free for personal use, collaborative software platform for email, calendaring, tasks and more. It is currently being developed and maintained by Zimbra, Inc. ZCS is completely extensible and secure for your Organization or customers. We can deploy ZCS either on premises or private and public clouds easily. Since, we have direct control over ZCS, the data is completely safe and secure. It provides Mobile-enabled browsers and mobile apps, so you can collaborate anywhere, from any device. ZCS will easily fit into your existing solutions and infrastructure and quickly add additional functionality via Open APIs. You can use ZCS in small, medium-size enterprises to very large organizations. In short, it supports any size of the organization all over the world.
ZCS comes in two flavours, Open Source edition(Free), and Network Edition(Paid). ZCS consists of client and server components, and a desktop client. Zimbra Desktop is a full-featured free desktop email client. The ZCS Web Client is a full-featured collaboration suite that supports email, group calendars, and document sharing using an Ajax web interface. ZCS can synchronize mail, contacts, and calendar items with open-source mail clients such as Evolution, and also with proprietary clients such as Microsoft Outlook and Apple Mail. Zimbra also provides native two-way sync to many mobile devices such as Nokia Eseries, BlackBerry, Windows Mobile, iPhone, Android etc..
The ZCS uses the following list of open source projects.
- Postfix
- MariaDB
- MySQL
- OpenDKIM
- OpenLDAP
- Jetty
- Apache Tomcat
- Lucene
- ClamAV
- SpamAssassin
- Amavis (amavisd-new)
- DSPAM
- Aspell
- James
- nginx
- ØMQ
- Perdition mail retrieval proxy
- And many
Install Zimbra Collaboration Suite In Ubuntu
We already have posted article about ZCS installation and configuration CentOS 7. If you’re planning to deploy ZCS in any RPM based distros, check out the following link.
In this tutorial, we will see how to install Zimbra Collaboration Suite in Debian based systems, for example Ubuntu 14.04.
In my case, my testing system details are:
- OS: Ubuntu 14.04 64bit.
- Hostname: mail.unixmen.local
- Domain: unixmen.local
- Zimbra Server’s IP address: 192.168.1.250
- Zimbra Server’s FQDN: mail.unixmen.local
- DNS Server’s IP address: 192.168.1.101
Recommended Hardware Requirements:
You need to have at least the following system requirements to deploy ZCS.
- Intel/AMD 64-bit CPU 1.5 GHz
- 8 GB or more RAM
- 10GB Hdd
- Additional disk space for mail storage
- Fast Internet connection
Recommended Software Requirements:
- Firewall should be disabled
-
RAID-5 is not recommended for installations with more than 100 accounts
- RHEL/CentOS 7 64 bit
- RHEL/CentOS 6 64 bit
- Ubuntu 14.04/12.04 LTS 64 bit.
-
SUSE Linux Enterprise Server (SLES) 11, SP3 64-bit
- VMware vSphere 4.x
- VMware vSphere 5.x
Update your system and install the necessary dependencies for Zimbra:
First make sure your system and the packages are up to date.
sudo apt-get update && sudo apt-get upgrade
Then, install the following prerequisites:
sudo apt-get install libgmp-dev libidn11 wget nano make netcat sudo sysstat libtool libltdl7-dev build-essential libc6 perl ntp libperl-dev libidn11-dev sysstat sqlite3 wget libaio1 resolvconf unzip pax netcat-openbsd -y
Network Configuration:
sudo vi /etc/hosts
Add your Zimbra server’s IP address and hostname as shown below. Replace the following lines with your own values.
192.168.1.250 mail.unixmen.local mail
Edit network configuration file:
sudo vi /etc/network/interfaces
Add nameserver IP address:
[...]
dns-nameservers 192.168.1.101
[...]
Then, edit:
sudo vi /etc/resolv.conf
Add your nameserver details.
nameserver 192.168.1.101
Reboot your system once to take effect the saved changes.
Add DNS records in your DNS server:
Then, add proper ‘A’ record for your hostname and ‘MX’ record for your Domain in your DNS server.
If you don’t have DNS server, refer the following links.
Go to your DNS server. Then, add the ‘A’ record for your hostname and ‘MX’ record for your domain. In my case, I have a private DNS server in Ubuntu.
Note: Don’t use the same system for DNS server and Zimbra. It may conflict during installation.
So, I added the following lines in my DNS server’s forward and reverse zone files.
sudo vi /etc/bind/forward.unixmen
Add the following lines.
[...]
@                       IN  A   192.168.1.250
mail.unixmen.local.     A       192.168.1.250
mail.unixmen.local.     MX  0   mail.unixmen.local.
unixmen.local.          MX  0   mail.unixmen.local.
[...]
Add the same lines in your reverse zone file.
Then, restart bind9 service using command:
sudo service bind9 restart
Now, run the following commands to verify if our DNS records are working or not.
Go to your Zimbra server, and run:
nslookup mail.unixmen.local
Sample output:
Server:        192.168.1.101
Address:    192.168.1.101#53

Name:    mail.unixmen.local
Address: 192.168.1.250
dig mail.unixmen.local mx
Sample output:
; <<>> DiG 9.9.5-3ubuntu0.2-Ubuntu <<>> mail.unixmen.local mx
;; global options: +cmd
;; Got answer:
;; ->>HEADER<<- opcode: QUERY, status: NOERROR, id: 18016
;; flags: qr aa rd ra; QUERY: 1, ANSWER: 1, AUTHORITY: 2, ADDITIONAL: 4

;; OPT PSEUDOSECTION:
; EDNS: version: 0, flags:; udp: 4096
;; QUESTION SECTION:
;mail.unixmen.local.        IN    MX

;; ANSWER SECTION:
mail.unixmen.local.    86400    IN    MX    0 mail.unixmen.local.

;; AUTHORITY SECTION:
unixmen.local.        86400    IN    NS    secondarydns.unixmen.local.
unixmen.local.        86400    IN    NS    masterdns.unixmen.local.

;; ADDITIONAL SECTION:
mail.unixmen.local.    86400    IN    A    192.168.1.250
masterdns.unixmen.local. 86400    IN    A    192.168.1.101
secondarydns.unixmen.local. 86400 IN    A    192.168.1.102

;; Query time: 5 msec
;; SERVER: 192.168.1.101#53(192.168.1.101)
;; WHEN: Fri Apr 10 17:36:53 IST 2015
;; MSG SIZE  rcvd: 162
If your Ubuntu server is behind router/firewall, you should forward at least port 25 from your router/firewall to your Ubuntu server.
Great, now we have added the proper DNS records, and it’s working well.
Now, we will install Zimbra.
Download and install Zimbra Collaboration Suite:
Please note that deploy ZCS in freshly installed system. You cannot have any other web server, database, LDAP, or MTA server running, when you install the Zimbra software. If you have installed any of the applications before you install Zimbra software, disable these applications. During the Zimbra Collaboration installation, Zimbra makes global system changes that may break applications that are on your server.
Now, Go to ZCS open source download page and download the latest version depending upon your OS type. Here, we are deploying ZCS in Ubuntu 14.04 LTS,
wget https://files.zimbra.com/downloads/8.6.0_GA/zcs-8.6.0_GA_1153.UBUNTU14_64.20141215151116.tgz
Unpack ZCS using command:
tar xvfz zcs-*
Change to the extracted folder using command:
cd zcs-*
Now, start ZCS installer with the following command:
sudo ./install.sh
Keep attention. You might have to answer several questions.
First, accept the license agreement.
Operations logged to /tmp/install.log.7384
Checking for existing installation...
    zimbra-ldap...NOT FOUND
    zimbra-logger...NOT FOUND
    zimbra-mta...NOT FOUND
    zimbra-dnscache...NOT FOUND
    zimbra-snmp...NOT FOUND
    zimbra-store...NOT FOUND
    zimbra-apache...NOT FOUND
    zimbra-spell...NOT FOUND
    zimbra-convertd...NOT FOUND
    zimbra-memcached...NOT FOUND
    zimbra-proxy...NOT FOUND
    zimbra-archiving...NOT FOUND
    zimbra-core...NOT FOUND

PLEASE READ THIS AGREEMENT CAREFULLY BEFORE USING THE SOFTWARE.
ZIMBRA, INC. ("ZIMBRA") WILL ONLY LICENSE THIS SOFTWARE TO YOU IF YOU
FIRST ACCEPT THE TERMS OF THIS AGREEMENT. BY DOWNLOADING OR INSTALLING
THE SOFTWARE, OR USING THE PRODUCT, YOU ARE CONSENTING TO BE BOUND BY
THIS AGREEMENT. IF YOU DO NOT AGREE TO ALL OF THE TERMS OF THIS
AGREEMENT, THEN DO NOT DOWNLOAD, INSTALL OR USE THE PRODUCT.

License Terms for the Zimbra Collaboration Suite:
  http://www.zimbra.com/license/zimbra-public-eula-2-5.html

Do you agree with the terms of the software license agreement? [N] y ## Type Y and Enter
Then, select the packages to install. I install all packages. Just press Enter to install each packages. Finally, enter ‘Y’ to install selected packages.
Select the packages to install

Install zimbra-ldap [Y]  ## Press Enter

Install zimbra-logger [Y] ## Press Enter

Install zimbra-mta [Y] ## Press Enter

Install zimbra-dnscache [Y] ## Press Enter

Install zimbra-snmp [Y] ## Press Enter

Install zimbra-store [Y] ## Press Enter

Install zimbra-apache [Y] ## Press Enter

Install zimbra-spell [Y] ## Press Enter

Install zimbra-memcached [Y] ## Press Enter

Install zimbra-proxy [Y] ## Press Enter
Checking required space for zimbra-core
Checking space for zimbra-store
Checking required packages for zimbra-store
zimbra-store package check complete.

Installing:
    zimbra-core
    zimbra-ldap
    zimbra-logger
    zimbra-mta
    zimbra-dnscache
    zimbra-snmp
    zimbra-store
    zimbra-apache
    zimbra-spell
    zimbra-memcached
    zimbra-proxy

The system will be modified.  Continue? [N] y  ## Type Y and press Enter
Now, installer continues again. After a couple of seconds, you’ll see the Zimbra main menu.
Main menu

   1) Common Configuration:
   2) zimbra-ldap:                             Enabled
   3) zimbra-logger:                           Enabled
   4) zimbra-mta:                              Enabled
   5) zimbra-dnscache:                         Enabled
   6) zimbra-snmp:                             Enabled
   7) zimbra-store:                            Enabled
        +Create Admin User:                    yes
        +Admin user to create:                 admin@mail.unixmen.local
******* +Admin Password                        UNSET
        +Anti-virus quarantine user:           virus-quarantine.qhae0rny@mail.unixmen.local
        +Enable automated spam training:       yes
        +Spam training user:                   spam.bijxe4tbpz@mail.unixmen.local
        +Non-spam(Ham) training user:          ham.noduijvbx@mail.unixmen.local
        +SMTP host:                            mail.unixmen.local
        +Web server HTTP port:                 8080
        +Web server HTTPS port:                8443
        +Web server mode:                      https
        +IMAP server port:                     7143
        +IMAP server SSL port:                 7993
        +POP server port:                      7110
        +POP server SSL port:                  7995
        +Use spell check server:               yes
        +Spell server URL:                     http://mail.unixmen.local:7780/aspell.php
        +Enable version update checks:         TRUE
        +Enable version update notifications:  TRUE
        +Version update notification email:    admin@mail.unixmen.local
        +Version update source email:          admin@mail.unixmen.local
        +Install mailstore (service webapp):   yes
        +Install UI (zimbra,zimbraAdmin webapps): yes

   8) zimbra-spell:                            Enabled
   9) zimbra-proxy:                            Enabled
  10) Default Class of Service Configuration:
   s) Save config to file
   x) Expand menu
   q) Quit

Address unconfigured (**) items  (? - help)
Now, you must configure the unconfigured items. The unconfigured items will be shown with a couple of stars(****) in front of them.
As you see in the above output, the ‘admin password’ item is not configured. This unconfigured item is found under Zimbra Store module, which is number 7.
To setup the admin password, enter number 7.
Address unconfigured (**) items (? - help) 7
Then, you will see the following sub-menu. Now, enter ‘4’ to set the admin user password.
Store configuration

   1) Status:                                  Enabled
   2) Create Admin User:                       yes
   3) Admin user to create:                    admin@mail.unixmen.local
** 4) Admin Password                           UNSET
   5) Anti-virus quarantine user:              virus-quarantine.qhae0rny@mail.unixmen.local
   6) Enable automated spam training:          yes
   7) Spam training user:                      spam.bijxe4tbpz@mail.unixmen.local
   8) Non-spam(Ham) training user:             ham.noduijvbx@mail.unixmen.local
   9) SMTP host:                               mail.unixmen.local
  10) Web server HTTP port:                    8080
  11) Web server HTTPS port:                   8443
  12) Web server mode:                         https
  13) IMAP server port:                        7143
  14) IMAP server SSL port:                    7993
  15) POP server port:                         7110
  16) POP server SSL port:                     7995
  17) Use spell check server:                  yes
  18) Spell server URL:                        http://mail.unixmen.local:7780/aspell.php
  19) Enable version update checks:            TRUE
  20) Enable version update notifications:     TRUE
  21) Version update notification email:       admin@mail.unixmen.local
  22) Version update source email:             admin@mail.unixmen.local
  23) Install mailstore (service webapp):      yes
  24) Install UI (zimbra,zimbraAdmin webapps): yes

Select, or 'r' for previous menu [r] 4
Set password for the admin user. Use any strong password. Press enter to update the password.
Password for admin@mail.unixmen.local (min 6 characters): [OaInFVvE] ubuntu@123
Now, enter ‘r’ to return to previous menu.
Select, or 'r' for previous menu [r] r
Configuration is complete now. Press ‘a’ to apply.
*** CONFIGURATION COMPLETE - press 'a' to apply
Select from menu, or press 'a' to apply config (? - help) a
Finally, type ‘yes’ to complete the setup.
Save configuration data to a file? [Yes]
Save config in file: [/opt/zimbra/config.17562]
Saving config in /opt/zimbra/config.17562...done.
The system will be modified - continue? [No] yes
After few minutes, you will see the installation completed message.
Access Zimbra Admin Web console
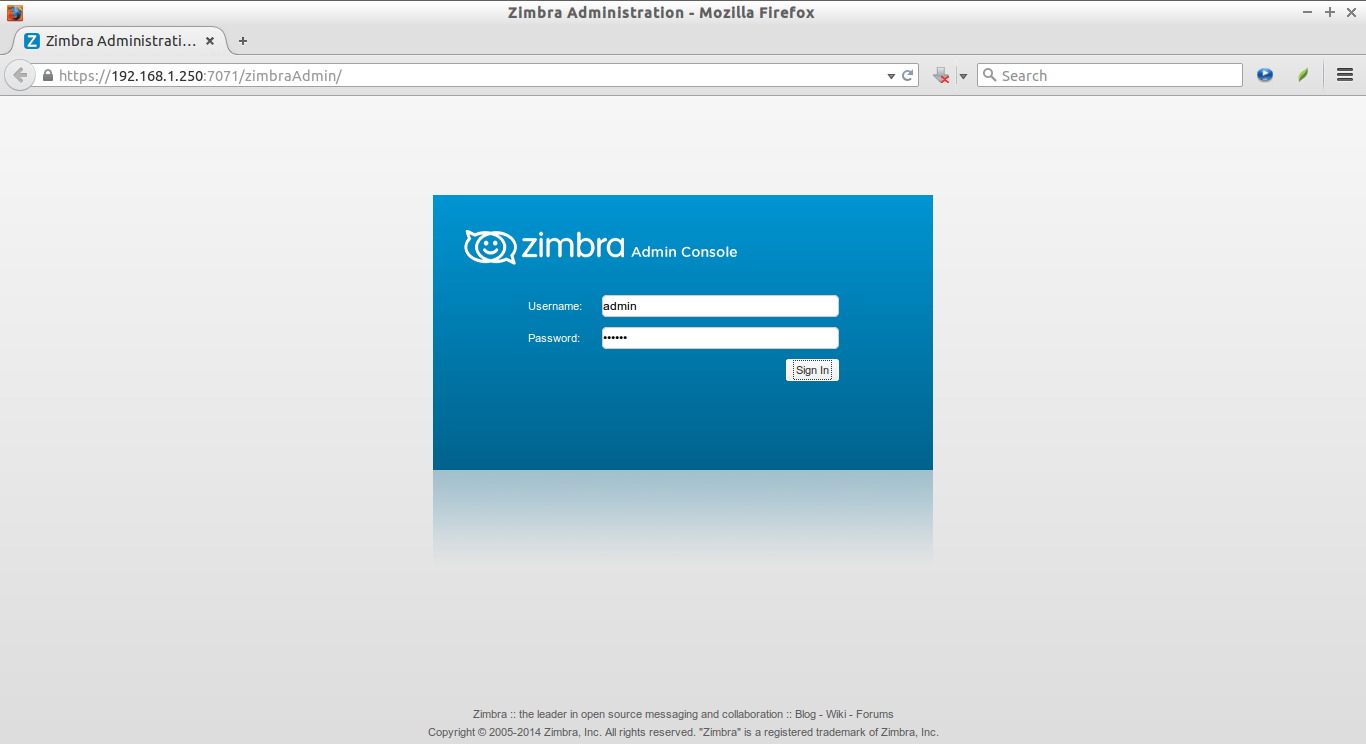
Open up your web browser and type: https://ip-address:7071 or https://domain-name:7071 in the address bar.
Enter the user name as ‘admin’ and the admin password which you have setup in the above steps.
![Zimbra Administration - Mozilla Firefox_001]()
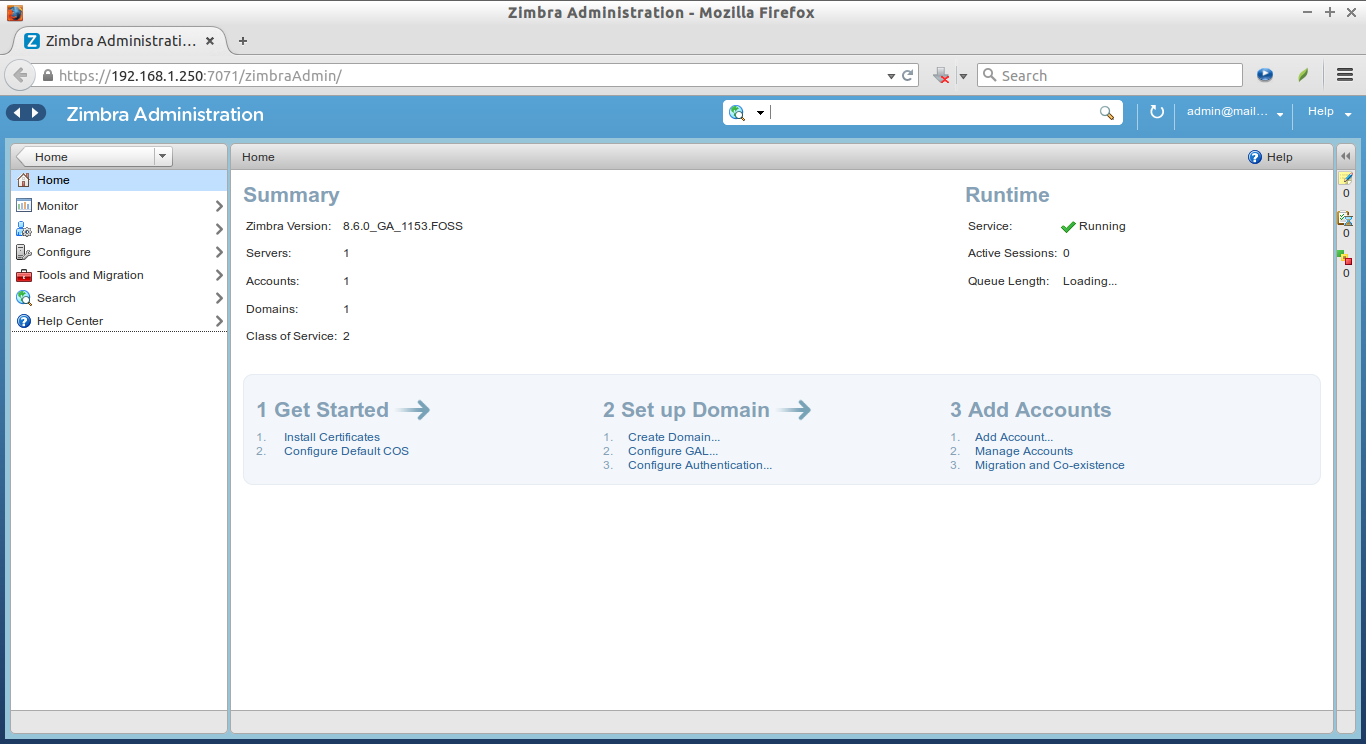
This is how my Dashboard looks.
![Zimbra Administration - Mozilla Firefox_002]()
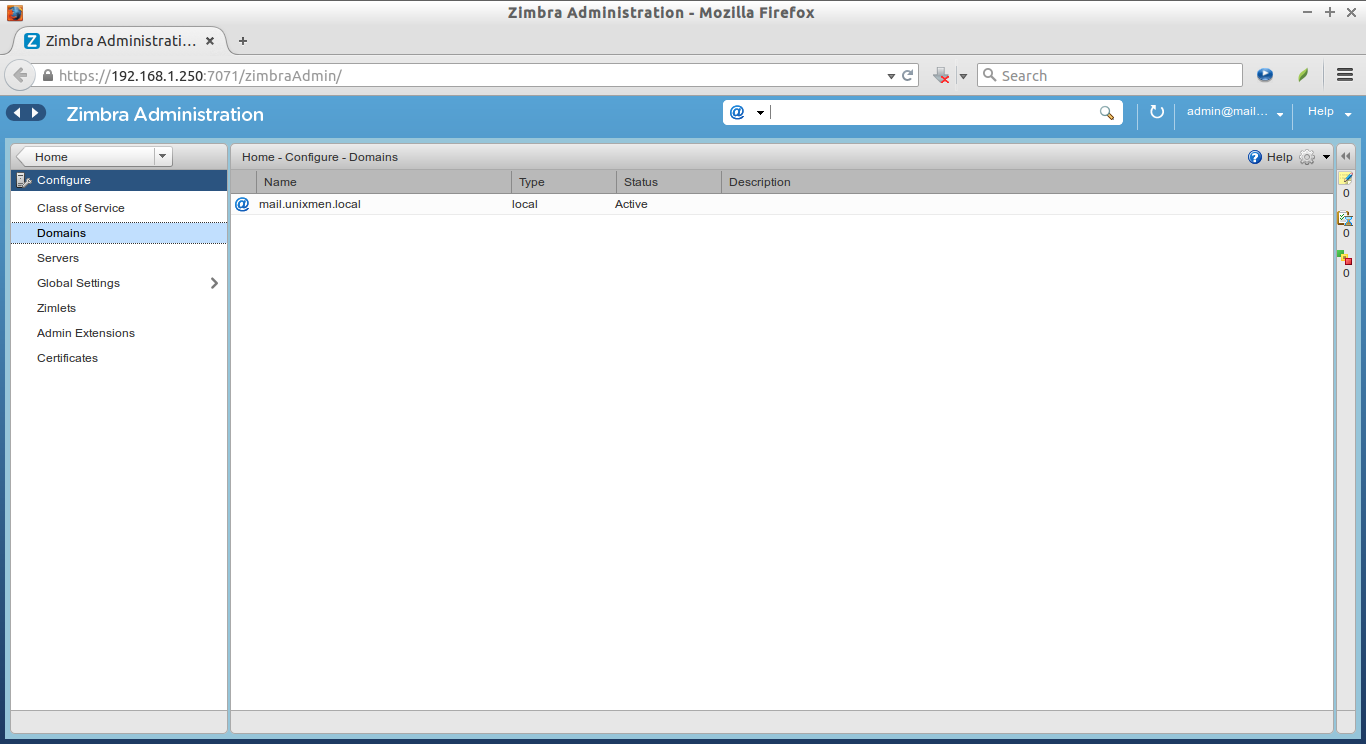
You find the list of available domains under the Configure tab.
![Zimbra Administration - Mozilla Firefox_003]()
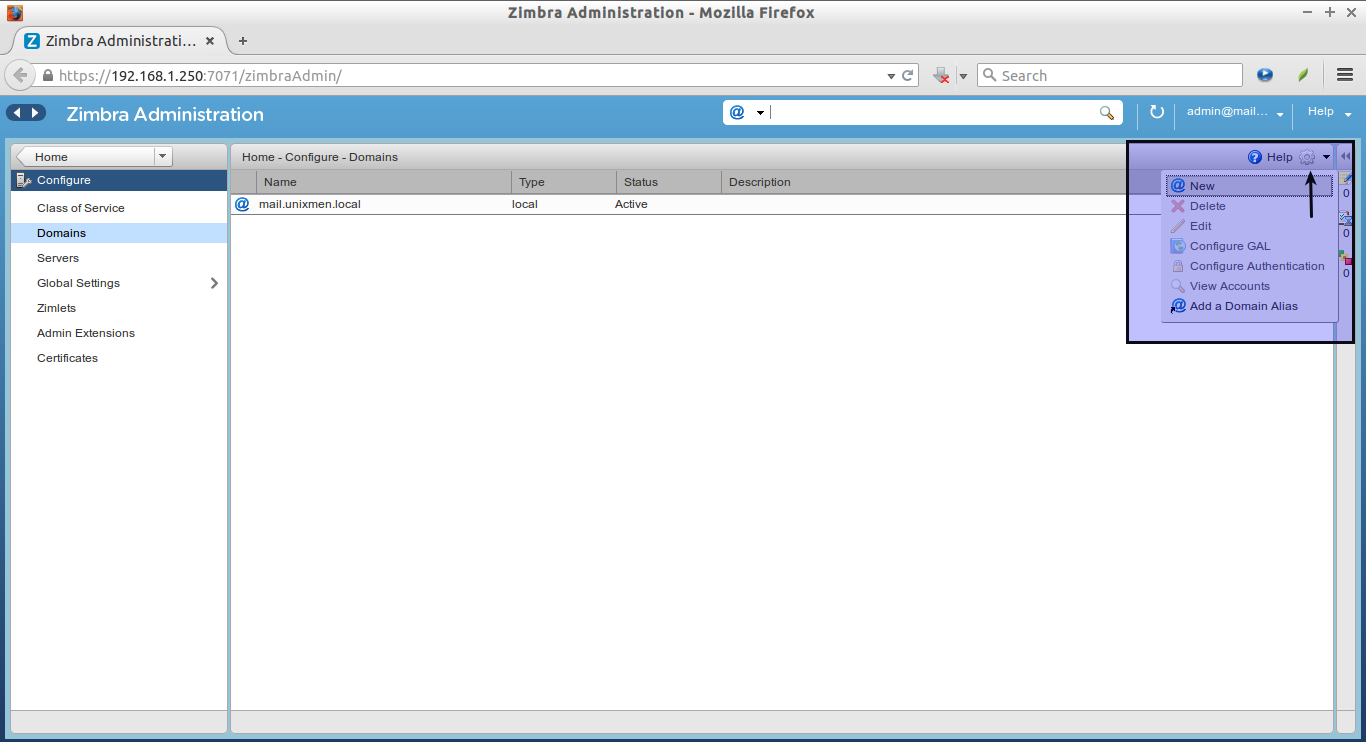
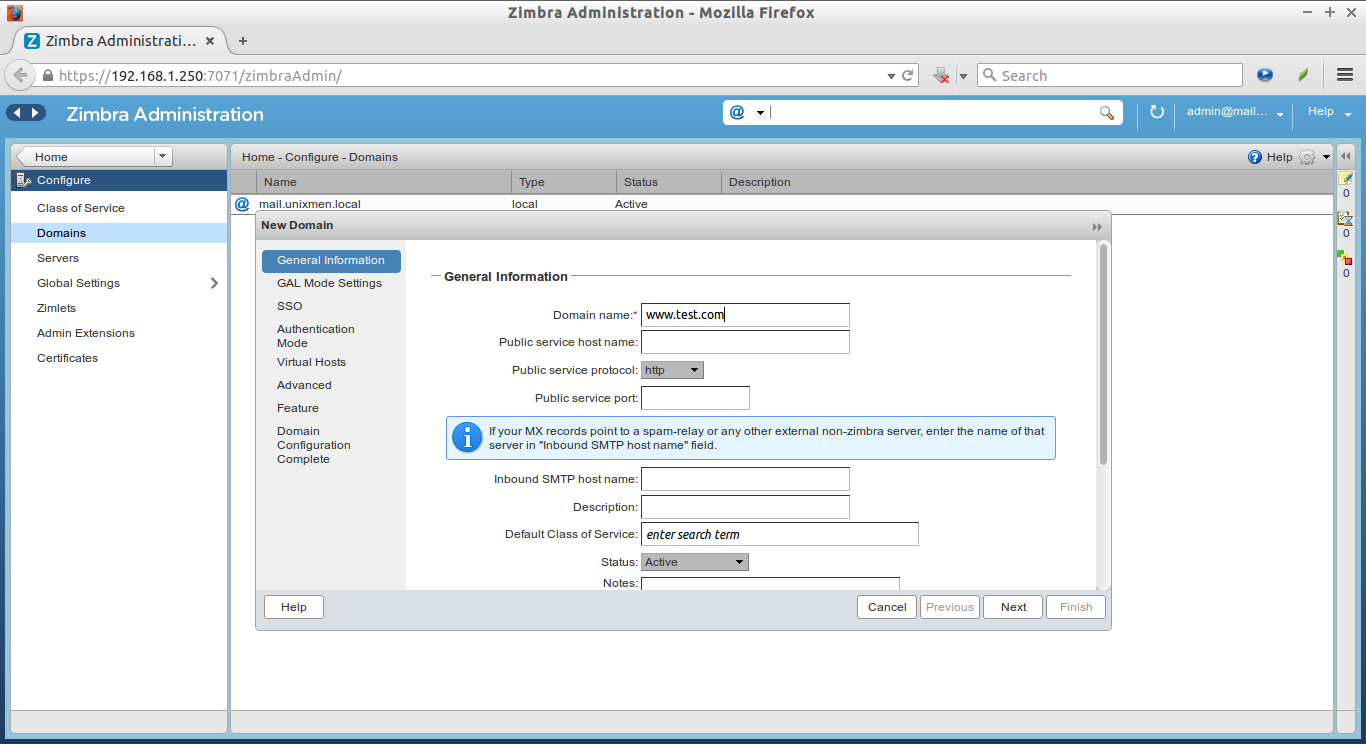
To create a new Domain, click on the Gear box on the right top corner and select New button.
![Tooltip_005]()
Enter the Domain name and protocol etc.
![Zimbra Administration - Mozilla Firefox_006]()
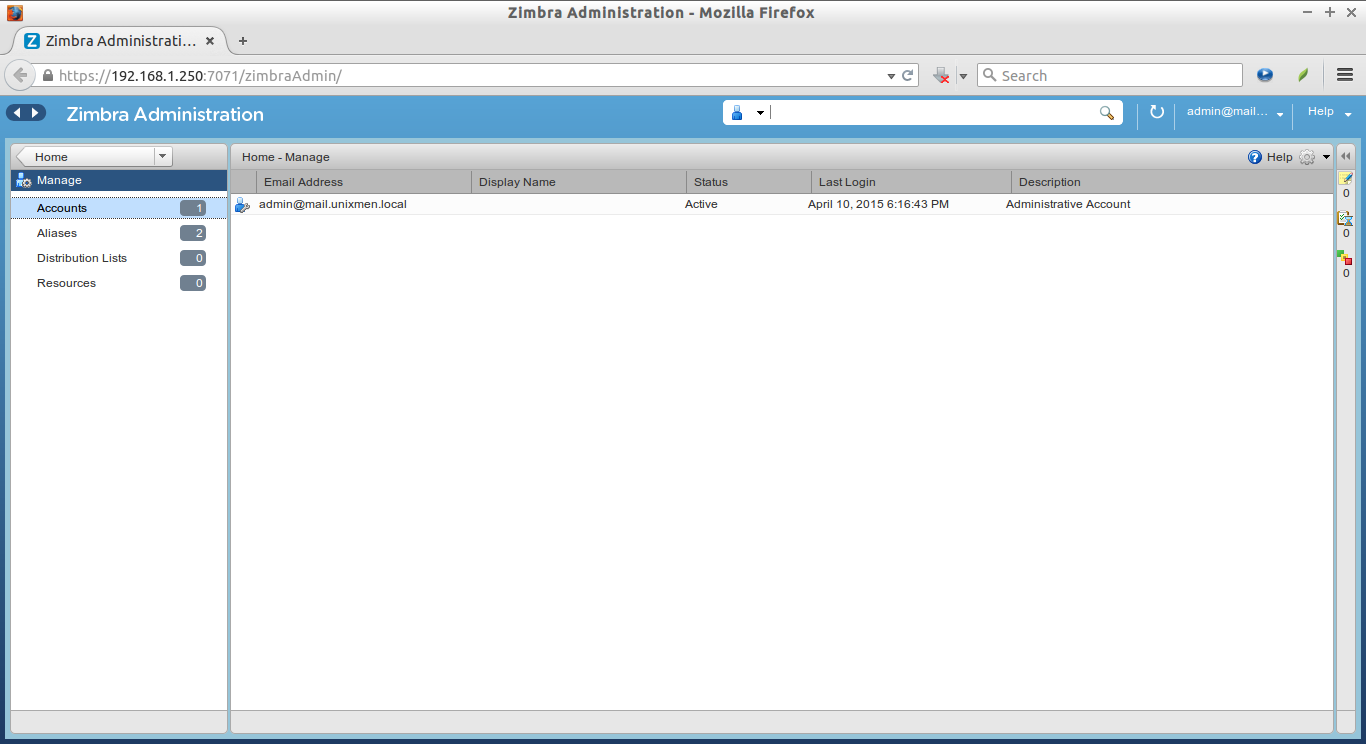
List of available accounts:
![Zimbra Administration - Mozilla Firefox_004]()
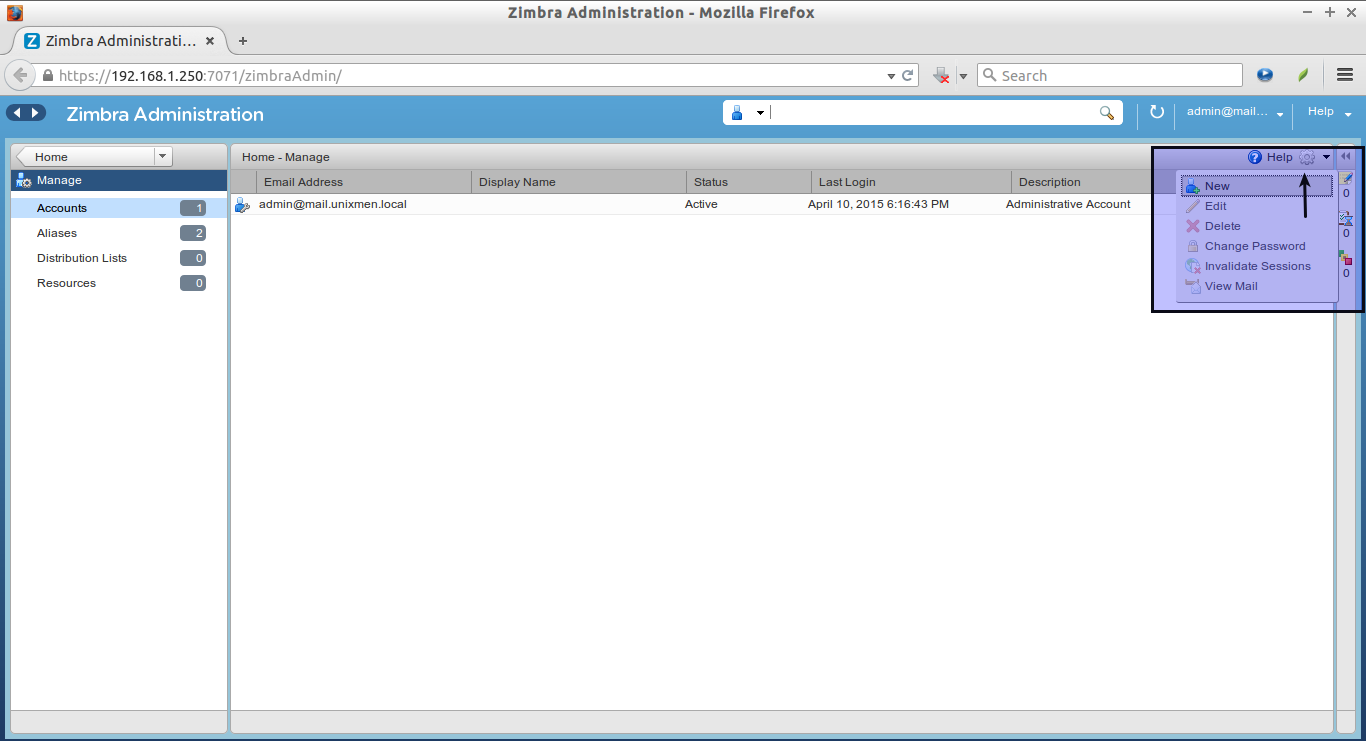
To create a new user account, click on the Gear box on the top right corner.
![Tooltip_007]()
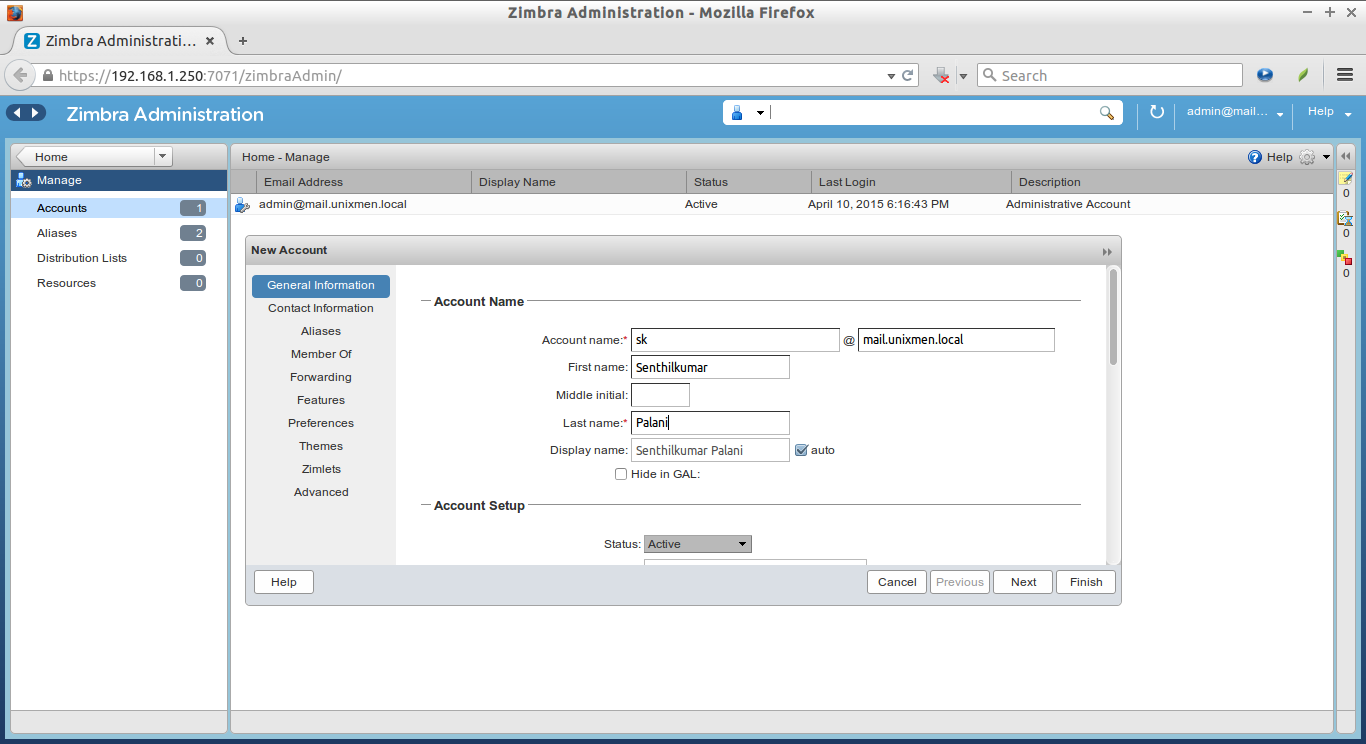
Enter the username, first name, last name, and the user’s password etc. Click Finish to create the user account.
![Zimbra Administration - Mozilla Firefox_008]()
Similarly, we can create, edit, delete users, mail-ids, domains, and also other kind administration tasks such as monitoring users, setup Quotas for Users etc.
Access Zimbra User’s Web console
The users can access their mails using this console.
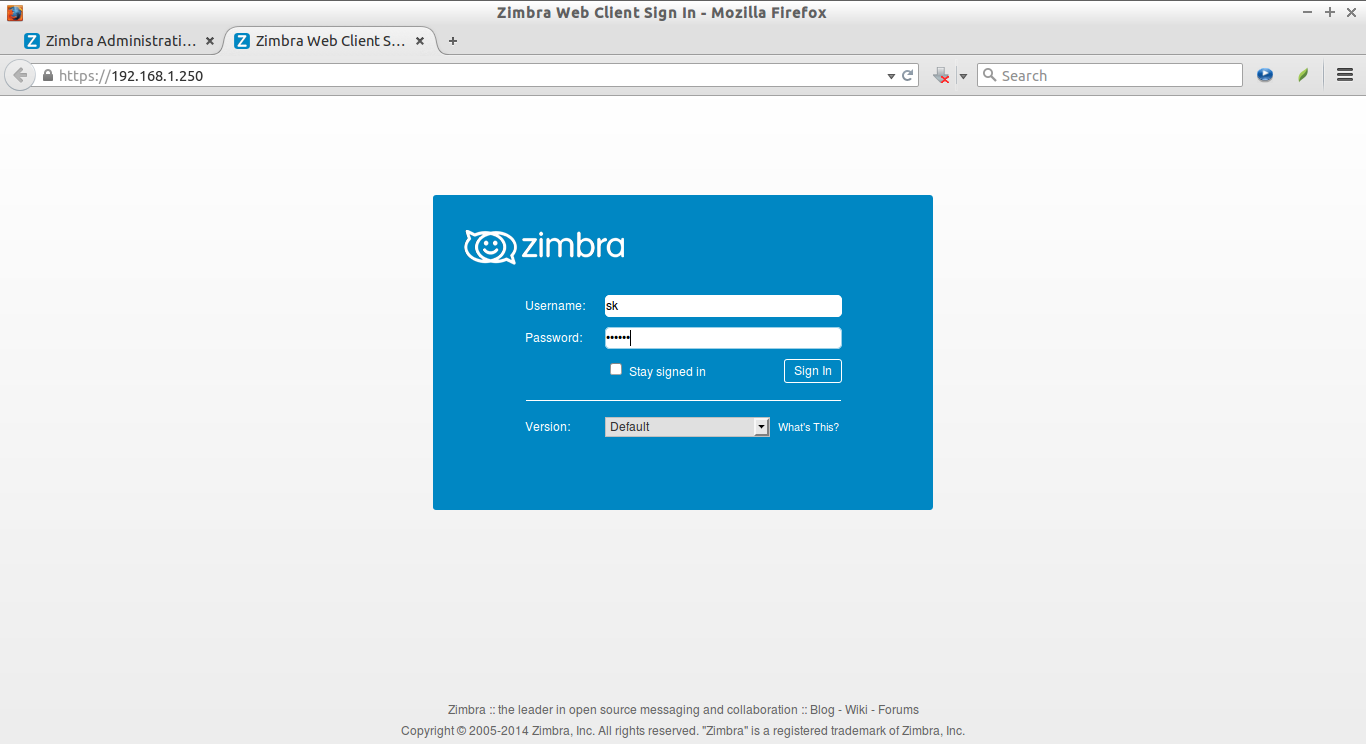
Type: https://ip-address/ or https://domain-name/ in the address bar. Log in with valid user name and password which we have created in the Zimbra Admin console.
![Zimbra Web Client Sign In - Mozilla Firefox_009]()
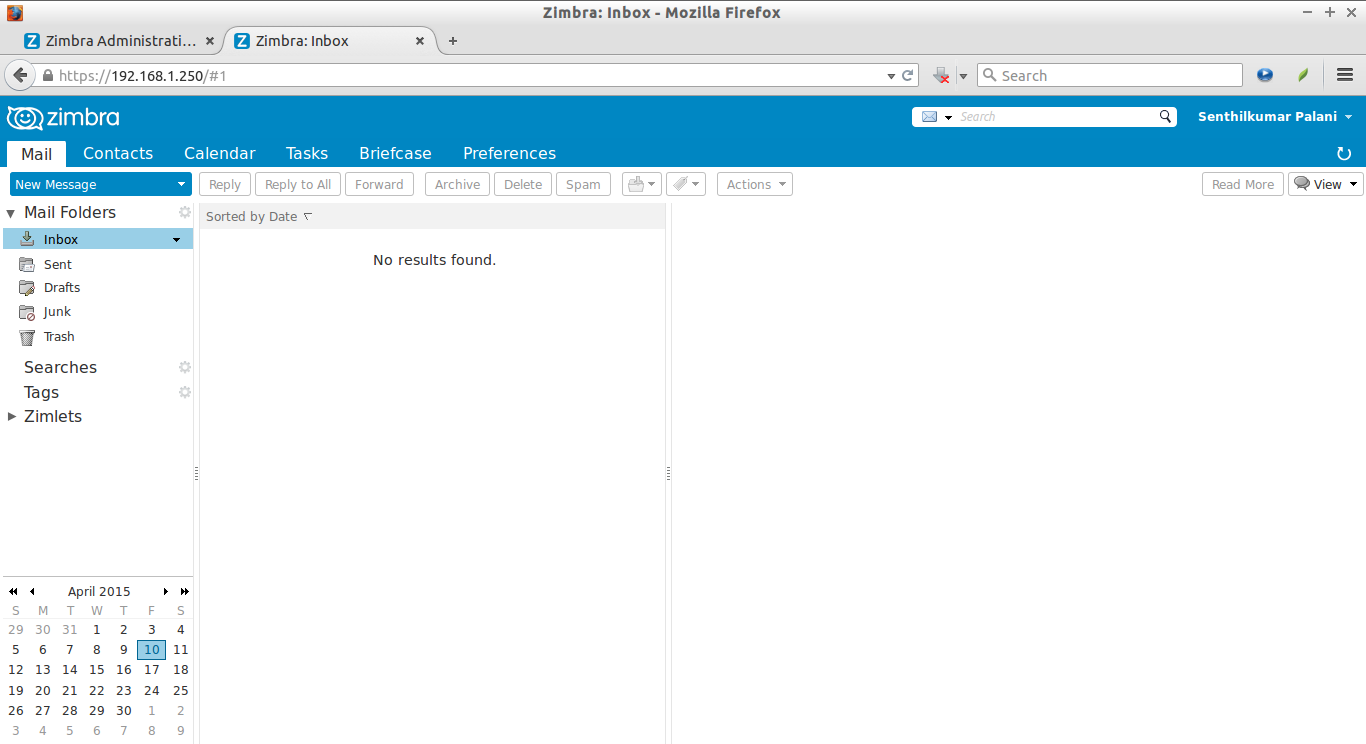
This is how the user’s mail box looks.
![Zimbra: Inbox - Mozilla Firefox_010]()
Let us compose a sample to admin user.
Click on the New Message on the top left corner.
Enter the username (ex.admin@mail.unixmen.local), subject, and body of the mail. Finally, hit the Send.
![Zimbra: Compose - Mozilla Firefox_011]()
Now, log out and log in back as admin user.
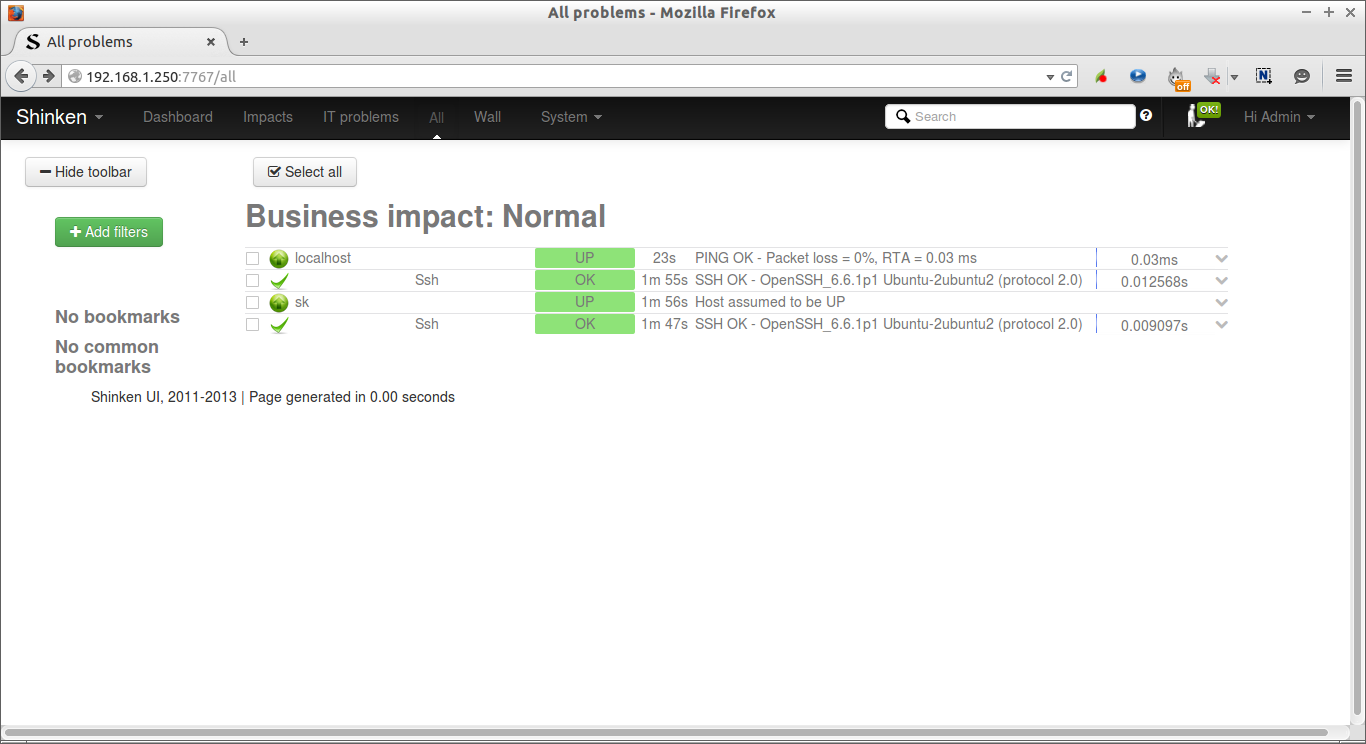
Voila! Admin user got the mail from user “sk”.
![Zimbra: Inbox - Mozilla Firefox_013]()
Uninstall Zimbra Collaboration Suite
Go the Zimbra installation directory
cd zcs-*
And, run the following command to completely uninstall Zimbra and and all its components.
sudo ./install.sh -u
Finally, delete Zimbra installation directory:
cd ..
sudo rm -rf zcs-*
Done!
We, just, have covered the installation and basic configuration part. For complete details about installation and usage, I recommend you to have a look at the below links.
Conclusion
Installing and configuring Zimbra is like a piece of cake. ZCS installation is quite easy if you follow the above steps carefully. You don’t have to be a master In Linux. Everything will be automatically configured during ZCS installation. If you’re not satisfied with Open Source edition, purchase the enterprise version to have complete features and Zimbra professional support.
Give it a try, you won’t be disappointed.
Cheers! happy weekend!!
![]()
Advertise here with BSA
---------------------------------------------------------------------
Install Zimbra Collaboration Suite In Ubuntu


![Ubuntu 14.04 [Running] - Oracle VM VirtualBox_003](http://www.unixmen.com/wp-content/uploads/2015/03/Ubuntu-14.04-Running-Oracle-VM-VirtualBox_003.png)
![Ubuntu 14.04 [Running] - Oracle VM VirtualBox_002](http://www.unixmen.com/wp-content/uploads/2015/03/Ubuntu-14.04-Running-Oracle-VM-VirtualBox_002.png)