Quantcast
Channel: Unixmen » Linux Mint
Viewing all 457 articles
Browse latest View live

How To Configure Port 465 For SMTP Authentication

$
0
0


Today we will see how we can configure port 465 for sending mail with authentication. SSL encryption is started automatically before any SMTP level communication can take place hence this is much more secure. Tcp port 465 is used for SMPT over SSL. Protocol name is known as smtps. SMTPS is not a proprietary protocol and not an extension of SMTP. It is just a way to secure SMTP at the transport layer.

For our today’s walkthrough, I am running a Ubuntu 14.04.3 LTS Linux distribution. I am considering that you have already installed qmail on your system as MTA (Mail Transfer Agents) and qmail is able to send & receive mails. It’s a prerequisite for us. Installing and configuring qmail are not that difficult as well. Refer the following link to install Qmail.

# STEP 1

We need to download the copy of qmail source archive file. You can try this direct download link. If it is not available then just google for “download qmail-1.03.tar.gz”.

Extract the qmail archive file to a location. To do so, issue the following command on a terminal.

sudo tar -zxvf qmail-1.03.tar.gz

SMTPS4651

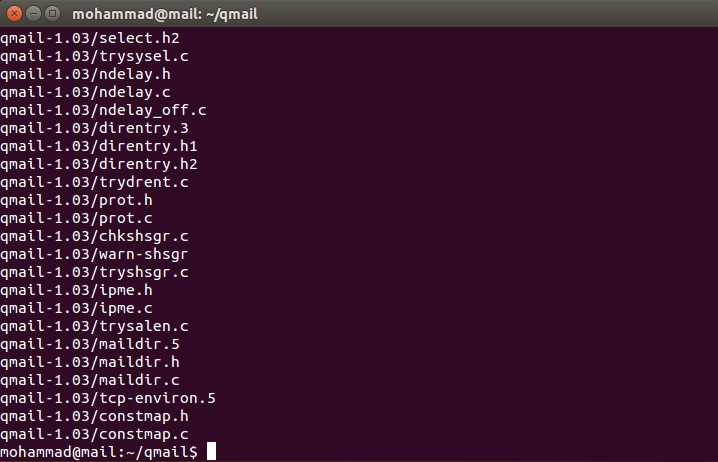
It will extract all file from the archive.

SMTPS4652

Now, move to the extracted directory. I am issuing the following command for my extracted location.

cd /qmail-1.03

Now, issue the following two 2 commands one after another on the terminal.

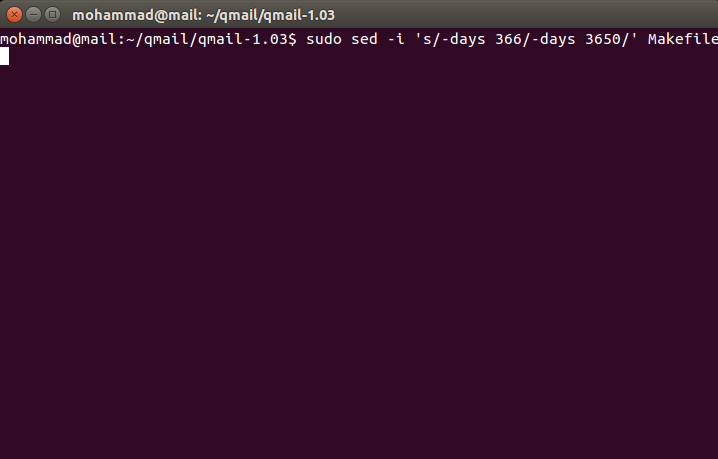
sudo sed -i 's/-days 366/-days 3650/' Makefile

SMTPS4653

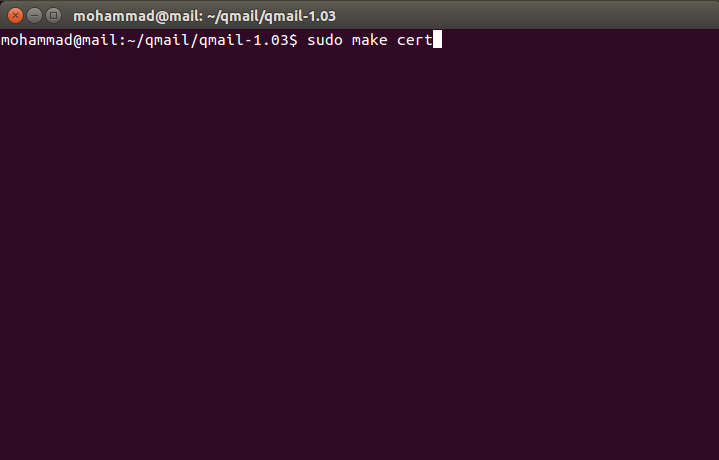
sudo make cert

SMTPS4654

# STEP 2

Installing ucspi-ssl for sslserver. Download ucspi-ssl-0.70.2.tar.gz from this link. If it is not available then just google for “download ucspi-ssl-0.70.2.tar.gz”.

Issue the commands one after another in the terminal.

sudo mkdir /packages
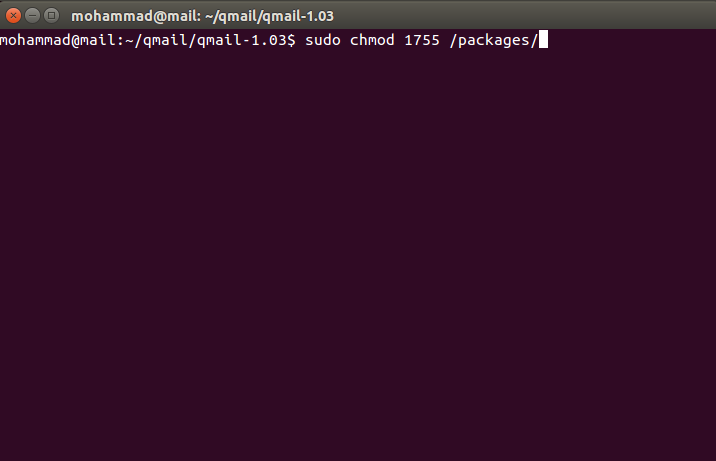
sudo chmod 1755 /packages

SMTPS465permis

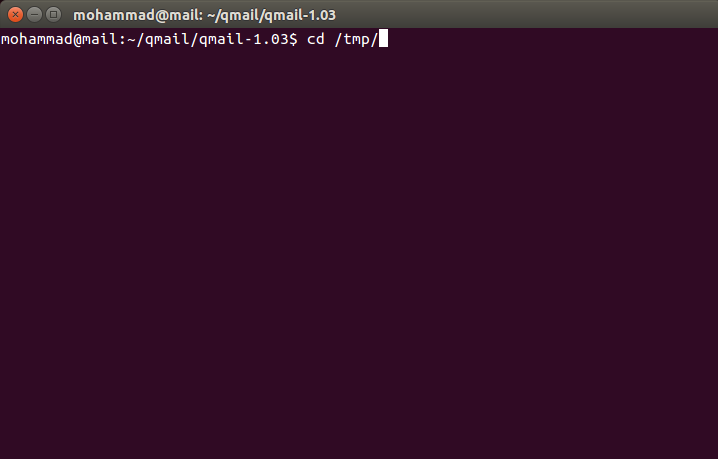
cd /tmp

SMTPS4655

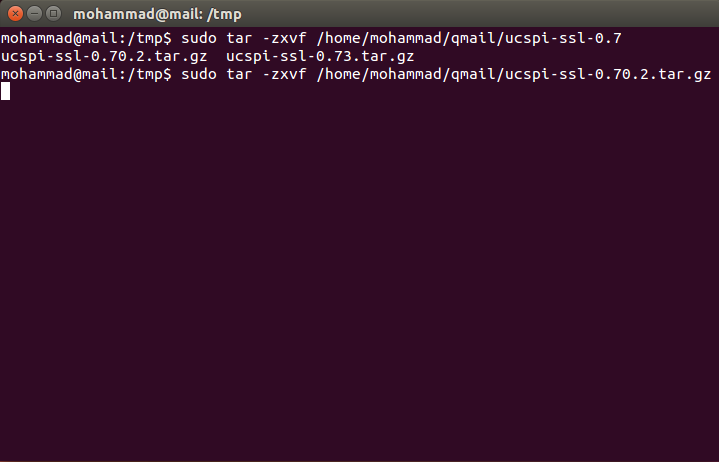
sudo tar -zxvf /home/mohammad/qmail/ucspi-ssl-0.70.2.tar.gz

The above command is for my path to ucspi-ssl-0.70.2.tar.gz file. Please use your own path location for ucspi-ssl-0.70.2.tar.gz.

SMTPS4656

sudo mv /tmp/host/superscript.com/net/ucspi-ssl-0.70.2/ /packages
cd /tmp
sudo rm -rf host
cd /packages/ucspi-ssl-0.70.2/

# STEP 3

Type the following command one by one in the terminal.

sudo sed -i 's/local\///' /packages/ucspi-ssl-0.70.2/src/conf-tcpbin
sudo sed -i 's/usr\/local/etc/' /packages/ucspi-ssl-0.70.2/src/conf-cadir
sudo sed -i 's/usr\/local\/ssl\/pem/etc\/ssl/' /packages/ucspi-ssl-0.70.2/src/conf-dhfile
sudo openssl dhparam -check -text -5 1024 -out /etc/ssl/dh1024.pem
sudo package/compile
sudo package/rts
sudo package/install

# STEP 4

Issue the following command in the terminal one by one and one after another.

sudo chmod a+r /var/qmail/control/servercert.pem
mkdir -p /var/qmail/supervise/qmail-smtpds/log
cd /var/qmail/supervise
sudo chmod +t qmail-smtpds

Now, download the file named service-qmail-smtpdssl-run from here. And then issue the following command.

sudo cp /home/mohammad/Downloads/service-qmail-smtpdssl-run /var/qmail/supervise/qmail-smtpds/run

Again, for the above command, my download folder location was /home/mohammad/Downloads. Please use your path location where you downloaded the file named service-qmail-smtpdssl-run.

Now, open the file /var/qmail/supervise/qmail-smtpds/log/run/smtpdssl_log in your favourite editor. I am using vim.

sudo vim /var/qmail/supervise/qmail-smtpds/log/run/smtpdssl_log

And add these following lines below to the file smtpdssl_log.

#!/bin/sh
 VQ="/var/qmail"
 exec env - PATH="$VQ/bin:/usr/local/bin:/usr/bin:/bin" \ setuidgid qmaill multilog t n1024 s1048576 n20 /var/log/qmail/qmail-smtpds

The file will look like below image.

SMTPS465log

Now, type these three commands one after another in the terminal.

sudo chmod 751 /var/qmail/supervise/qmail-smtpds/run
sudo chmod 751 /var/qmail/supervise/qmail-smtpds/log/run
sudo ln -s /var/qmail/supervise/qmail-smtpds /service/qmail-smtpds

If everything goes well, we are done with configuring port 465 for SMTP authentication. You can test it by using your favourite mail client. Configure your favourite mail client so that it use port 465. I am showing a screenshot of mine.

SMTP465mailclient

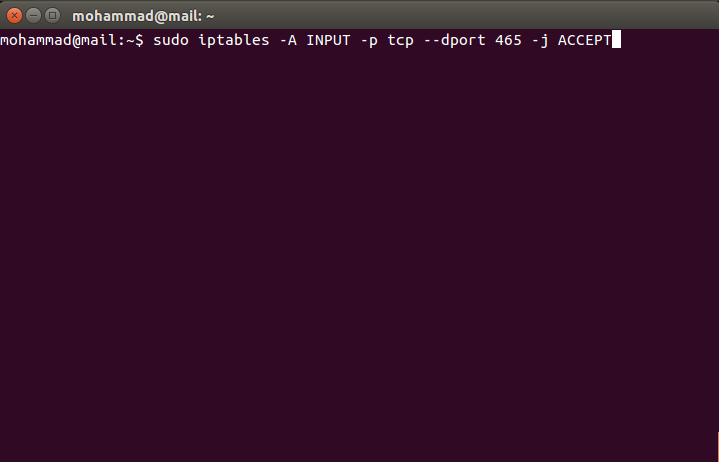
Note: If you are behind any physical firewall like Juniper or Cisco, then you must allow port 465 to pass through. If you are behind any Linux driven firewall, issue the following  command in the terminal to add the rule to your iptables firewall.

sudo iptables -A INPUT -p tcp --dport 465 -j ACCEPT

SMTPS465iptables

That’s all for today. Hope you enjoyed it.


The post How To Configure Port 465 For SMTP Authentication appeared first on Unixmen.


How To Install And Configure Arno Iptables On Ubuntu 14.04 LTS

$
0
0


Today, we will come to know how we can install and configure arno iptables on Ubuntu 14.04 LTS. This is related to security hardening of your server. A good System Administrator must secure his Linux driven servers. There are many ways we can secure our servers. Setting up a good solid firewall is an essential step to take in securing any modern operating system according to your needs. I will show you how to install & Configure arno iptables On Ubuntu 14.04 LTS for securing your servers.

We choose Ubuntu 14.04.3 LTS Linux as this is the latest Long Term Supported Ubuntu Linux distribution. Ubuntu is very easy to work with and has all the beauty that every Linux distribution has.

What is iptables?

Iptables requires elevated privileges to operate and must be executed by user root, otherwise it fails to function. Iptables is a user-space application program that allows a system administrator to configure the tables provided by the Linux kernel firewall (implemented as different Netfilter modules) and the chains and rules it stores. Different kernel modules and programs are currently used for different protocols; iptables applies to IPv4, ip6tables to IPv6, arptables to ARP, and ebtables to Ethernet frames.

We can call it as the basics of Firewall in Linux in general. Iptables is a rules driven firewall system and is normally available pre-installed on most Linux systems for controlling the incoming and outgoing packets. By-default, iptables runs without any rules or policies so we can create, add, edit rules to it according to our needs.

What is arno iptables?

It’s a single & multi-homed firewall script with DSL/ADSL support. It is written by Arno van Amersfoort and dedicated to his father. This program is a free software and available under GNU General Public License agreement. This is the github link for the project. For more details, you can visit the author’s website as well.

It’s a very secure stateful filtering firewall which supports Masquerading (NAT) and SNAT. To learn about all the features, please visit this link.

Here, I will show how to configure arno iptables with two interfaces. Which means, I have two wired LAN / NIC (with RJ 45 port) card already installed and IP address has been already assigned to those interfaces. One will be external and one will be internal interfaces. This two interfaces are normally known as eth0 & eth1. I hope you already know that :)

# STEP 1

Let’s update the repository for packages lists by issuing the following command in the terminal. It’s a good practice to do so whenever you are installing something on your server. It is not mandatory but it will make your server packages up to date.

To do so, open a terminal on your Linux and issue the following command

sudo apt-get update

If you are using CentOS, RedHat or Fedora Linux distribution, please use the following command to get updated.

sudo yum update

# STEP 2

Let’s install arno iptables. Type the following command in the terminal to install it. Hit y/Y to continue.

sudo apt-get install arno-iptables-firewall

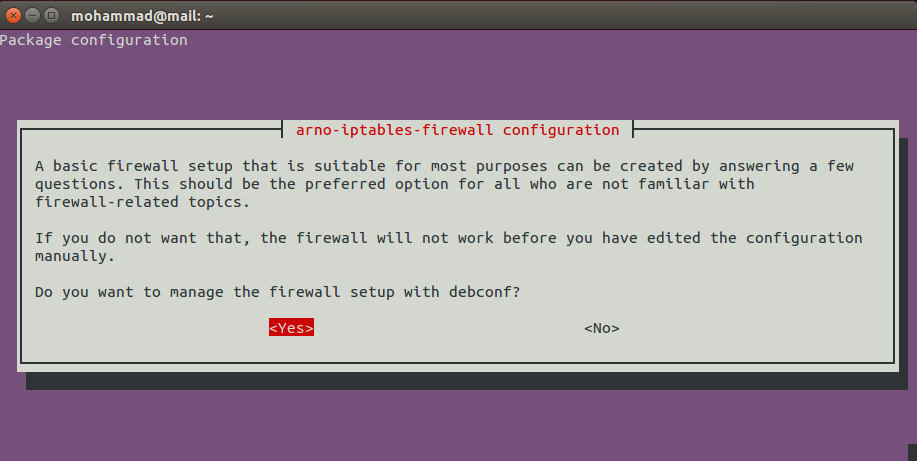
While installing arno iptables, it will show you a window like following with a Yes / No options.

arnoyesnoopitons

Select or hit Yes to continue.

Now, you will see something like below image. Select OK to continue.

okshotonly

# STEP 3

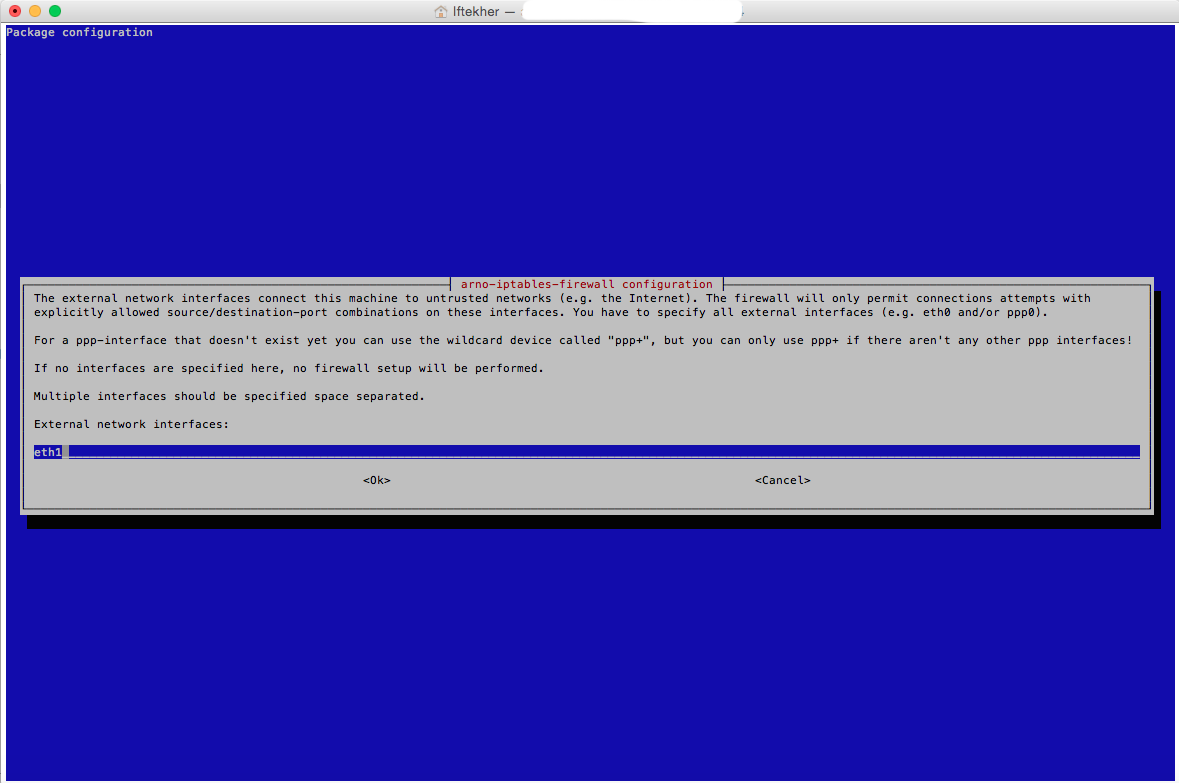
Now, you will see a window like below. Enter your external network interface card alias name. For me, it is eth1. So, I am putting eth1 over here for my external interface card.

arnostep3

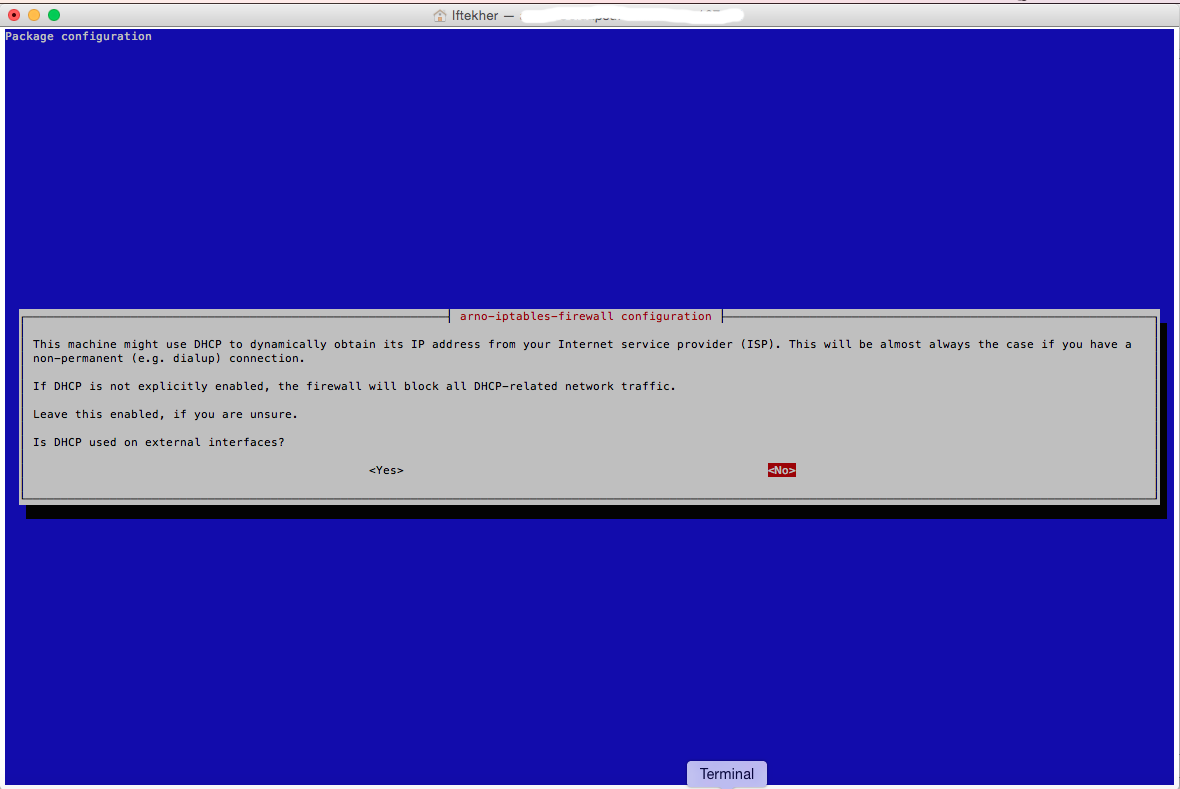
Then, you will get a new window where it will ask that whether the external interface is getting IP address from a DHCP server or not. For me, it is not. My external interface card IP address is manually/statically assigned. So, I am selecting NO.

arnostep3_1

# STEP 4

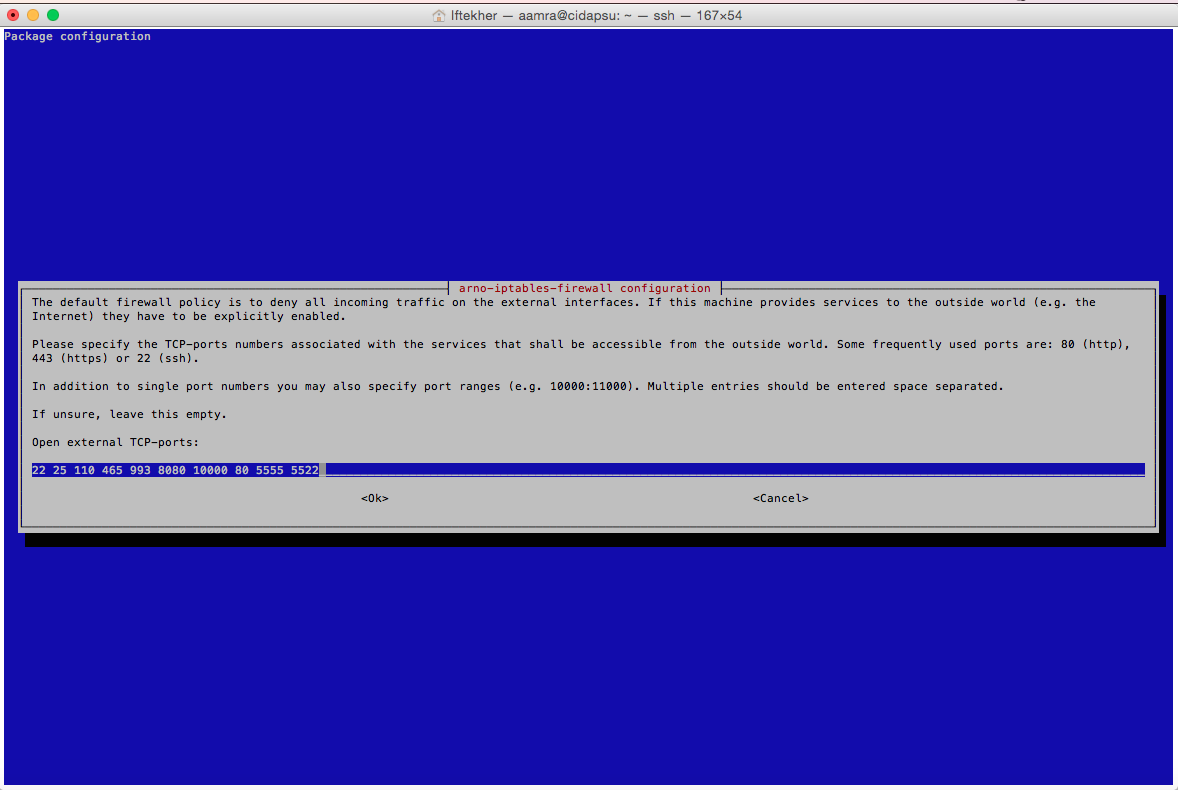
The next window heading tells the story. The default firewall policy is to deny all incoming traffic on the external interfaces. Note that, this is for TCP protocols only. Please type your port numbers which will be opened by the firewall. I am typing according to my needs and you should open your desired ports for the external interface.

arnostep4

You can see that I am opening some commonly known ports like 22 (SSH), 25 (SMTP), 8080 (Proxy), 10000 (webmin) and few other TCP ports according to my requirements. You should type your desired TCP port numbers over here. Hit OK once you are done.

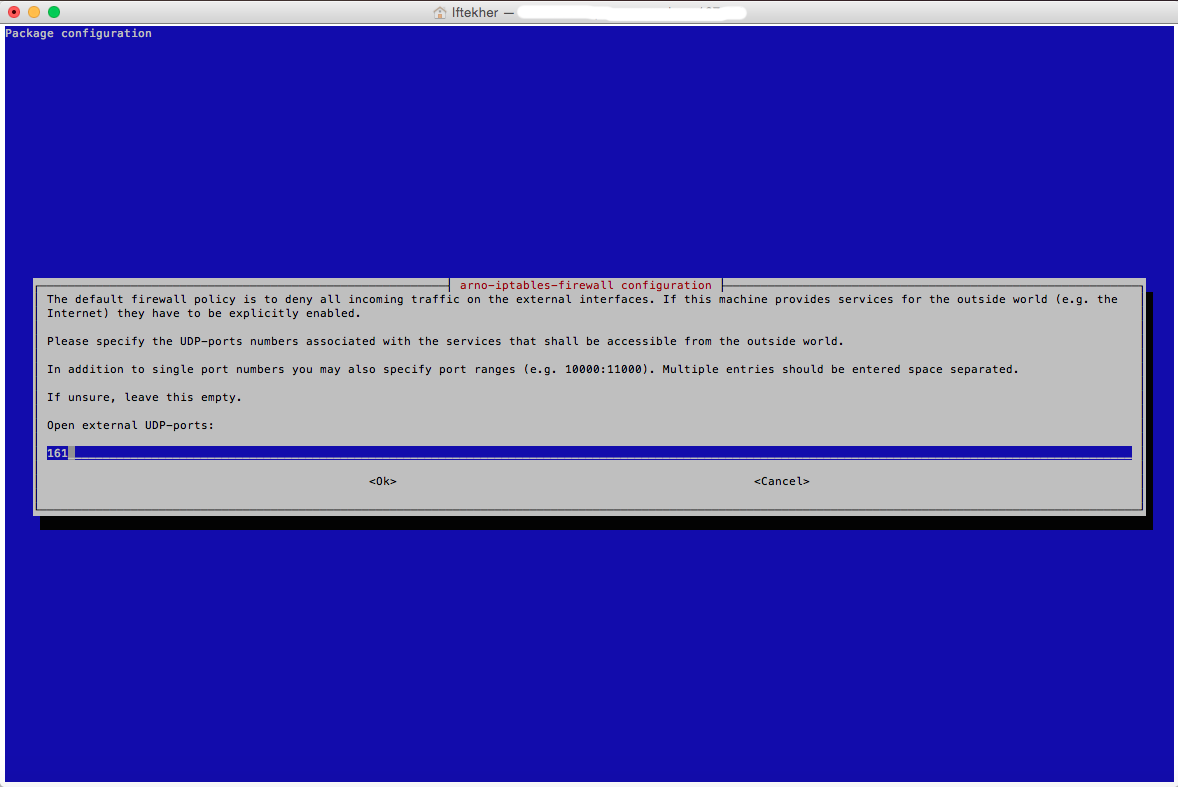
The next window is almost similar like the previous one. But it is related to UDP ports. It will open your desired UDP ports on the external interface card. I am typing my one over here. You should type your’s desired UDP port to be opened for the external interface. I am opening 161 for my purpose.

arnostep4_1

# STEP 5

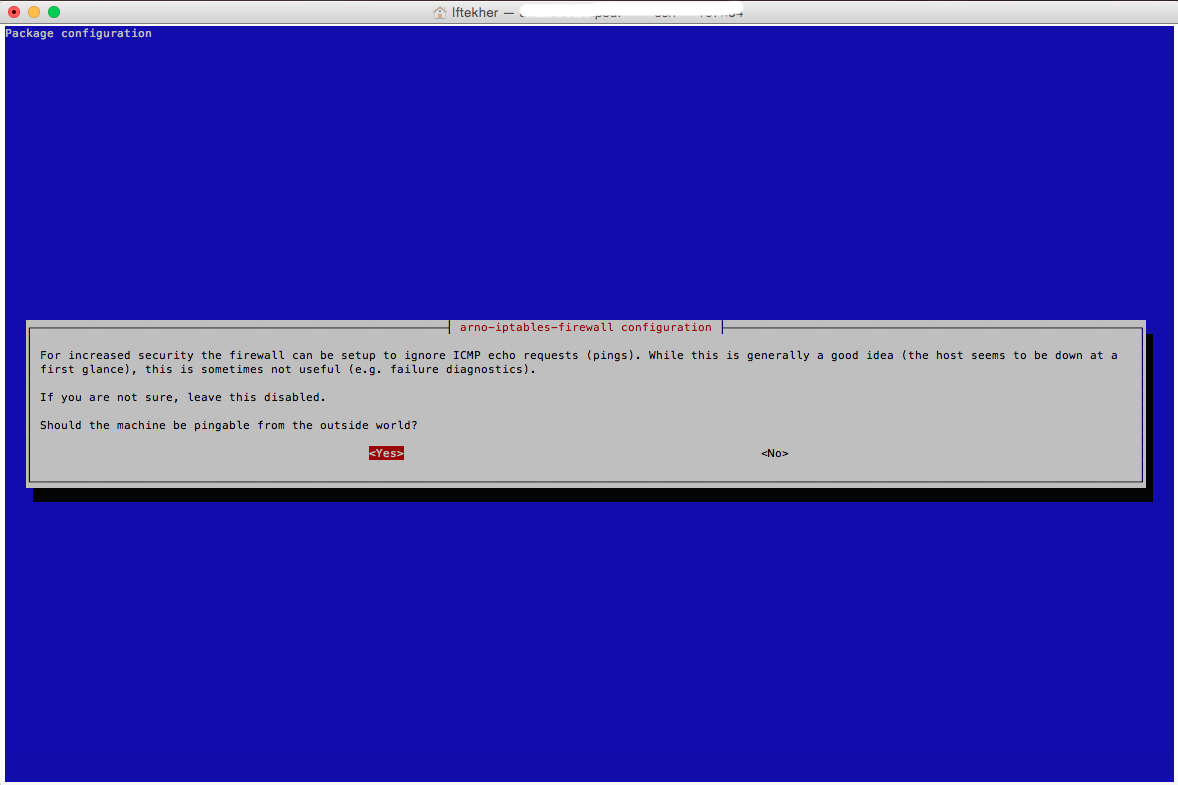
The next window is all about ping/ICMP for your server from outside of the world. I am selecting YES cause I want to ping my server from anywhere from the outside world. If you don’t want to ping your server from the outside world, select NO.

arnostep5

# STEP 6

Now, enter the name of your internal network interface card. Mine is eth0. Enter your own internal network interface ethernet card alias name. This is normally connected to your private internal LAN.

arnostep6

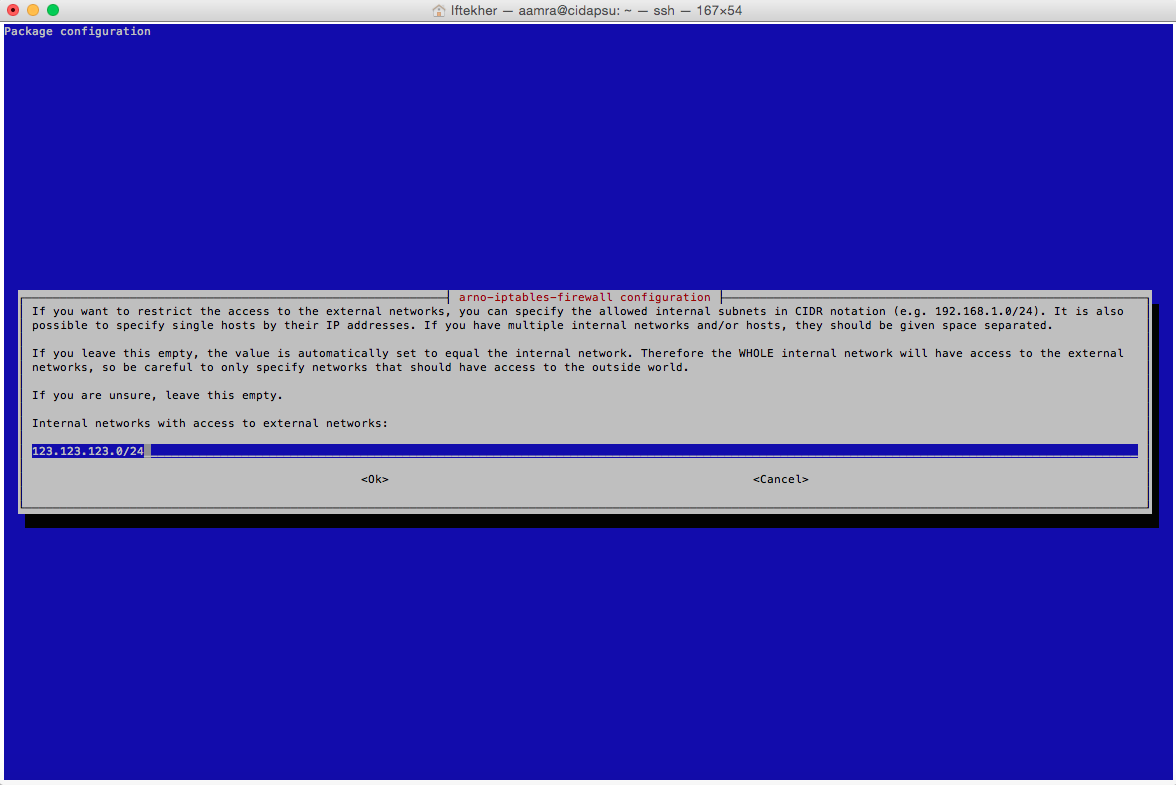
Now enter your internal subnets ip address with proper CIDR (Classless Inter-Domain Routing) values. I am entering 123.123.123.0/24 for mine. You may have 192.168.1.0/24.

arnostep6_1

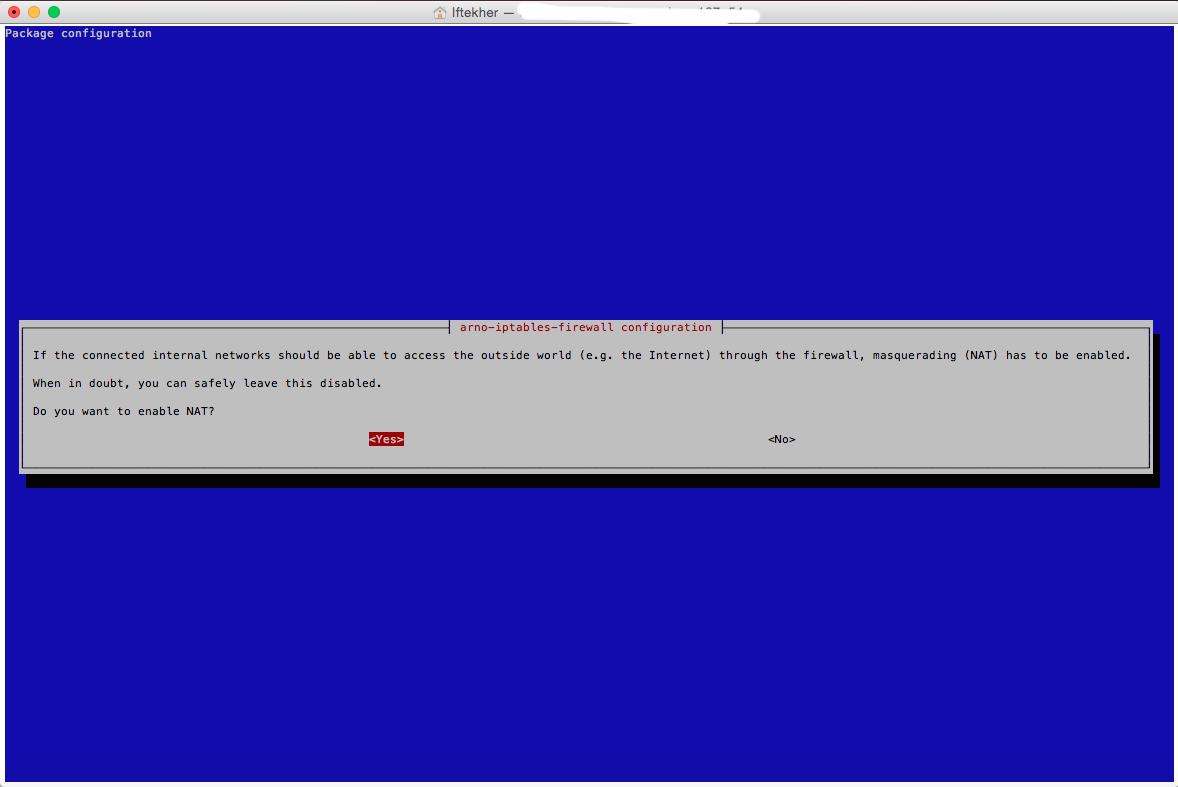
Now, enable NAT (Network Address Translation). This is required if you want to get internet access from your internal network (LAN). This is a very common method to connect to internet via a single public/real IP by using NAT. I am enabling it for me by selecting YES.

arnostep6_2

The next window of the wizard is for internal networks with access to external networks. I am using 123.123.123.0/24 for mine. Please use your own.

arnostep6_3

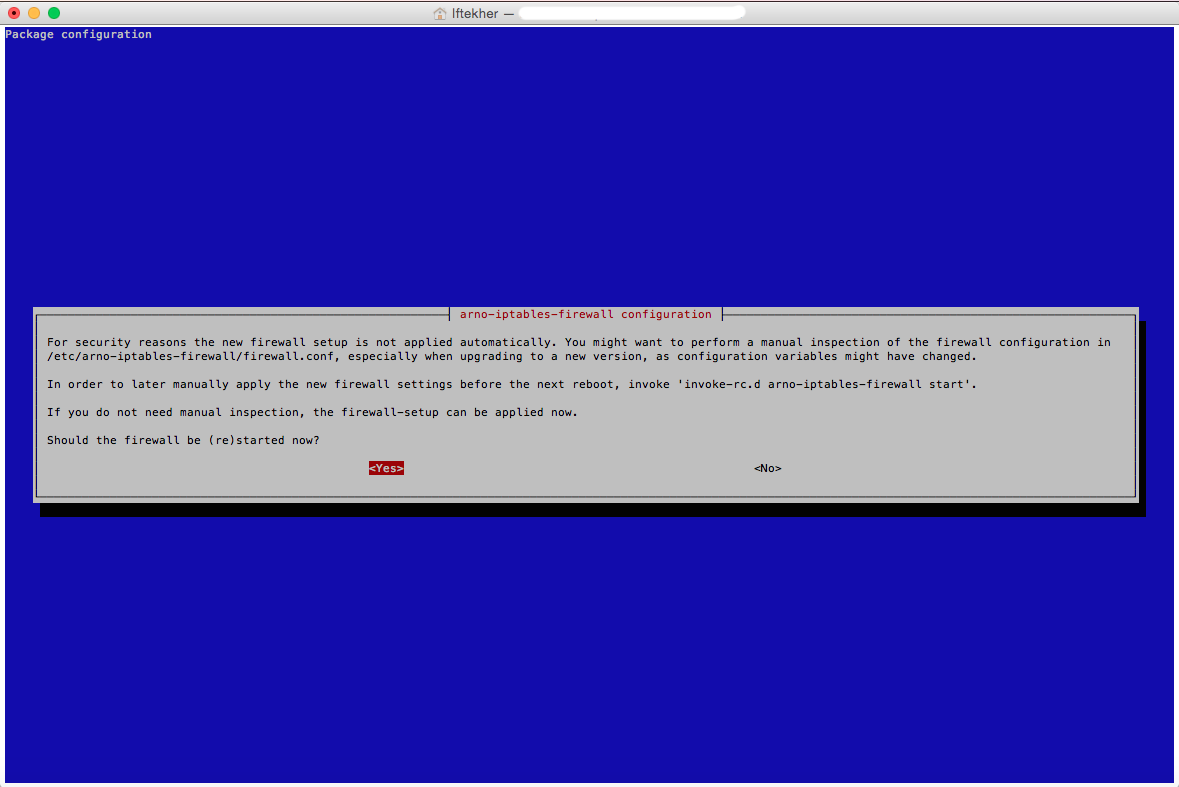
Let’s restart the firewall so that our new applied rules can take place.

arnostep6_4

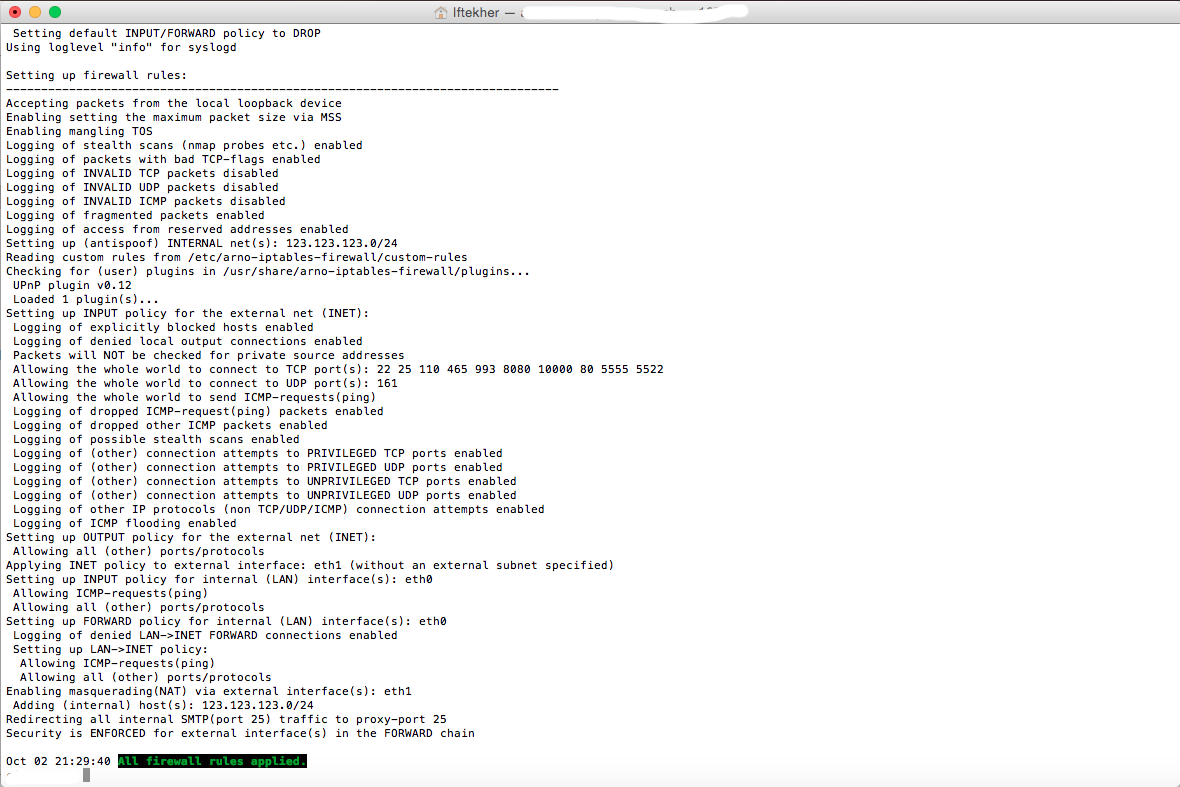
After restarting the firewall, you will see something like below image and will see that it is applying all the newly created policies to that.

arnostep6_5

# STEP 7

To know more about arno iptables, issue the following command in the terminal so that you can read the manual file.

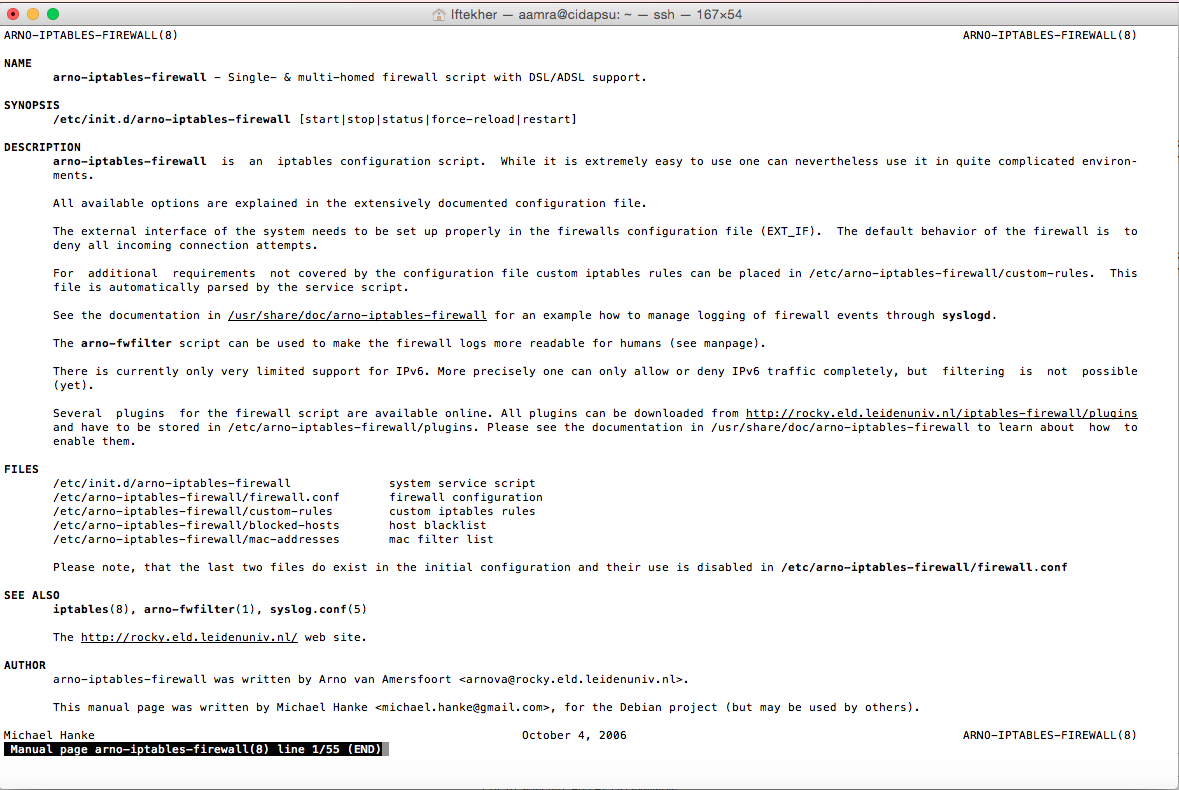
sudo man arno-iptables-firewall

After issuing the above command, you will see something like below image.

arnostep7_1

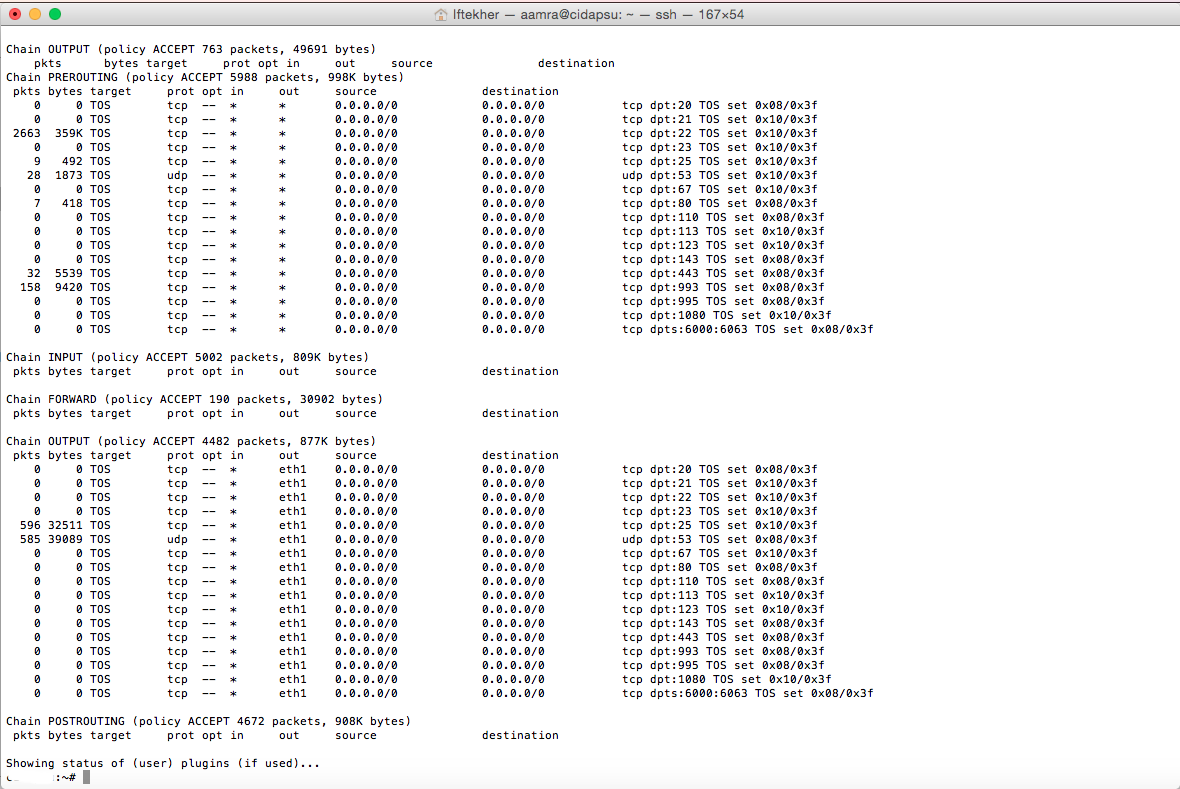
Now, issue the below command in the terminal to know the status of the arno firewall.

sudo /etc/init.d/arno-iptables-firewall status

This will show the rules and policies available on the arno firewall just like below image.

arnostep7_3

# STEP 8

You can edit the firewall config file as well. To do so, use your favourite file editor to edit the below file. I am using vim as my editor.

vim /etc/arno-iptables-firewall/firewall.conf

If you want to add more custom rules, please use the following command to edit the custom rule file.

vim /etc/arno-iptables-firewall/custom-rules

If you want to block host, edit the following file.

vim /etc/arno-iptables-firewall/blocked-hosts

That’s all for today. I hope this will help you to build your own firewall.

Featured image: Luca Racioppa Via Flickr.

The post How To Install And Configure Arno Iptables On Ubuntu 14.04 LTS appeared first on Unixmen.

How To Install And Configure Kolab Groupware Solution

$
0
0


About Kolab Groupware Solution

Kolab Groupware Solution is free, open source, secure, scalable and reliable groupware server. It offers Email, Directory or LDAP server, Contacts, events and appointments etc. It comes with a default configuration and default components, but everything is modular and can easily be changed.

Kolab comes in two different editions:

  • Kolab Community edition
  • Kolab Enterprise edition

As the name implies, Community edition is maintained by group of community volunteers in their free time, whereas Enterprise edition is the full-fledged edition which is maintained by Kolab systems. The enterprise edition is professionally supported for up to 5 years and you’ll receive regular updates.

For more details about Kolab Enterprise edition, visit this link.

You can either host and run your own collaboration server using Community or Enterprise editions. Or, you can directly purchase a hosted service at MyKolab.com and run your groupware server immediately.

Concerning about Kolab features, we can list the following:

  • Email ;
  • Contacts ;
  • Calendars ;
  • Files, Tasks, Notes ;
  • Cloud ready and highly customizable ;
  • Multi-platform desktop clients ;
  • and more

Technically, Kolab consists of many components.

Here is the Kolab groupware component overview.

KolabServer-Component-Overview

I hope you now you got the basic idea about what is Kolab and what it does actually. Now, we’ll see how to install it.

Install Kolab On Ubuntu

Kolab can be installed on all modern Linux operating systems such as Debian, Ubuntu, CentOS, RHEL, and SUSE/OpenSUSE.

In this tutorial, let us see how to install Kolab groupware in Ubuntu 14.04 LTS server.

Switch to the root user using command:

sudo su

Search for Kolab GPG key using command:

gpg --search devel@lists.kolab.org

Sample output:

As you see below, there is one key available. So, just enter “1” to get the key.

 gpg: searching for "devel@lists.kolab.org" from hkp server keys.gnupg.net
 (1) Kolab Development Coordination Mailing List <devel@lists.kolab.org>
 2048 bit RSA key 446D5A45, created: 2014-08-20
 Keys 1-1 of 1 for "devel@lists.kolab.org". Enter number(s), N)ext, or Q)uit > 1
 gpg: requesting key 446D5A45 from hkp server keys.gnupg.net
 gpg: /root/.gnupg/trustdb.gpg: trustdb created
 gpg: key 446D5A45: public key "Kolab Development Coordination Mailing List <devel@lists.kolab.org>" imported
 gpg: no ultimately trusted keys found
 gpg: Total number processed: 1
 gpg: imported: 1 (RSA: 1)

Now, import the key using command:

gpg --export --armor devel@lists.kolab.org | apt-key add -

Update the source list:

apt-get update

Install Kolab collaboration suite using command:

apt-get install kolab

During installation, you’ll be asked to setup the MySQL root user password.

root@server: -home-sk_001

Re-enter the password:

root@server: -home-sk_002

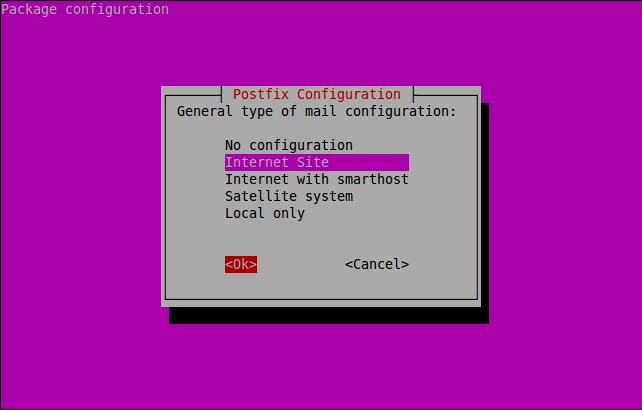
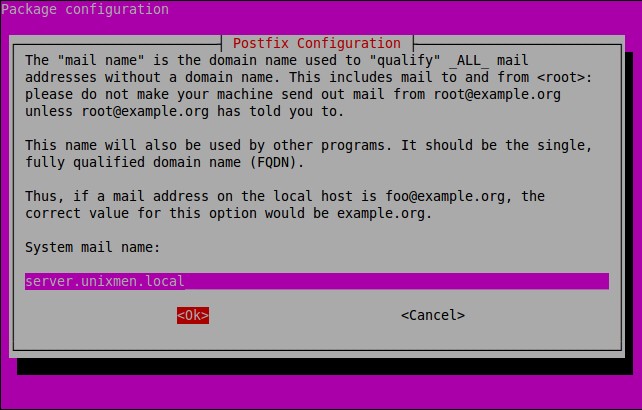
Next, we need to configure the Postfix mail server. Click Ok to continue.

root@server: -home-sk_003

Select the type of postfix mail configuration. I go with defaults.

root@server: -home-sk_004

Enter your System FQDN:

root@server: -home-sk_005

That’s it. Kolab groupware has been installed.

To install Kolab on other Linux distributions, refer the following links.

Setup Kolab

Run the following command to set up Kolab Groupware:

setup-kolab

The installer will ask you series of questions. Answer them accordingly.

First, specify the LDAP admin password:

Please supply a password for the LDAP administrator user 'admin', used to login
to the graphical console of 389 Directory server.

Administrator password [jkhByPCV_cPXohZ]: ## Enter password
Confirm Administrator password: ## Re-enter password

Specify a password for the LDAP Directory Manager user:

Please supply a password for the LDAP Directory Manager user, which is the
administrator user you will be using to at least initially log in to the Web
Admin, and that Kolab uses to perform administrative tasks.

Directory Manager password [PHvk0gnEqvKdRKf]: ## Enter password
Confirm Directory Manager password: ## Re-enter password

Choose the system user and group. In my case, I left the default values.

Please choose the system user and group the service should use to run under.
These should be existing, unprivileged, local system POSIX accounts with no
shell.

User [dirsrv]: ## Press Enter
Group [dirsrv]: ## Press Enter

Confirm this is the appropriate domain name space:

This setup procedure plans to set up Kolab Groupware for the following domain
name space. This domain name is obtained from the reverse DNS entry on your
network interface. Please confirm this is the appropriate domain name space.

unixmen.local [Y/n]: y ## Type Y and press enter

Confirm the root dn:

The standard root dn we composed for you follows. Please confirm this is the root
dn you wish to use.

dc=unixmen,dc=local [Y/n]: y ## Type Y and press enter

Please be patient. The installer is going to set up the 389 Directory Server. This may take a little while (during which period there is no output and no progress indication).

After a while, specify a Cyrus Administrator password. This password is used by Kolab to execute administrative tasks in Cyrus IMAP.

Please supply a Cyrus Administrator password. This password is used by Kolab to
execute administrative tasks in Cyrus IMAP. You may also need the password
yourself to troubleshoot Cyrus IMAP and/or perform other administrative tasks
against Cyrus IMAP directly.

Cyrus Administrator password [EzP686XNm3cH7A8]: ## Enter password
Confirm Cyrus Administrator password: ## Re-enter password

Specify Kolab Service account password. This account is used by various services such as Postfix, and Roundcube.

Please supply a Kolab Service account password. This account is used by various
services such as Postfix, and Roundcube, as anonymous binds to the LDAP server
will not be allowed.

Kolab Service password [oqD_X55ICo5GBU6]: ## Enter password
Confirm Kolab Service password: ## Re-enter password

Next, specify what MySQL server are we setting up. As we already setup MySQL server in the Kolab installation part, let us choose the option: Choice 1 (Existing MySQL server).

What MySQL server are we setting up?
 - 1: Existing MySQL server (with root password already set).
 - 2: New MySQL server (needs to be initialized).
 Choice: 1 ## Type 1 and Press Enter

Enter the MySQL root user password:

Please supply the root password for MySQL, so we can set up user accounts for
other components that use MySQL.
MySQL root password: ## Enter MySQL root user password

Specify password for the MySQL user ‘kolab’:

Please supply a password for the MySQL user 'kolab'. This password will be used
by Kolab services, such as the Web Administration Panel.

MySQL kolab password [_kdGDH6sfMrBEEy]: ## Enter password
Confirm MySQL kolab password: ## Re-enter password

Specify your Timezone:

Please supply the timezone PHP should be using. You have to use a Continent or
Country / City locality name like 'Europe/Berlin', but not just 'CEST'.

Timezone ID [UTC]: Asia/Kolkata

Specify a password for the MySQL user ’roundcube’:

Please supply a password for the MySQL user 'roundcube'. This password will be
used by the Roundcube webmail interface.

MySQL roundcube password [QtwYeWy73PpEIJY]: ## Enter password
Confirm MySQL roundcube password: ## Re-enter password

That’s it. Kolab has been successfully configured.

Kolab web mail client is available under the /roundcubemail/ location on your web- server (./var/www/html/ in Ubuntu).

Also, the additional locations for applications installed include:

  • chwala: /chwala/
  • iRony: /iRony/
  • kolab-freebusy: /freebusy/
  • kolab-webadmin: /kolab-webadmin/
  • roundcubemail: /roundcubemail/

Now, it’s time to access Kolab administration console and create some sample users.

Access Kolab Administration console

Navigate to Kolab admin console using URL: http://ip-address/kolab-webadmin or http://domain-name/kolab-webadmin.

The following page should appear.

Login using the username cn=Directory Manager and the corresponding password you supplied during the setup process.

Kolab Web Admin Panel – Google Chrome_001

Here it is how my Kolab administration console looks.

Kolab Web Admin Panel – Google Chrome_002

From here, you can create/edit/delete users, groups, domains, shared folders and roles etc.

That’s all for now. In our next tutorial, let us see how to create users, domains, and roles etc. Also, we will discuss how to send/receive mails via web browser and Kolab desktop clients and many more features of Kolab.

Reference links:

Cheers!

The post How To Install And Configure Kolab Groupware Solution appeared first on Unixmen.

How To Install Linux Kernel 4.2.3

$
0
0


The Linux Kernel development team has announced the latest stable Kernel version 4.2.3 on October 3, 2015. Greg Kroah-Hartman from Linux Kernel development team wrote in the release notes:

I’m announcing the release of the 4.2.3 kernel.

All users of the 4.2 kernel series must upgrade.

The updated 4.2.y git tree can be found at:
git://git.kernel.org/pub/scm/linux/kernel/git/stable/linux-stable.git linux-4.2.y
and can be browsed at the normal kernel.org git web browser:
http://git.kernel.org/?p=linux/kernel/git/stable/linux-stable.git;a=summary

thanks,

Kernel 4.2.3 brings various networking improvements, especially for the IPv6 and IPv4 network protocols, as well as for the Open vSwitch multilayer virtual switch, but also for NetLink, Stream Control Transmission Protocol (SCTP), Bridge, and Scheduler.

For more details, refer the official release notes.

Install Linux Kernel 4.2.3

In this tutorial, we will see how to compile and install Linux Kernel 4.2.3 latest stable version in Ubuntu and CentOS.

First, we will see how to install Kernel 4.2.3 in Ubuntu 14.04 LTS.

1. Install Linux Kernel 4.2.3 in Ubuntu

The following steps are tested in Ubuntu 14.04 LTS server edition. However, the same steps might work on Debian, and other Ubuntu derivatives such as Linux Mint, Elementary OS etc.

Run the following command to find the current Linux kernel version installed on your system:

uname -r

Sample output:stumbleupon

3.13.0-24-generic

As you see in the above input, the currently installed version is 3.13. Let us upgrade it to 4.2.3.

To do that, first download the Kernel 4.2.3 stable version from the official website using the following command.

On 64bit Ubuntu systems:

wget http://kernel.ubuntu.com/~kernel-ppa/mainline/v4.2.3-unstable/linux-headers-4.2.3-040203_4.2.3-040203.201510030832_all.deb
wget http://kernel.ubuntu.com/~kernel-ppa/mainline/v4.2.3-unstable/linux-headers-4.2.3-040203-generic_4.2.3-040203.201510030832_amd64.deb
wget http://kernel.ubuntu.com/~kernel-ppa/mainline/v4.2.3-unstable/linux-image-4.2.3-040203-generic_4.2.3-040203.201510030832_amd64.deb

On 32bit Ubuntu systems:

wget http://kernel.ubuntu.com/~kernel-ppa/mainline/v4.2.3-unstable/linux-headers-4.2.3-040203_4.2.3-040203.201510030832_all.deb
wget http://kernel.ubuntu.com/~kernel-ppa/mainline/v4.2.3-unstable/linux-headers-4.2.3-040203-generic_4.2.3-040203.201510030832_i386.deb
wget http://kernel.ubuntu.com/~kernel-ppa/mainline/v4.2.3-unstable/linux-image-4.2.3-040203-generic_4.2.3-040203.201510030832_i386.deb

After downloading the necessary Kernel packages depending upon your Ubuntu system’s architecture, run the following commands to install Kernel 4.2.3:

sudo apt-get install gdebi
sudo gdebi linux-headers-4.2*.deb linux-image-4.2*.deb

Update the Grub boot loader using command:

sudo update-grub

If you use BURG boot loader, then run:

sudo update-burg

That’s it. Reboot your system to log in to your new Kernel.

After successful log in, run the following command to check if the new Kernel has been updated.

uname -r

Sample output:

4.2.3-040203-generic

Or, use -a flag to view the complete details:

stumbleuponuname -a

Sample output:

Linux server 4.2.3-040203-generic #201510030832 SMP Sat Oct 3 12:34:31 UTC 2015 x86_64 x86_64 x86_64 GNU/Linux

In case, you have some issues or end up with an unresponsive system after installing new Kernel, just reboot your system and login with your old Kernel.

Select ‘Advanced options for Ubuntu’ from the Boot menu to log in to your old Kernel.

Ubuntu 14.04 64bit Server [Running] – Oracle VM VirtualBox_017

Select the previous working kernel version, which is 3.13 in our case.

Ubuntu 14.04 64bit Server [Running] – Oracle VM VirtualBox_018

Then, run the following command to remove the newly installed Kernel:

sudo apt-get remove linux-header-4.2* linux-image-4.2*

Reboot your Ubuntu system to apply the changes.

2. Install Linux Kernel 4.2.3 in CentOS

Now, we will see how to install/update Linux Kernel 4.2.3 in CentOS. The steps are tested in CentOS 7, however the same steps should work on RHEL 7, Scientific Linux 7 and Fedora etc.

Kernel 4.2.3 is not included in the CentOS default repositories. In order to install the Latest stable Kernel version, we will add ELRepo. ELRepo is an RPM repository for Enterprise Linux packages. ELRepo supports Red Hat Enterprise Linux (RHEL) and its derivatives (Scientific Linux, CentOS & others).

To install ELRepo, follow the steps given below.

First of all, Import the public key:

rpm --import https://www.elrepo.org/RPM-GPG-KEY-elrepo.org

To install ELRepo for RHEL/Scientific Linux/CentOS-7:

rpm -Uvh http://www.elrepo.org/elrepo-release-7.0-2.el7.elrepo.noarch.rpm

To make use of ELRepo mirror system, please also install yum-plugin-fastestmirror too.

yum install yum-plugin-fastestmirror

On Fedora 22 or later:

dnf install yum-plugin-fastestmirror

To install ELRepo for RHEL/Scientific Linux/CentOS-6:

rpm -Uvh http://www.elrepo.org/elrepo-release-6-6.el6.elrepo.noarch.rpm

To make use of ELRepo mirror system, please also install yum-plugin-fastestmirror too.

yum install yum-plugin-fastestmirror

To install ELRepo for RHEL/Scientific Linux/CentOS-5:

rpm -Uvh http://www.elrepo.org/elrepo-release-5-5.el5.elrepo.noarch.rpm

To make use of ELRepo mirror system, please also install yum-plugin-fastestmirror too.

yum install yum-plugin-fastestmirror

After installing ELRepo, let us find out the current Kernel version using command:

uname -r

Sample output:

3.10.0-123.9.3.el7.x86_64

Now, let us install the latest stable Kernel version 4.2.3 using command:

yum --enablerepo=elrepo-kernel install kernel-ml

Note: Here, Kernel-ml refers the current mainline stable version i.e 4.2.3. the letter “ml” is the short form of mainline. The kernel-ml packages are built from the sources available from the “mainline stable” branch of The Linux Kernel Archives.

Sample output:

Type ‘Y’ to continue.

Loaded plugins: fastestmirror
Loading mirror speeds from cached hostfile
 * base: centos.excellmedia.net
 * elrepo: ftp.nluug.nl
 * elrepo-kernel: ftp.nluug.nl
 * extras: centos.excellmedia.net
 * updates: centos.excellmedia.net
Resolving Dependencies
--> Running transaction check
---> Package kernel-ml.x86_64 0:4.2.3-1.el7.elrepo will be installed
--> Finished Dependency Resolution

Dependencies Resolved

========================================================================================================================================================================
 Package Arch Version Repository Size
========================================================================================================================================================================
Installing:
 kernel-ml x86_64 4.2.3-1.el7.elrepo elrepo-kernel 37 M

Transaction Summary

========================================================================================================================================================================
Install 1 Package

Total download size: 37 M
Installed size: 167 M
Is this ok [y/d/N]: y

That’s it. Reboot your system after the installation is completed.

Now, you’ll see the Kernel 4.2.3 entry has been added to the Boot menu. Select it and hit enter to log in with new Kernel.

CentOS 7 -1 [Running] – Oracle VM VirtualBox_019

To check the Kernel details, run:

uname -r

Sample output:

4.2.3-1.el7.elrepo.x86_64

Or,

uname -a

Sample output:

Linux server1.unixmen.local 4.2.3-1.el7.elrepo.x86_64 #1 SMP Sat Oct 3 10:19:41 EDT 2015 x86_64 x86_64 x86_64 GNU/Linux

If you have any problem after updating the latest Kernel and want to remove it, then reboot your system. Select your previous working Kernel from the boot menu:

Then, run the following command to remove the newly installed Kernel:

yum remove kernel-ml -y

Reboot once to use the old Kernel.

That’s all for now. Hope this tutorial will be useful for you.

Cheers!

The post How To Install Linux Kernel 4.2.3 appeared first on Unixmen.

Setup A Centralized Media Server Using Emby Server

$
0
0


Take your Home media anywhere with Emby

Yes, you read it right. Meet Emby, a free and open source application that let your personal media library, such as home videos, audios and photos, to be accessible from anywhere using any device. Emby Server automatically converts and streams your media on-the-fly to play on any device. You can also manage your Emby server contents from any device using its web-based dashboard.

Emby comes in two different editions, free and paid (Emby premiere). The free edition has almost all features to setup a basic home media server. Only few more additional bonus features such as Cover Art, Mobile Sync, Cloud Sync, and free Android apps are not available in free edition. If you want all features you can buy Emby premiere service.

Emby apps available for almost all devices, including:

  • Android Mobile (Play Store)
  • Android Mobile (Amazon)
  • Android TV
  • Amazon Fire TV
  • HTML5
  • iPad
  • iPhone
  • Kodi
  • Media Portal
  • Roku
  • Windows Desktop
  • Windows Media Center
  • Windows Phone
  • Windows 8

In addition, Emby also offers a service called Emby connect which is similar to Plex Pass in Plex media server. Using this service, you can access your Media server from outside the local network or from mobile devices without having to use the actual IP address (private or public IP) of your Emby server.

Installation

Follow the below steps depending upon the distribution you use to install Emby server.

On Arch Linux:

Run the following command from your Terminal to Emby server:
pacman -S emby-server
Then, start Emby Server using command:
systemctl start emby-server
On CentOS 6:
Install epel repository using command:
yum install epel-release
Add Emby repository and Install Emby Server using the following commands:
wget http://download.opensuse.org/repositories/home:/emby/CentOS_6/home:emby.repo -O /etc/yum.repos.d/emby.repo
yum install emby-server
Start Emby Server:
systemctl start emby-server

OR

service start emby-server

On CentOS 7:

Install epel repository using command:
yum install epel-release
Add Emby repositories and Install Emby Server using the following commands:
wget http://download.opensuse.org/repositories/home:/emby/CentOS_7/home:emby.repo -O /etc/yum.repos.d/emby.repo
yum install emby-server
Start Emby Server:
systemctl start emby-server

OR

service start emby-server

Debian 7:

Add Emby repositories and install Emby server as shown below:

wget -qO - http://download.opensuse.org/repositories/home:emby/Debian_7.0/Release.key | sudo apt-key add -
sudo sh -c "echo 'deb http://download.opensuse.org/repositories/home:/emby/Debian_7.0/ /' >> /etc/apt/sources.list.d/emby-server.list"
sudo apt-get update
sudo apt-get install mono-runtime mediainfo libsqlite3-dev imagemagick-6.q8 libmagickwand-6.q8-2 libmagickcore-6.q8-2
sudo apt-get install emby-server
Start Emby Server:
sudo service emby-server start

Debian 8:

Add Emby repositories and install Emby server as shown below:

wget -qO - http://download.opensuse.org/repositories/home:emby/Debian_8.0/Release.key | sudo apt-key add -
sudo sh -c "echo 'deb http://download.opensuse.org/repositories/home:/emby/Debian_8.0/ /' >> /etc/apt/sources.list.d/emby-server.list"
sudo apt-get update
sudo apt-get install mono-runtime mediainfo libsqlite3-dev imagemagick-6.q8 libmagickwand-6.q8-2 libmagickcore-6.q8-2
sudo apt-get install emby-server
Start Emby Server:
sudo service emby-server start

Fedora 20:

Install epel repository:
yum install epel-release
Add Emby repositories and Install Emby Server as shown below.
wget http://download.opensuse.org/repositories/home:/emby/Fedora_20/home:emby.repo -O /etc/yum.repos.d/emby.repo
yum install emby-server
Start Emby Server:
systemctl start emby-server

OR

service start emby-server

Fedora 21:

Install epel repository:
yum install epel-release
Add Emby repositories and Install Emby Server as shown below.
wget http://download.opensuse.org/repositories/home:/emby/Fedora_21/home:emby.repo -O /etc/yum.repos.d/emby.repo
yum install emby-server
Start Emby Server:
systemctl start emby-server

OR

service start emby-server

Ubuntu 15.04

Add Emby repositories and Install it using the following commands:

wget -qO - http://download.opensuse.org/repositories/home:emby/xUbuntu_15.04/Release.key | sudo apt-key add -
sudo sh -c "echo 'deb http://download.opensuse.org/repositories/home:/emby/xUbuntu_15.04/ /' >> /etc/apt/sources.list.d/emby-server.list"
sudo apt-get update
sudo apt-get install mono-runtime mediainfo libsqlite3-dev imagemagick-6.q8 libmagickwand-6.q8-2 libmagickcore-6.q8-2
sudo apt-get install emby-server
Start Emby Server:
sudo service emby-server start

Ubuntu 14.10:

Add Emby repositories and Install it using the following commands:

wget -qO - http://download.opensuse.org/repositories/home:emby/xUbuntu_14.10/Release.key | sudo apt-key add -
sudo sh -c "echo 'deb http://download.opensuse.org/repositories/home:/emby/xUbuntu_14.10/ /' >> /etc/apt/sources.list.d/emby-server.list"
sudo apt-get update
sudo apt-get install mono-runtime mediainfo libsqlite3-dev imagemagick-6.q8 libmagickwand-6.q8-2 libmagickcore-6.q8-2
sudo apt-get install emby-server
Start Emby Server:
sudo service emby-server start

Ubuntu 14.04:

Add Emby repositories and Install it using the following commands:

wget -qO - http://download.opensuse.org/repositories/home:emby/xUbuntu_14.04/Release.key | sudo apt-key add -
sudo sh -c "echo 'deb http://download.opensuse.org/repositories/home:/emby/xUbuntu_14.04/ /' >> /etc/apt/sources.list.d/emby-server.list"
sudo apt-get update
sudo apt-get install mono-runtime mediainfo libsqlite3-dev imagemagick-6.q8 libmagickwand-6.q8-2 libmagickcore-6.q8-2
sudo apt-get install emby-server
Start Emby Server:
sudo service emby-server start

Ubuntu 12.04:

Add Emby repositories and Install it using the following commands:

wget -qO - http://download.opensuse.org/repositories/home:emby/xUbuntu_12.04/Release.key | sudo apt-key add -
sudo sh -c "echo 'deb http://download.opensuse.org/repositories/home:/emby/xUbuntu_12.04/ /' >> /etc/apt/sources.list.d/emby-server.list"
sudo apt-get update
sudo apt-get install mono-runtime mediainfo libsqlite3-dev imagemagick-6.q8 libmagickwand-6.q8-2 libmagickcore-6.q8-2
sudo apt-get install emby-server
In this tutorial, We’ll be installing Emby server in Ubuntu 14.04 server:

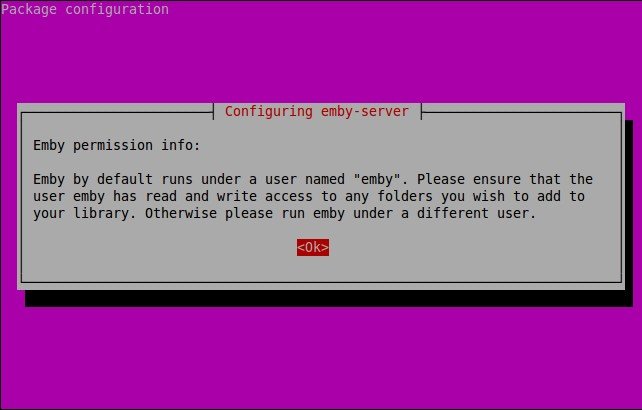
During the installation, you will be asked to create an user who has read and write permissions to any folders you wish to add to your library. By default, Emby runs under a user called “emby”. You can either create the same user (i.e emby) or create a new user.

sk@server: ~_001

I already had a user named “sk”. So, I use this user to configure Emby-server.

sk@server: ~_002

That’s it. Now, It is time to start web based setup.

Start Emby Server:
sudo service emby-server start

Configure Emby

Open up your web browser and navigate to: http://localhost:8096 or http://IP-Address:8096.

Note: In CentOS and other distributions, make sure you have allowed the Emby default ports 8096(http) and 8920(https) through router or firewall in order to access the web installer.

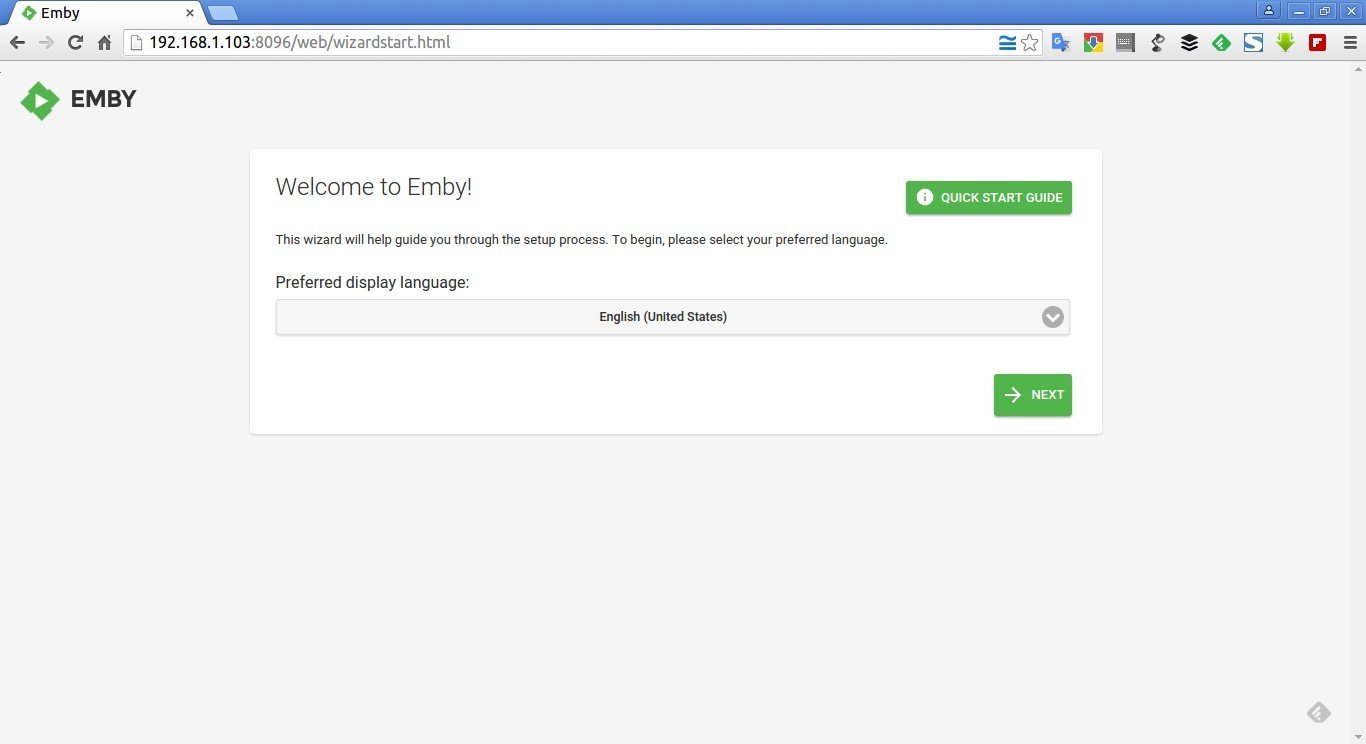
The following wizard should appear.

Select your preferred language and click NEXT.

Emby - Google Chrome_003

Emby includes built-in support for user profiles, enabling each user to have their own display settings, playstate and parental controls. Enter your first name and press Next. This is your personal Empy account user name to access the dashboard. You can add more users later in the Emby dashboard.

Emby - Google Chrome_005

Now, setup your media library. Emby identifies your media according to folder structure, file name, and the type of library to which it is assigned. Once identified, Emby downloads information like posters, descriptions, and ratings that make media selection a rich experience.

Emby - Google Chrome_006

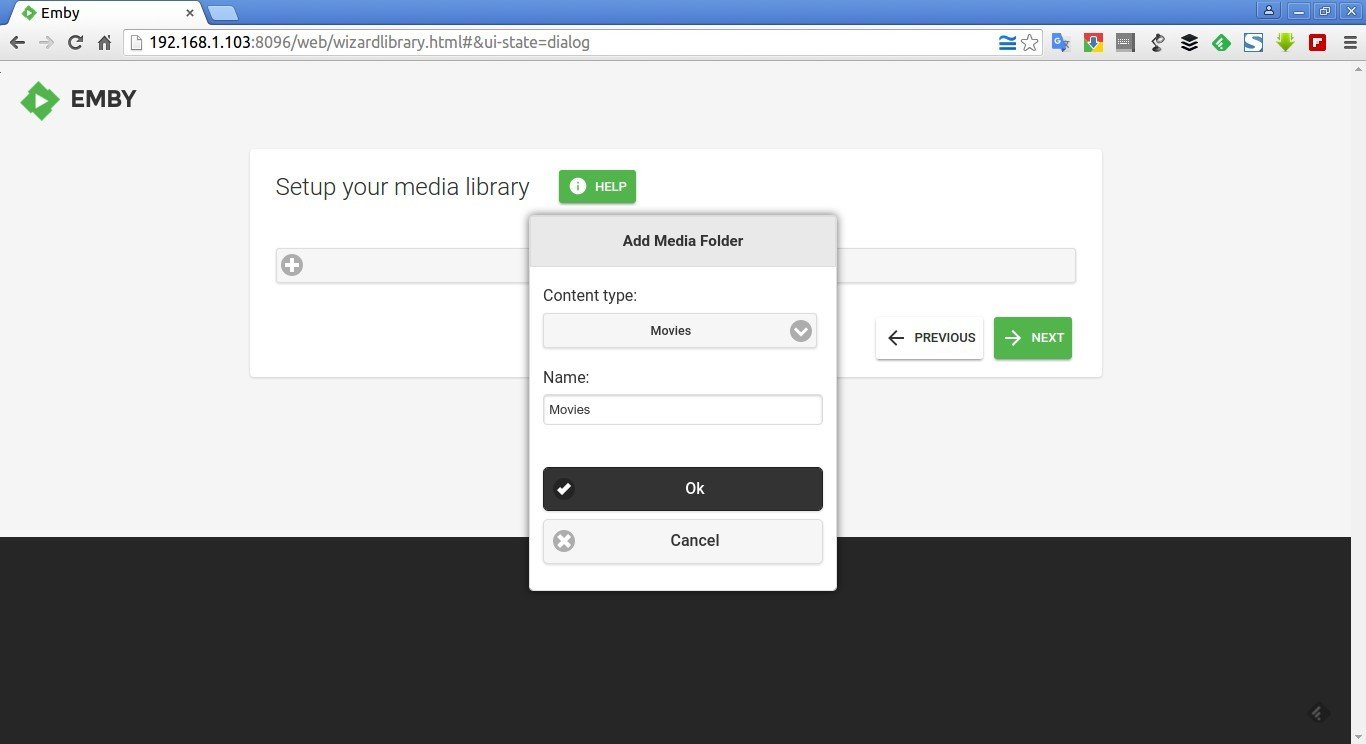
Click on the Add media folder. A media folder is a grouping of one or more physical folders on your file system. Select the type of the media such as videos, audios, TV, or Books from the Content type drop-down box.

Emby - Google Chrome_007

Similarly, you can create as many media folders as you want.

For testing purpose, I have added only two media folders, one for Movies and Videos, and another one for Music.

Emby - Google Chrome_009

Be mindful that, we have only added the media folders, and we haven’t add any medias to those folders yet.

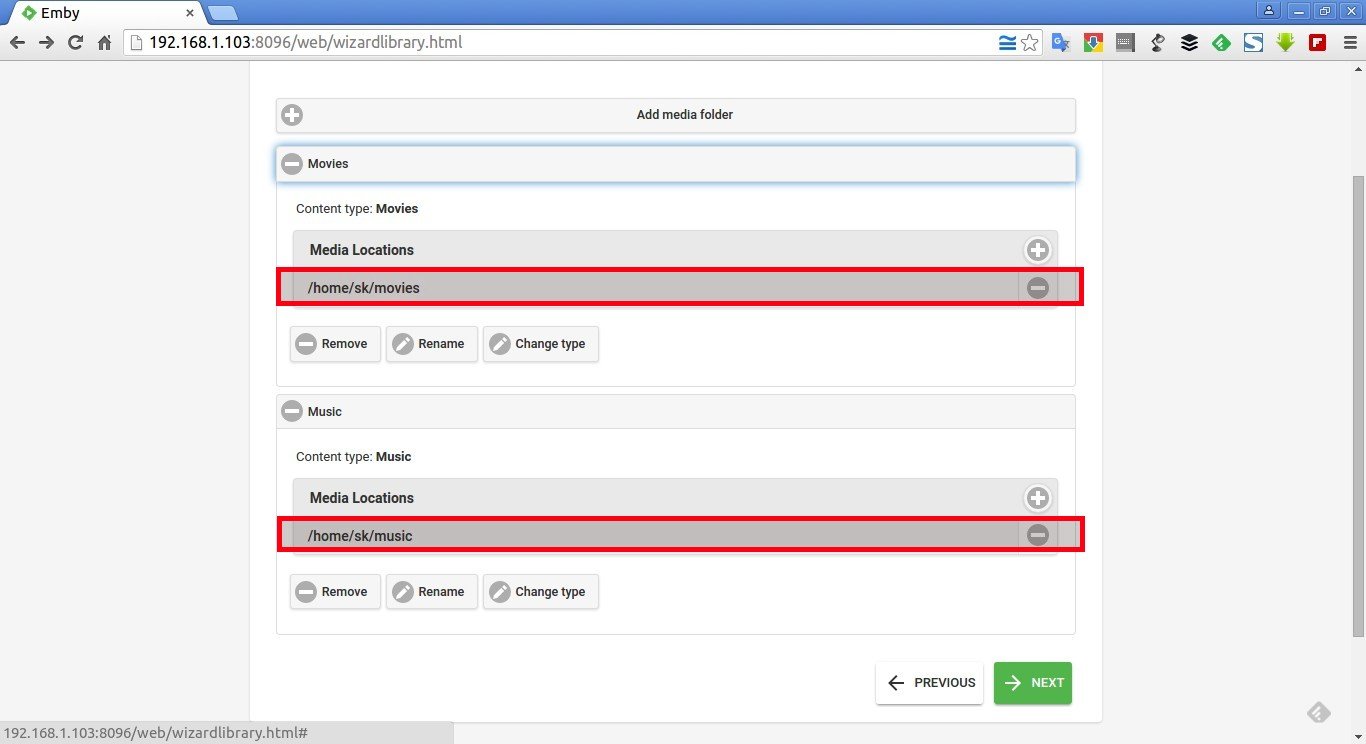
Next, let us specify the physical library paths. Each media folder can have one or more physical library paths. Physical library path is a location where you kept your media files such movies, videos, audios etc., in your local or remote system.

To add the physical library path, click on the plus (+) sign in front of the each media folder. Then, again click the plus (+) in the Media locations entry.

Emby - Google Chrome_010

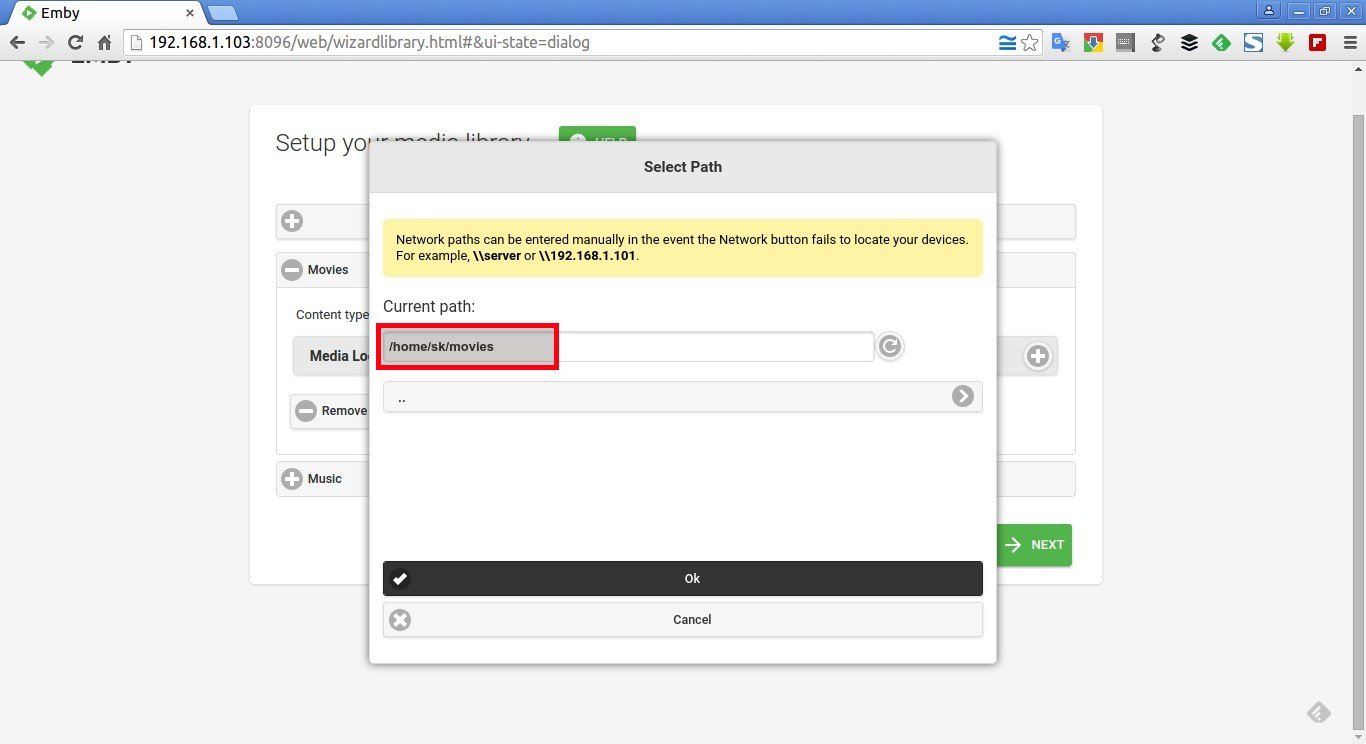
Select the path and click Ok.

Emby - Google Chrome_011

Similarly, select the library paths to all other media folders too. After specifying library paths to all media folders, click Next to continue.

Emby - Google Chrome_012

Select your Language and Country. Click Next to continue.

Emby - Google Chrome_014

In the next step, you’ll be asked to setup a Live TV. Since, I don’t have TV tuner card in my Ubuntu system, I simply skipped this step.

Emby - Google Chrome_015

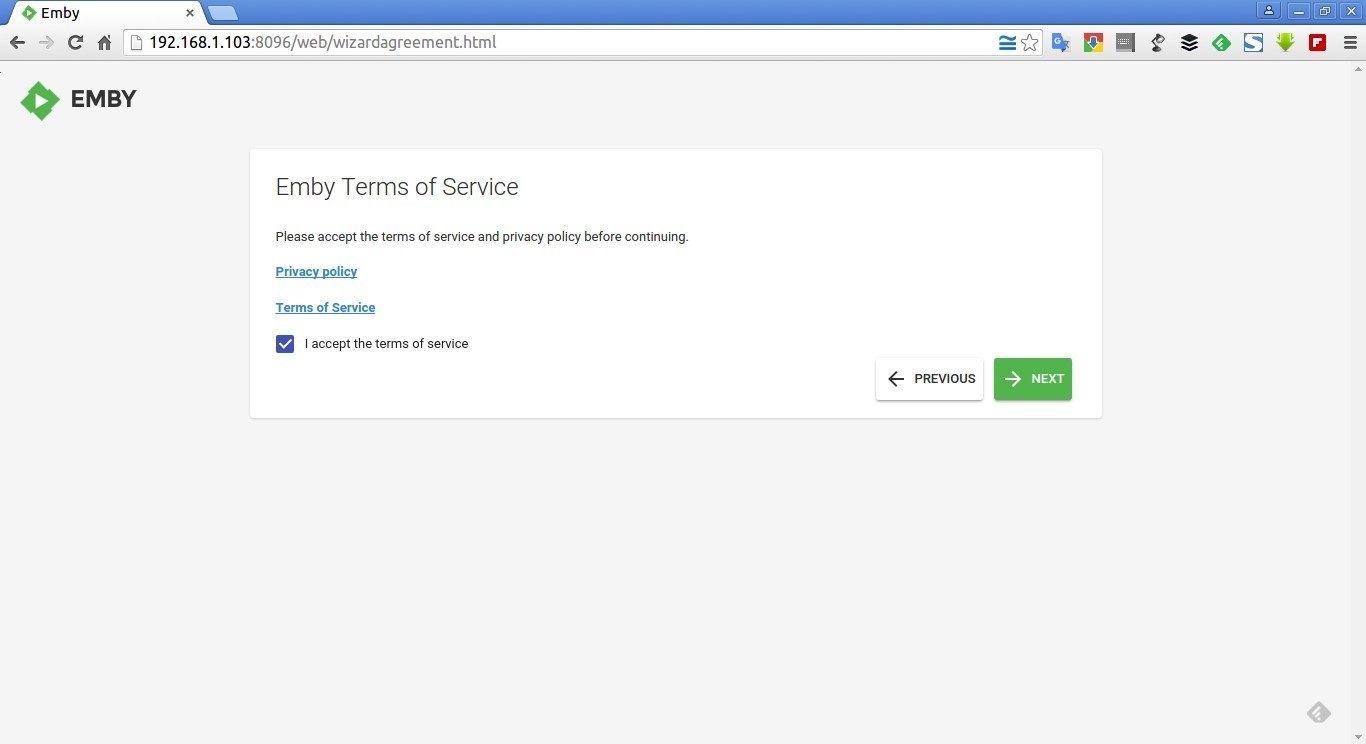
Accept the Emby terms and conditions and click Next.

Emby - Google Chrome_016

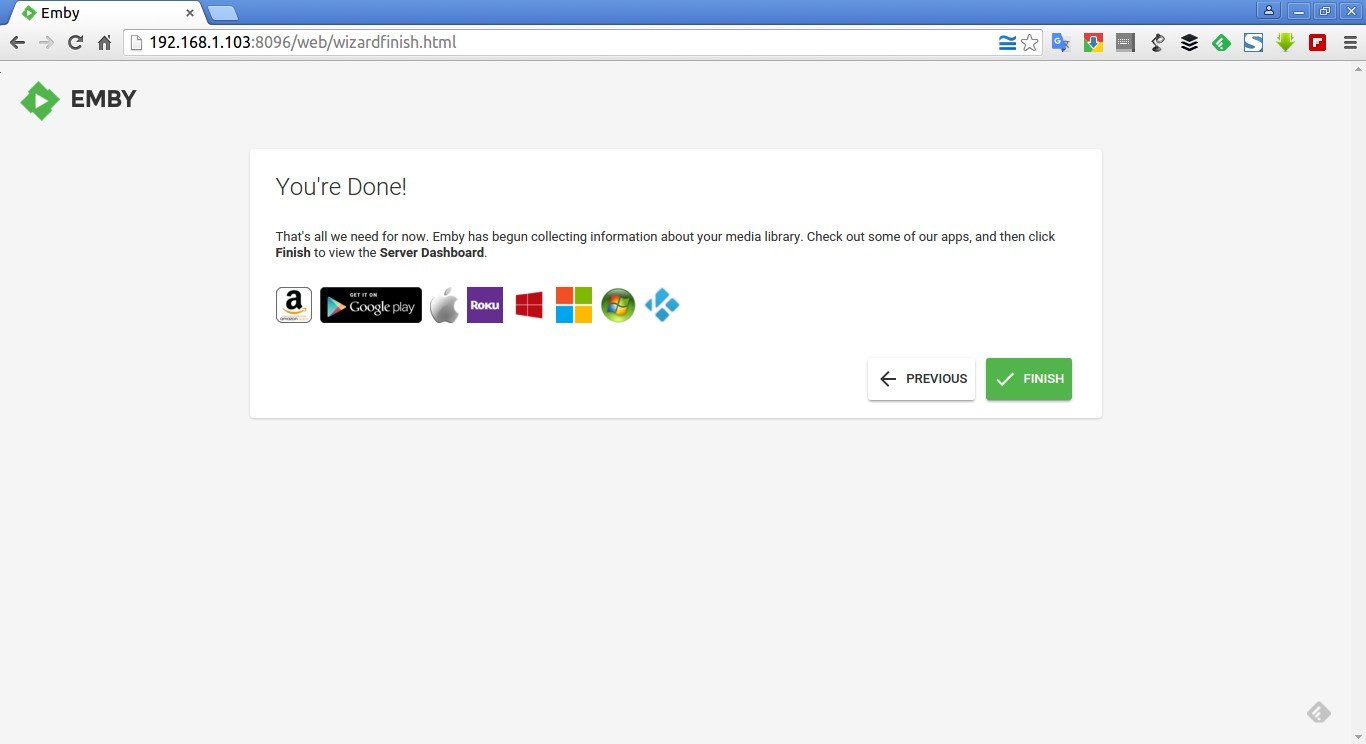
That’s all we need for now. Emby has begun collecting information about your media library.

click Finish to view the Server Dashboard.

Emby - Google Chrome_018

Click on the user (Ex. Sk) to continue logging.

Sign In - Google Chrome_019

Here it is how my Emby dashboard looks like.

server web_dashboard.html

As you see in the above screenshot, Emby server is up and running. You can either access your Emby server from locally using private address (Ex. http://192.168.1.102:8096 in our case), or public IP address (Ex. http://1xx.1xx.1xx.1x:8096).

Alternatively, you can access your Emby server using a free Emby Connect account with out having to specify Emby server’s IP address from a remote system.

Creating Emby Connect Account

This account will let you to access your media anywhere, anytime using Emby app without having to use your actual Emby server’s IP address.

To create this account got to: https://emby.media/connect/

Click Sign Up.

Emby Connect - Emby - Google Chrome_024

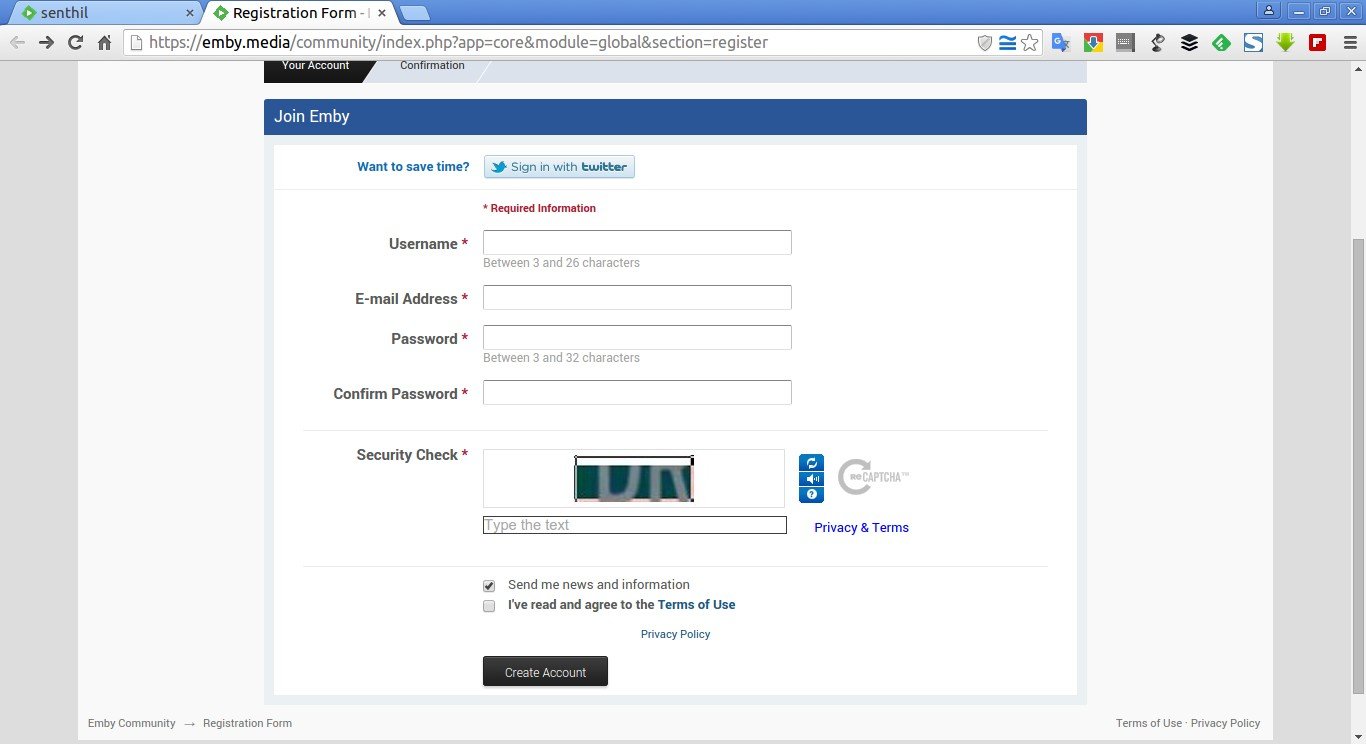
Fill up the registration form or sign in with your Twitter account to save some time. Here, I use my Twitter account to register.

Registration Form - Emby Community - Google Chrome_025

At first login, you’ll be asked to use the existing account or create a new account. Since, It’s my first time I am going to create my new account.

Welcome to our community - Emby Community - Google Chrome_026

Fill up the details and click Create New Account.

Welcome to our community - Emby Community - Google Chrome_027

That’s it. After logging in to your account, you need to setup a local password (If you use Twitter to login).

To do that, click on the on the user name on the right corner and go to Settings.

Menu_028

In the My Settings Window, Click Email & Password link on the left. Then, enter your password twice.

Selection_029

Important Note: Don’t confuse it with your Twitter account’s password. It’s your Emby Connect account password to access Emby server’s media from anywhere using any device.

Now, you can use this account to connect to your Emby server either from a web browser or using an app.

Link Emby Connect Account

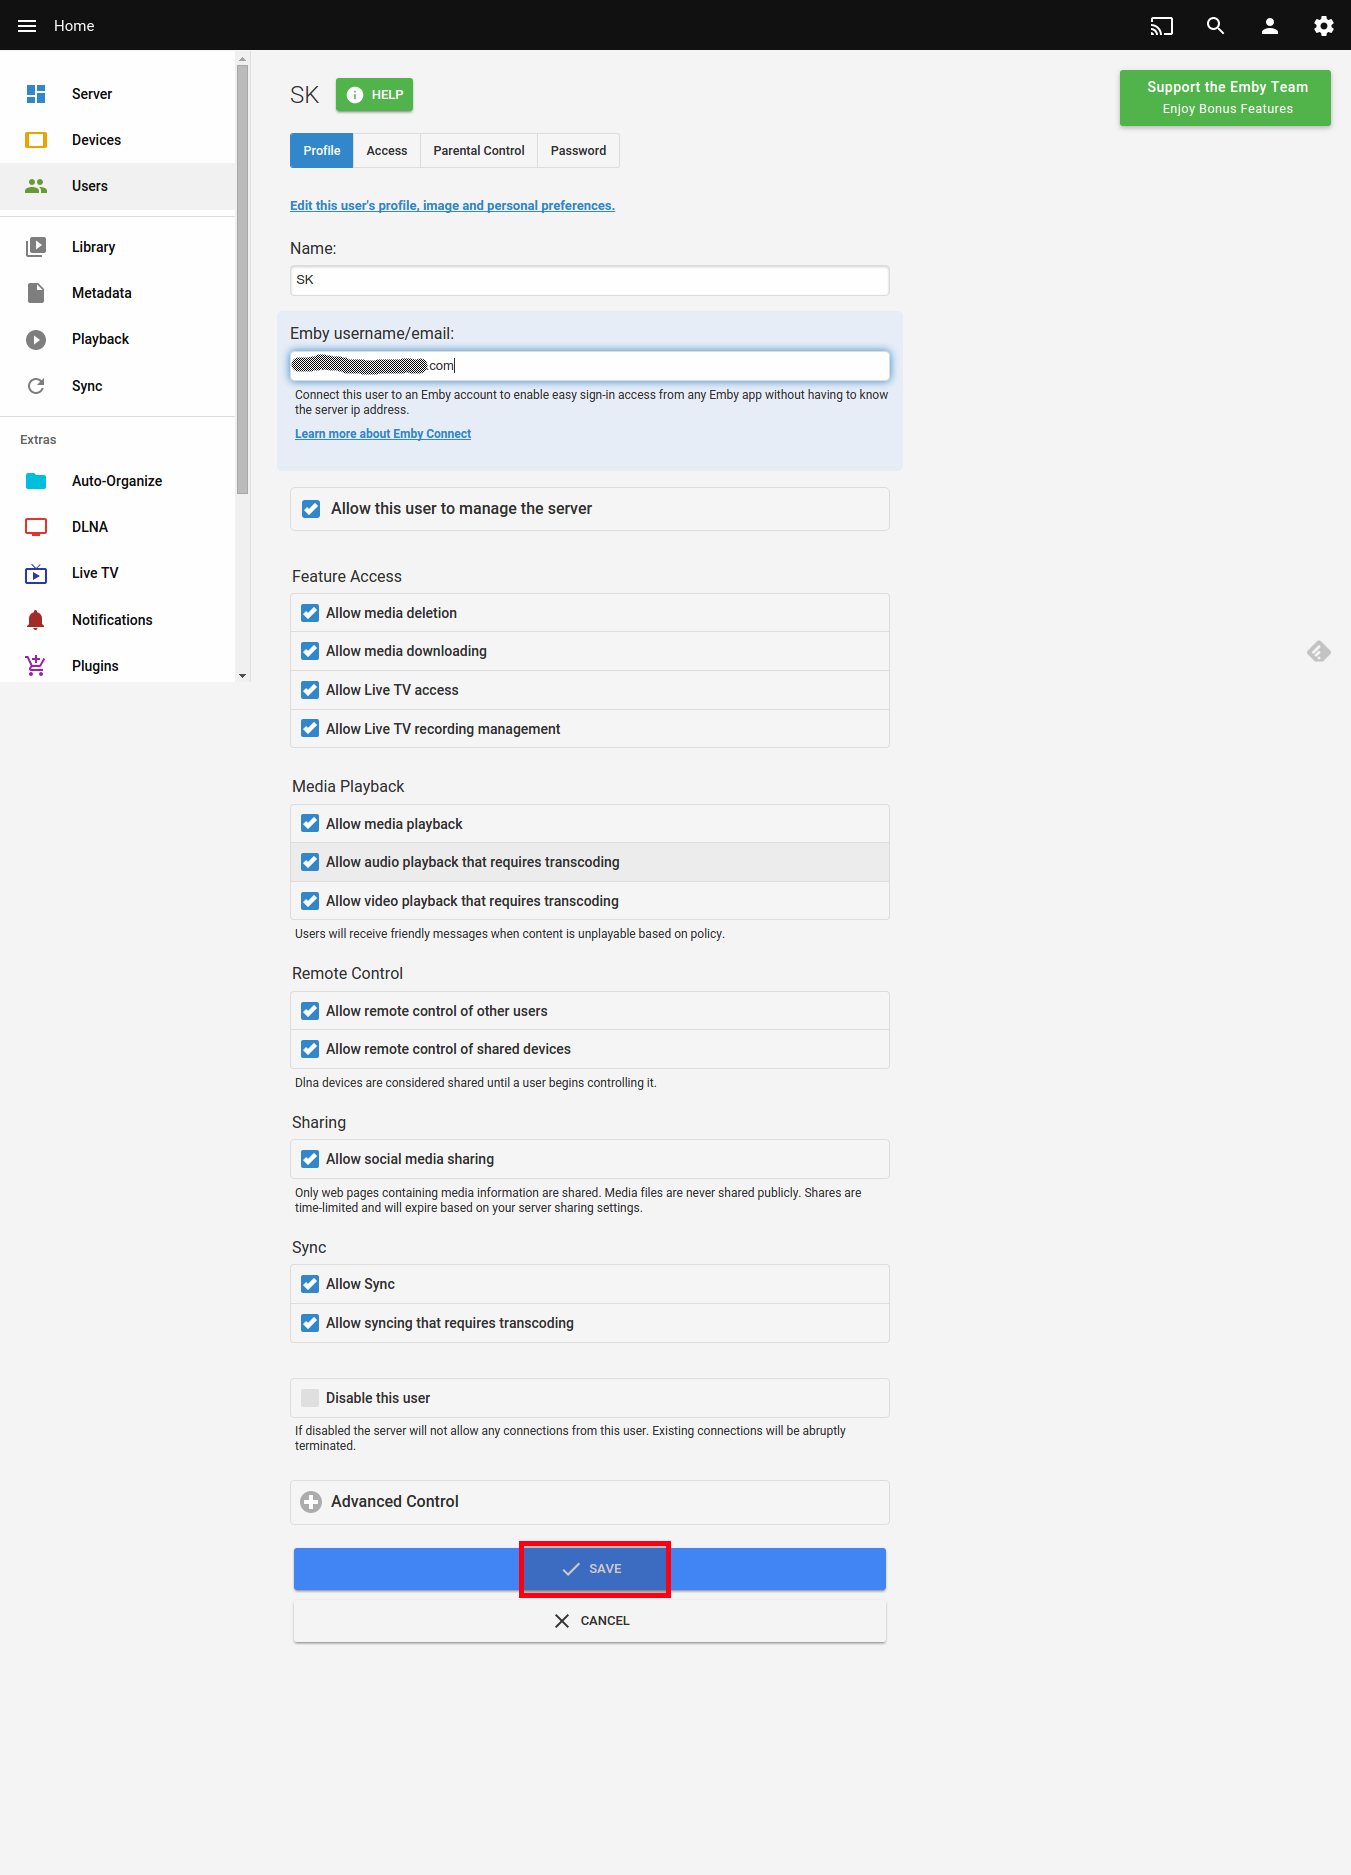
Log in to Emby server dashboard. Click on the Users tab on the Left panel. Enter your registered username/Email in the Emby username/email field. Finally, click Save.

SK web_user

The Emby account has been added to this user. An email will be sent to the mail. The invitation will need to be confirmed by clicking a link within the email.

That’s it. Your Emby server is now linked to your Emby Account. You can now access it by logging in with your Connect user name in any supported client app or at http://app.emby.media via a web browser.

Access Emby server via Web browser from a remote system

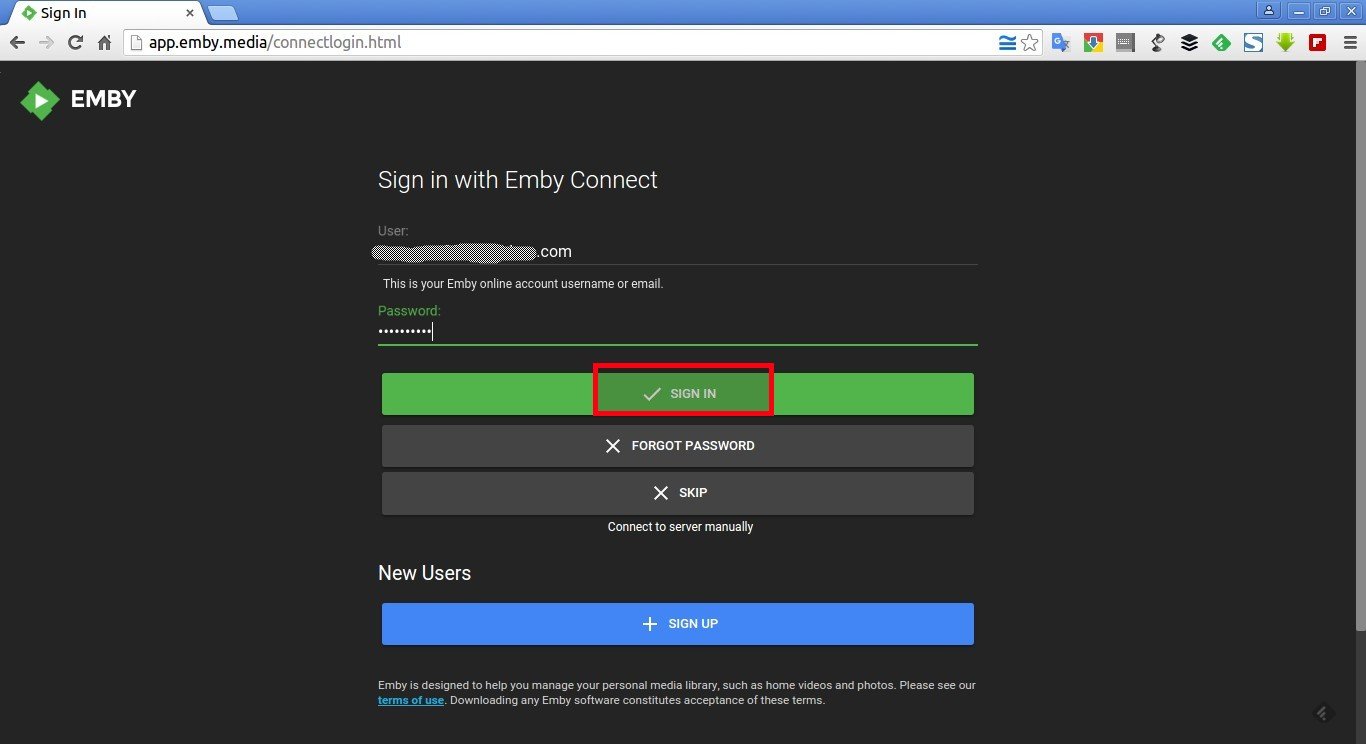
Open up your web browser and access the URL: http://app.emby.media

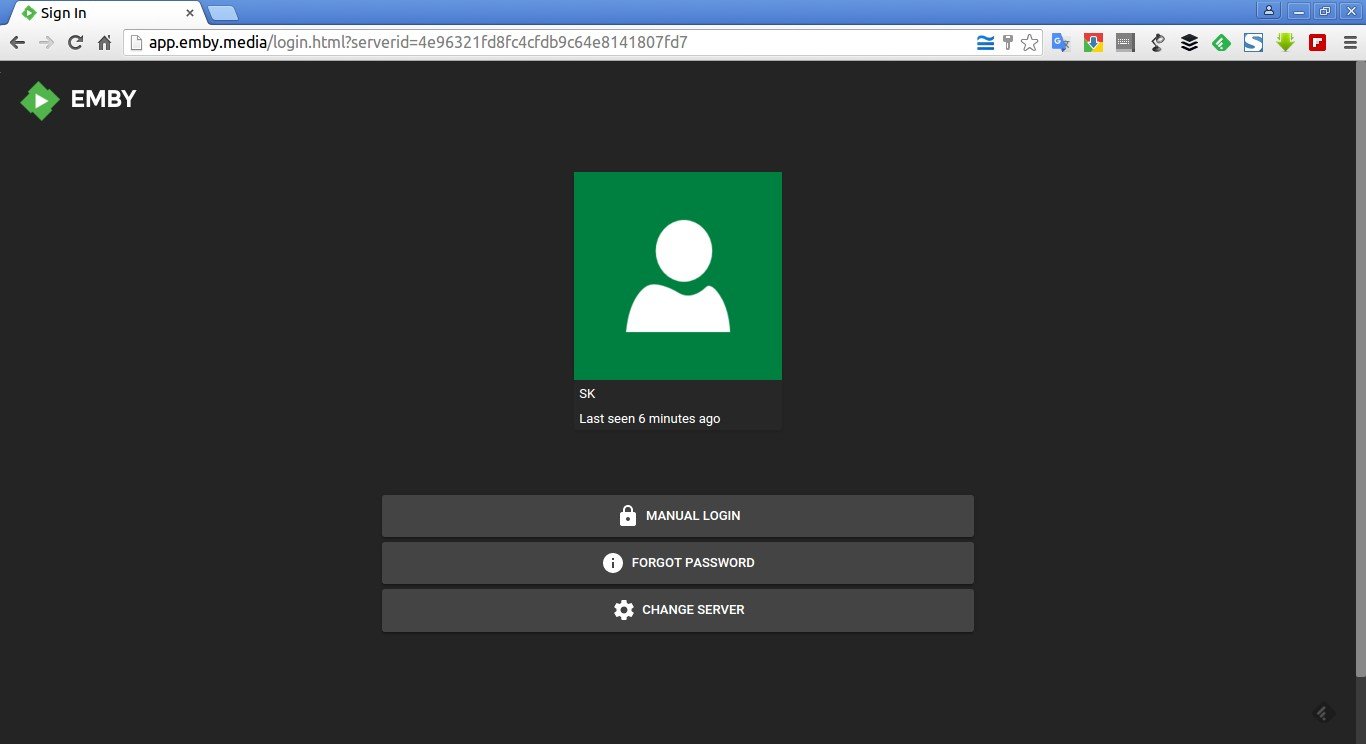
The following screen should appear. Enter your Emby account’s name and its password.

Sign In - Google Chrome_030

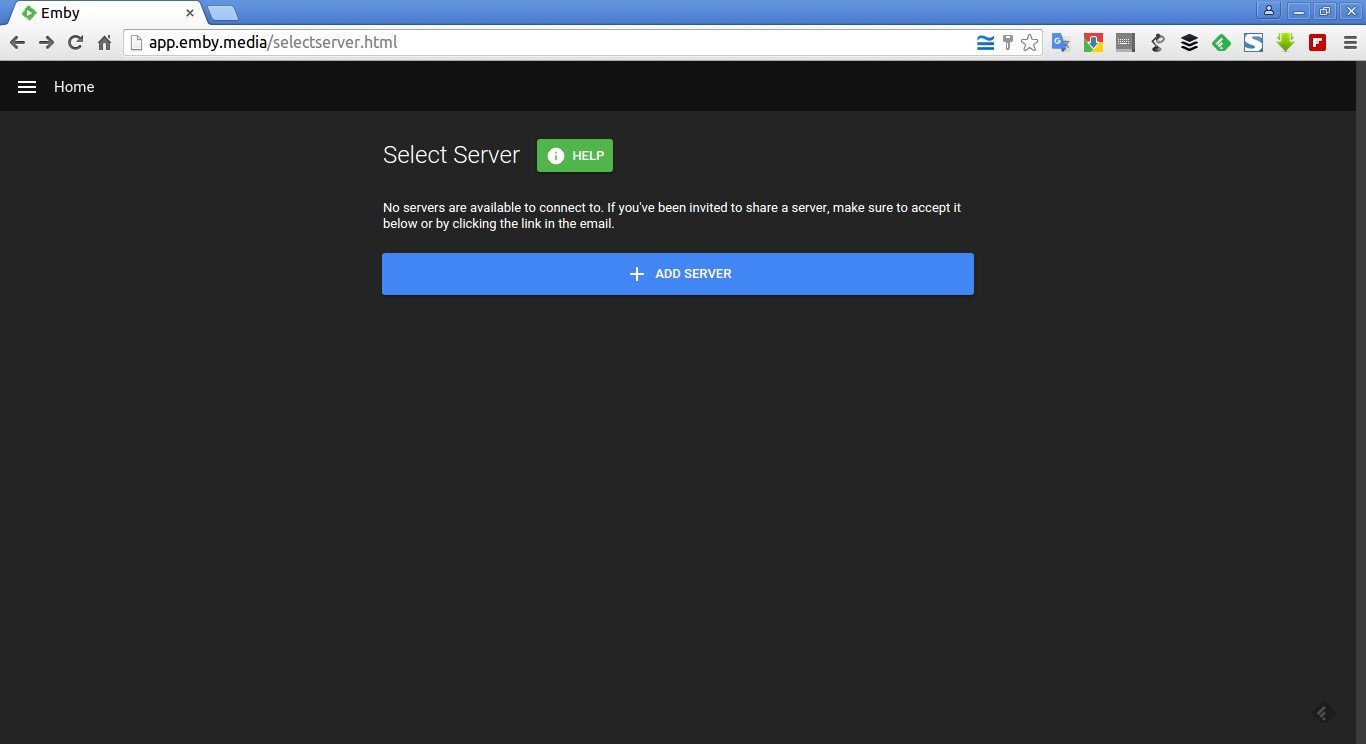
You can either select your existing server or add a new server by clicking on the ADD SERVER button.

Emby - Google Chrome_031

Enter your Emby server’s IP address, for example http://192.168.1.102 or public IP address. Click Connect.

Sign In - Google Chrome_032

Now, select the username to log in to the Emby dashboard. Remember I have already created the user account sk in the Emby server’s web based installer.

Sign In - Google Chrome_033

Here is my Emby server’s dashboard.

Home - Google Chrome_034

Similarly, you can install client app for Android, iOS, or Windows devices and access the Emby server from anywhere using the Emby Connect account.

That’s all for now. Start using your media server. Hope this article will help you.

Cheers!

Reference links:

The post Setup A Centralized Media Server Using Emby Server appeared first on Unixmen.

Linux Mint History and Development

$
0
0


Linux Mint was mainly developed and released by Clement Lefebvre in France in 2006. Clement is one of the software developers who are notoriously reluctant and reclusive to give interviews but at the same time, he has stressed repeatedly that he has an aim to modify Ubuntu and achieve elegance to it. Practically, that meant focusing on incorporating user feedback, ease of use, and also choosing pleasant color layouts and schemes.

Linux Mint is distribution based on the Debian and Ubuntu operating systems, with alternative LMDE (Linux Mint Debian Edition) based purely on the Debian. Linux Mint provides full multimedia support that is out-of-the-box by including proprietary software like Adobe Flash.

At the first new versions of Ubuntu-based Linux Mint were released about every 6 months. First release was in 2006 and named “Ada”. The 17th version was released in 2014 and named “Qiana” which was another long-term-support release (LTS). Linux Mint software developers decided that after Qiana, all the subsequent versions should use source-code of current LTS release of Linux Mint till Ubuntu releases a new LTS release. Basically, all the new version releases could be based on the Ubuntu’s LTS release, and all Point releases could be based on existing LTS’s source code. The most recent update is named “Rafaela”, and it was released on June 30, 2015.

The History of Linux Mint

Linux Mint started in 2006 based on Kubuntu, with name “Ada” as version 1.0. After that another release, “Barbara”, as version 2.0 was first version which used Ubuntu as codebase using its package repositories. Linux Mint had some users from those early versions till the “Cassandra” release version 3.0.

Linux Mint in 2008 adopted precisely the same release cycle as Ubuntu and dropped its minor version number before releasing the version 5 “Elyssa”. For increasing the compatibility between the 2 systems, Linux Mint made a decision to abandon its code-base and also changed the way built its releases. Starting with version 6 “Felicia” each release was now completely using the latest Ubuntu release, built from it directly, and timed for about one month following the corresponding Ubuntu release.

In 2010, Linux Mint released the LMDE (Linux Mint Debian Edition). Regardless other Ubuntu-based editions, Linux Mint Debian Edition was originally rolling release based on Debian directly and wasn’t tied to the Ubuntu packages or even its release schedule. On May 2015, Linux Mint team decided to no longer support original rolling release version of Linux Mint Debian Edition after January 2016. New version of Linux Mint Debian Edition called Linux Mint Debian Edition 2 “Betsy”. It is LTS release based on the Debian Jessie. When Betsy was released, all LMDE users could be automatically upgraded to the new versions of the MintTools software and the new Desktop Environments before even they were released into main edition of the Linux Mint.

Linux Mint Features

  • Linux Mint utilizes primarily the free and open-source software, which is making exceptions for few proprietary software, including plug-ins and codecs which provide MP3, Adobe Flash, and also DVD playback.
  • Linux Mint’s inclusion of the proprietary software is unusual at all as some Linux distributions don’t include the proprietary software by default because the common goal for the Linux distributions is to adhere to model of the free and open-source software.
  • Linux Mint develops actively software for its operating system and the most of development is done in Python and you find the source code available on GitHub.
  • Linux Mint is available with some desktop environments to choose from, such as default Cinnamon desktop, KDE, MATE, and Xfce. The other desktop environments may be installed via Synaptic, APT, or via custom Mint Software Manager.
  • Linux Mint often comes with many software installed which includes Firefox, Transmission, LibreOffice, XChat, Pidgin, Thunderbird, and GIMP. Other software which isn’t installed by default can be easily downloaded using Linux Mint’s package manager.
  • Linux Mint also allows the networking ports to be closed using firewall, with availability of customized port selection.
  • Default Linux Mint desktop environments, MATE and Cinnamon, can support various languages.
  • Linux Mint can run many programs which are designed for Microsoft Windows like Microsoft Office as example, by using Wine Windows compatibility layer software for Linux, or any available virtualization software, such as VirtualBox and VMware Workstation.

Software Developed by the Linux Mint

  • Cinnamon: This is fork of GNOME Shell based on innovations made in the MGSE (Mint Gnome Shell Extensions). It was released as add-on for the Linux Mint version 12 and is available as default desktop environment since the Linux Mint 13.
  • MintTools
    • Software Manager (mintInstall): This tool can run .mint files that are files which contain instructions to the install packages. From the Linux Mint 6, this tool can download all information on all applications on Mint Software Portal for the offline viewing purpose.

This tool enables also the installation of any programs that are directly listed from the desktop, instead of going to the website.

There’s also an option to use old mintInstall program available on Ubuntu Repositories or GetDeb.net can be searched and found.

  • Update Manager (mintUpdate): This tool is designed for preventing the inexperienced users from installing any updates which are not necessary or may require certain level of knowledge for configuring properly.

It assigns the updates safety level (from 1 to 5), based on stability and necessity of update.

The updates can simply be set to notify the users be listed but not notify, or hidden by default. Also to include the updates specifically for Linux Mint distribution, the software developers team tests all the package-wide updates.

  • Main Menu (mintMenu): This is menu of options such as installation and removal of software, filtering, custom places, favorites, system and places links, editable items, session management, and many other configuration options. It’s also ported to the MATE in the Linux Mint 12 “Lisa”.
  • Backup tool (mintBackup): This tool can enable user for backing up and restoring data. Data may be backed up before fresh install of the newer release, then can be restored.
  • Upload Manager (mintUpload): This tool can define the upload services for SFTP, FTP, and SCP servers. Services are available in the system tray, and can provide zones where can be automatically uploaded to the corresponding destinations.
  • Domain Blocker (mintNanny): This is basic domain blocking parenting control tool and was introduced with Linux Mint version 6. It also can enable users to add domains manually to be blocked system-wide.
  • Desktop Settings: This tool is for the configuration of the desktop.
  • Welcome screen (mintWelcome): This tool was introduced in Linux Mint version 7, as application which starts on first login of any new account.

It can also provide links to Linux Mint site, beside user guide and the community website.

  • Remastering tool (mintConstructor): This tool is for remastering the Linux Mint, as it can be no longer obtained, since Linux Mint software developers team removed it from their repository.

Users would use this tool previously in order for creating their own distribution based on the Linux Mint.

  • Mint Gnome Shell Extensions (MGSE): This is desktop layer on the top of the GNOME 3 in order to make it feel like the GNOME 2, and is still popular within Linux community when the GNOME 3 was introduced.

Includes bottom panel, window list, application menus, task-centric desktop (like switches between windows, but not applications), and also system tray icons. That was included in the Linux Mint version 12 “Lisa”.

Ubuntu-Based Editions

In Linux Mint version 13, there’re 2 main editions of the Linux Mint, which were developed by core development team and were using the Ubuntu as codebase. One of them includes the Linux Mint’s own Cinnamon as desktop environment while the other one uses the MATE.

Linux Mint develops also editions which feature KDE and Xfce desktop environments by default. These have a secondary priority and they’re generally released later than the two main editions.

Older releases, which are now obsolete, included the editions which featured the LXDE, GNOME, and the Fluxbox desktop environments by default.

Linux Mint Debian Edition

Linux Mint Debian Edition was originally based on the Debian’s Testing branch directly, rather than the Ubuntu, but it was designed in order to provide same functionalities, and look and feel, as Ubuntu-based edition.

After releasing Linux Mint Debian Edition 2 on 2015 Linux Mint Debian Edition, it was based on the Debian Stable, but it has received automatic updates to latest versions of the MintTools and latest version of installed Desktop Environment before being released into Main edition of the Linux Mint. Linux Mint Debian Edition is available with MATE and Cinnamon desktop environments.

Linux Mint Debian Edition originally had semi-rolling release development model. The Debian Testing is real rolling release which receives updates constantly while the older Linux Mint Debian Edition version periodically introduced what we call “Update Packs” that are packed tested snapshots of the Debian Testing.

Linux Mint Development

Companies and Individual users using operating system often act as sponsors, partners, and donors of the distribution. Linux Mint relies on the user feedback in order to make decisions and also orient its development.

The official blog usually features the discussions where users are asked to tell their opinion about latest features or decisions that are implemented for the upcoming releases. Also ideas may be submitted, and commented upon and rated by the users via Linux Mint Community site.

Community of the Linux Mint users use the Launchpad in order to participate in translation of operating system and in reporting the bugs.

Most of the extraneous development is done in Python programming language and is organized on-line on GitHub, which is making it easy for software developers in order to implement additional features, to provide patches, or to fork the Linux Mint sub-projects.

With every release, new features are added which are mainly developed by community. In the Linux Mint version 9 as example, ability to edit the menu items is feature which was contributed by a user of the Linux Mint.

The post Linux Mint History and Development appeared first on Unixmen.

Install PostgreSQL 9.4 And phpPgAdmin On Ubuntu 15.10

$
0
0


Introduction

PostgreSQL is a powerful, open-source object-relational database system. It runs under all major operating systems, including Linux, UNIX (AIX, BSD, HP-UX, SGI IRIX, Mac OS, Solaris, Tru64), and Windows OS.

Here is what Mark Shuttleworth, the founder of Ubuntu, says about PostgreSQL.

Postgres is a truly awesome database. When we started working on Launchpad I wasn’t sure if it would be up to the job. I was so wrong. It’s been robust, fast, and professional in every regard.

— Mark Shuttleworth.

In this handy tutorial, let us see how to install PostgreSQL 9.4 on Ubuntu 15.10 server.

Install PostgreSQL

PostgreSQL is available in the default repositories. So enter the following command from the Terminal to install it.

sudo apt-get install postgresql postgresql-contrib

If you’re looking for other versions, add the PostgreSQL repository, and install it as shown below.

The PostgreSQL apt repository supports LTS versions of Ubuntu (10.04, 12.04 and 14.04) on amd64 and i386 architectures as well as select non-LTS versions(14.10). While not fully supported, the packages often work on other non-LTS versions as well, by using the closest LTS version available.

On Ubuntu 14.10 systems:

Create the file /etc/apt/sources.list.d/pgdg.list;

sudo vi /etc/apt/sources.list.d/pgdg.list

Add a line for the repository:

deb http://apt.postgresql.org/pub/repos/apt/ utopic-pgdg main

Note: The above repository will only work on Ubuntu 14.10. It is not updated yet to Ubuntu 15.04 and 15.10.

On Ubuntu 14.04, add the following line:

deb http://apt.postgresql.org/pub/repos/apt/ trusty-pgdg main

On Ubuntu 12.04, add the following line:

deb http://apt.postgresql.org/pub/repos/apt/ precise-pgdg main

Import the repository signing key:

wget --quiet -O - https://www.postgresql.org/media/keys/ACCC4CF8.asc
sudo apt-key add -

Update the package lists:

sudo apt-get update

Then install the required version.

sudo apt-get install postgresql-9.4

Accessing PostgreSQL command prompt

The default database name and database user are “postgres”. Switch to postgres user to perform postgresql related operations:

sudo -u postgres psql postgres

Sample Output:

psql (9.4.5)
Type "help" for help.

postgres=#

To exit from posgresql prompt, type \q in the psql prompt return back to the Terminal.

Set “postgres” user password

Login to postgresql prompt,

sudo -u postgres psql postgres

.. and set postgres password with following command:

postgres=# \password postgres 
Enter new password: 
Enter it again: 
postgres=# \q

To install PostgreSQL Adminpack, enter the command in postgresql prompt:

sudo -u postgres psql postgres
postgres=# CREATE EXTENSION adminpack;
CREATE EXTENSION

Type \q in the psql prompt to exit from posgresql prompt, and return back to the Terminal.

Create New User and Database

For example, let us create a new user called “senthil” with password “ubuntu”, and database called “mydb”.

sudo -u postgres createuser -D -A -P senthil
sudo -u postgres createdb -O senthil mydb

Delete Users and Databases

To delete the database, switch to postgres user:

sudo -u postgres psql postgres

Enter command:

$ drop database <database-name>

To delete a user, enter the following command:

$ drop user <user-name>

Configure PostgreSQL-MD5 Authentication

MD5 authentication requires the client to supply an MD5-encrypted password for authentication. To do that, edit /etc/postgresql/9.4/main/pg_hba.conf file:

sudo vi /etc/postgresql/9.4/main/pg_hba.conf

Add or Modify the lines as shown below

[...]
# TYPE  DATABASE        USER            ADDRESS                 METHOD

# "local" is for Unix domain socket connections only
local   all             all                                     md5
# IPv4 local connections:
host    all             all             127.0.0.1/32            md5
host    all             all             192.168.1.0/24          md5
# IPv6 local connections:
host    all             all             ::1/128                 md5
[...]

Here, 192.168.1.0/24 is my local network IP address. Replace this value with your own address.

Restart postgresql service to apply the changes:

sudo systemctl restart postgresql

Or,

sudo service postgresql restart

Configure PostgreSQL-Configure TCP/IP

By default, TCP/IP connection is disabled, so that the users from another computers can’t access postgresql. To allow to connect users from another computers, Edit file /etc/postgresql/9.4/main/postgresql.conf:

sudo vi /etc/postgresql/9.4/main/postgresql.conf

Find the lines:

[...]
#listen_addresses = 'localhost'
[...]
#port = 5432
[...]

Uncomment both lines, and set the IP address of your postgresql server or set ‘*’ to listen from all clients as shown below. You should be careful to make postgreSQL to be accessible from all remote clients.

[...]
listen_addresses = '*'
[...]
port = 5432
[...]

Restart postgresql service to save changes:

sudo systemctl restart postgresql

Or,

sudo service postgresql restart

Manage PostgreSQL with phpPgAdmin

phpPgAdmin is a web-based administration utility written in PHP for managing PosgreSQL.

phpPgAdmin is available in default repositories. So, Install phpPgAdmin using command:

sudo apt-get install phppgadmin

By default, you can access phppgadmin using http://localhost/phppgadmin from your local system’s web browser.

To access remote systems, do the following.

On Ubuntu 15.10 systems:

Edit file /etc/apache2/conf-available/phppgadmin.conf,

sudo vi /etc/apache2/conf-available/phppgadmin.conf

Find the line Require local and comment it by adding a # in front of the line.

#Require local

And add the following line:

allow from all

Save and exit the file.

Then, restart apache service.

sudo systemctl restart apache2

On Ubuntu 14.10 and previous versions:

Edit file /etc/apache2/conf.d/phppgadmin:

sudo nano /etc/apache2/conf.d/phppgadmin

Comment the following line:

[...]
#allow from 127.0.0.0/255.0.0.0 ::1/128

Uncomment the following line to make phppgadmin from all systems.

allow from all

Edit /etc/apache2/apache2.conf:

sudo vi /etc/apache2/apache2.conf

Add the following line:

Include /etc/apache2/conf.d/phppgadmin

Then, restart apache service.

sudo service apache2 restart

Configure phpPgAdmin

Edit file /etc/phppgadmin/config.inc.php, and do the following changes. Most of these options are self-explanatory. Read them carefully to know why do you change these values.

sudo nano /etc/phppgadmin/config.inc.php

Find the following line:

$conf['servers'][0]['host'] = '';

Change it as shown below:

$conf['servers'][0]['host'] = 'localhost';

And find the line:

$conf['extra_login_security'] = true;

Change the value to false.

$conf['extra_login_security'] = false;

Find the line:

$conf['owned_only'] = false;

Set the value as true.

$conf['owned_only'] = true;

Save and close the file. Restart postgresql service and Apache services.

sudo systemctl restart postgresql
sudo systemctl restart apache2

Or,

sudo service postgresql restart
sudo service apache2 restart

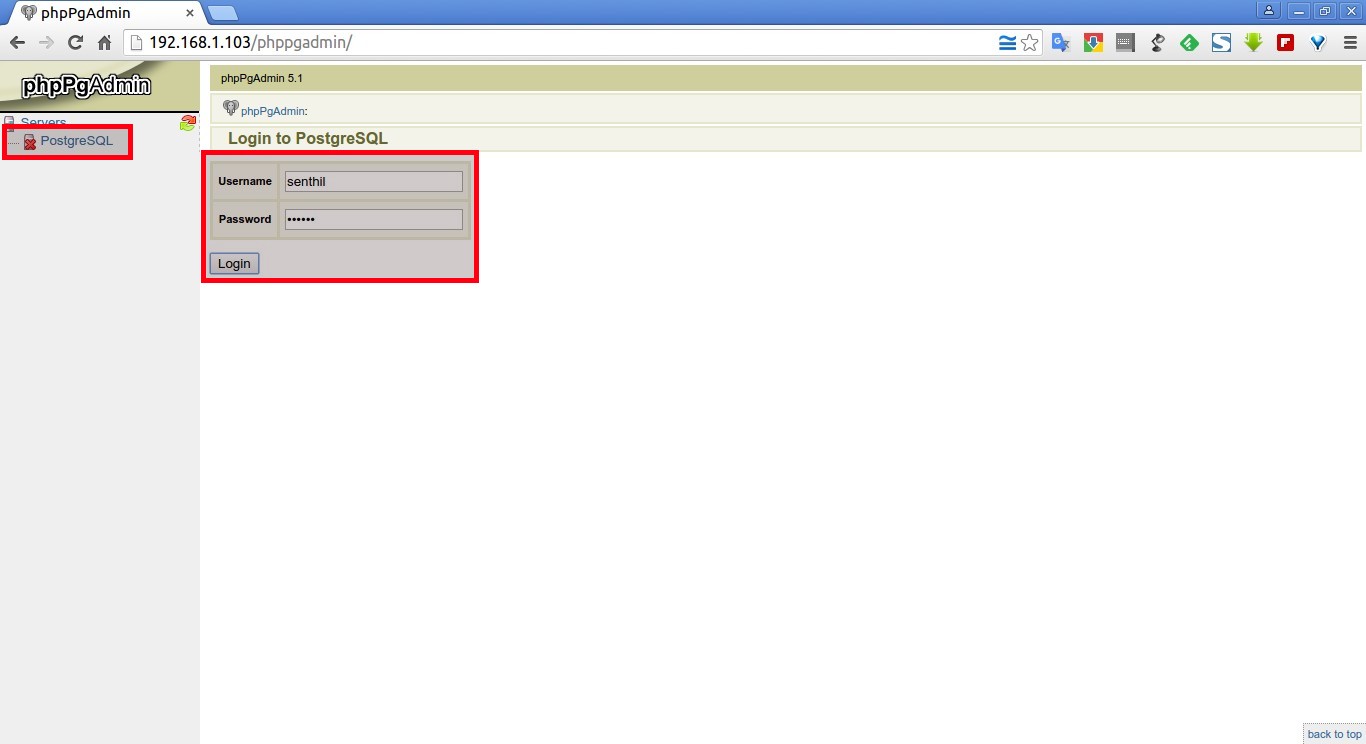
Now open your browser and navigate to http://ip-address/phppgadmin. You will see the following screen.

phpPgAdmin – Google Chrome_001

Login with users that you’ve created earlier. I already have created a user called “senthil” with password “ubuntu” before, so I log in with user “senthil”.

phpPgAdmin – Google Chrome_002

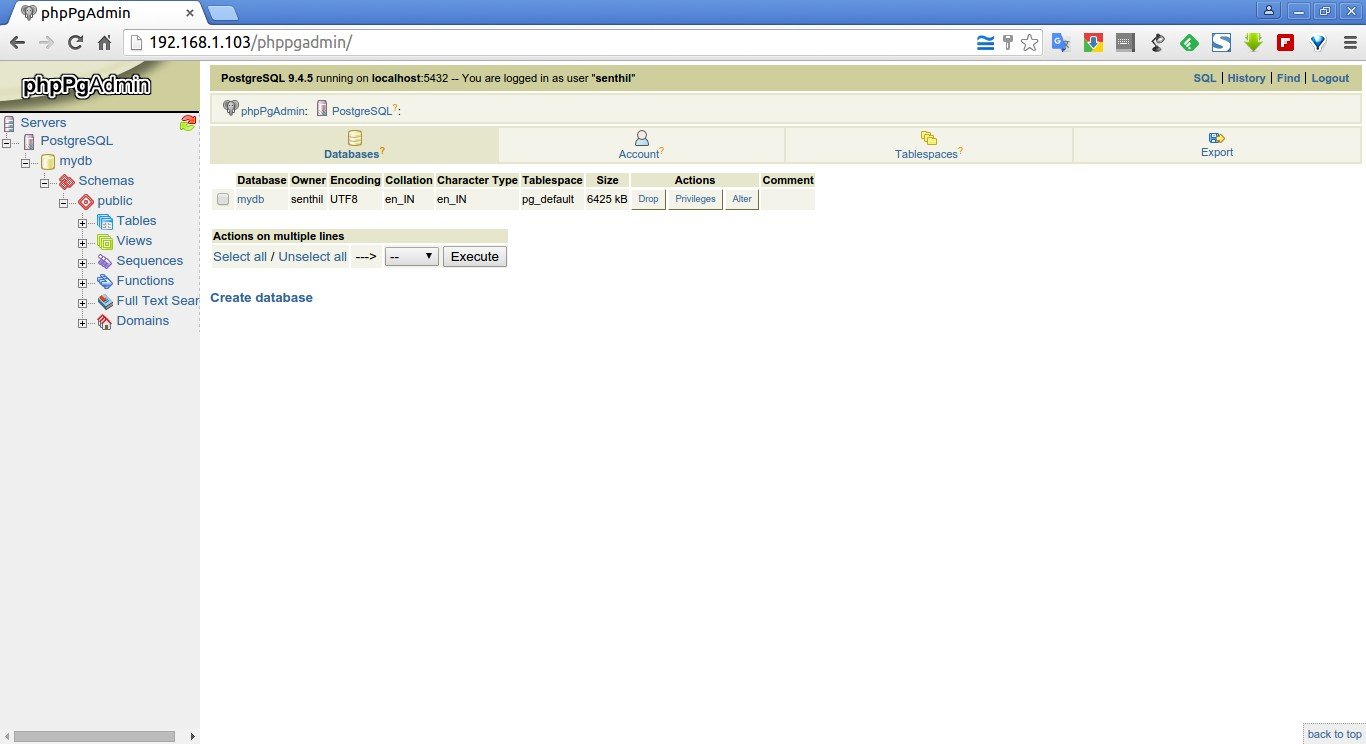
Now, you will be able to access the phppgadmin dashboard.

phpPgAdmin – Google Chrome_003

Log in with postgres user:

phpPgAdmin – Google Chrome_004

That’s it. Now you’ll able to create, delete and alter databases graphically using phppgadmin.

Cheers!

The post Install PostgreSQL 9.4 And phpPgAdmin On Ubuntu 15.10 appeared first on Unixmen.

Install OpenGTS Tracking System In Linux Mint 17

$
0
0


Introduction

OpenGTS is first open source web based GPS based tracking system.It is used worldwide in more then 110 countries and used in thousands of vehicles. It is used for entry level fleet and equally for high level tracking systems.

Features

Web based authentication

Each account support multiple users, each user can have its own login and password. User can access their account settings.

Customizable web interface

Look and feel of tracking website and be modified as per requirement of the user.

Operating System independent

It is an entirely java based application with used Apache tomcat for web services and mysql as database, it can be installed and configured with Linux, Mac, FreeBSD or Microsoft based Operating systems.

Reports customization

It used XML base internal reporting engine which help to generate any tracking history as and when required.

Customizable zeozones

Customized zeo forced area can be set up to provide arrival and departure reports. Each zeozone can be assign with a different name.

For more details: http://opengts.sourceforge.net/

Install OpenGTS

Prerequisites

We will use mint Linux 17 for demo purpose, minimum 2 GB RAM, 5 GB storage with a dual core process will be sufficient.

Update system:

# sudo apt-get update

Install required software packages:

$ sudo apt-get install apache2 php5 mysql-server libmysql-java wget curl unzip ant

Provide mysql password during installation.

Selection_014

Start Mysql and apache2 services:

 $ sudo /etc/init.d/mysql start
 $ sudo /etc/init.d/apache2 start

Install openjdk:

$ sudo apt-get install openjdk-7-jdk

Download and install Apache Tomcat version 7-x-x.

$ wget -c http://apache.mirror.uber.com.au/tomcat/tomcat-7/v7.0.65/bin/apache-tomcat-7.0.65.zip

Extract tomcat package and copy everything to /usr/local/ directory.

$ sudo  unzip apache-tomcat-7.0.65.zip
$ sudo cp -av  apache-tomcat-7.0.65 /usr/local/

Define CATALINA_HOME environment and run the startup script.

$ export CATALINA_HOME=/usr/local/apache-tomcat-7.0.65/
$ cd /usr/local
$ sudo ln -s $CATALINA_HOME tomcat
$ cd /usr/local/apache-tomcat-7.0.65/bin
$ chmod a+x *.sh
$ ./startup.sh
$ sudo  ln -s $CATALINA_HOME /usr/local/tomcat

Selection_019

Define JAVA_HOME environment:

 $ export JAVA_HOME=/usr/lib/jvm/java-7-openjdk-amd64
 $ echo "export JAVA_HOME=/usr/lib/jvm/java-7-openjdk-amd64" >> ~/.bashrc
 $ sudo  ln -s $JAVA_HOME /usr/local/java

Configure JAVA mail setup and Java Connector:

First Download and setup mysql Java connector, extract package and copy mysql java connector to $JAVA_HOME/jre/lib/ext folder

$ cd /tmp/ && wget http://cdn.mysql.com//Downloads/Connector-J/mysql-connector-java-5.1.37.tar.gz
$ tar -xvf mysql-connector-java-5.1.37.tar.gz
$ cd  mysql-connector-java-5.1.37
$ sudo  cp mysql-connector-java-5.1.37-bin.jar $JAVA_HOME/jre/lib/ext

Now download and configure Java mail setup and copy that downloaded .jar file to $JAVA_HOME/jre/lib/ext folder.

$ cd /tmp/ && wget https://maven.java.net/content/repositories/releases/com/sun/mail/javax.mail/1.5.4/javax.mail-1.5.4.jar
$ sudo cp javax.mail-1.5.4.jar $JAVA_HOME/jre/lib/ext/

Rename javax.mail-1.5.4.jar to javax.mail.jar:

$ mv $JAVA_HOME/jre/lib/ext/javax.mail-1.5.2.jar $JAVA_HOME/jre/lib/ext/javax.mail.jar

Download OpenGTS:

$ cd /tmp && wget http://ncu.dl.sourceforge.net/project/opengts/server-base/2.6.0/OpenGTS_2.6.0.zip

Extract package to /usr/local folder:

$ sudo unzip OpenGTS_2.6.0.zip -d /usr/local/

Set up GTS_HOME environment:

$ export GTS_HOME=/usr/local/OpenGTS_2.6.0/
$ echo "export GTS_HOME=/usr/local/OpenGTS_2.6.0" >> ~/.bashrc
$ sudo  ln -s $GTS_HOME /usr/local/gts

Change ownership for user currently logged in before running next command:

$ sudo chown -R unixmen:sudo /usr/local/OpenGTS_2.6.0/

Now change directory to $GTS_HOME and run following command:

 && ant all

If everything goes smooth, output will be something like below.

Selection_018

Define database user name and password (Note that we are still in $GTS_HOME).

$  bin/initdb.sh -rootUser=root -rootPass=password

Sample output:

Selection_020

 Run ant track  command which will create a  file named track.war,  we have to copy that file to $CATALINA_HOME/webapps folder.

$ ant track

Sample output:

Selection_021

$ cp $GTS_HOME/build/track.war /usr/local/apache-tomcat-7.0.65/webapps/
Before moving ahead stop and restart apache tomcat again
$ $CATALINA_HOME/bin/startup.sh

Open browser and type http://<ip_address>:8080/track/Track

Selection_022

Oops, we have not create a sysadmin account required to login the server, let us create it first.

$ cd $GTS_HOME/bin
$ ./admin.sh Account -account=unixmen -pass=unixmen -create

Sample output

Selection_023

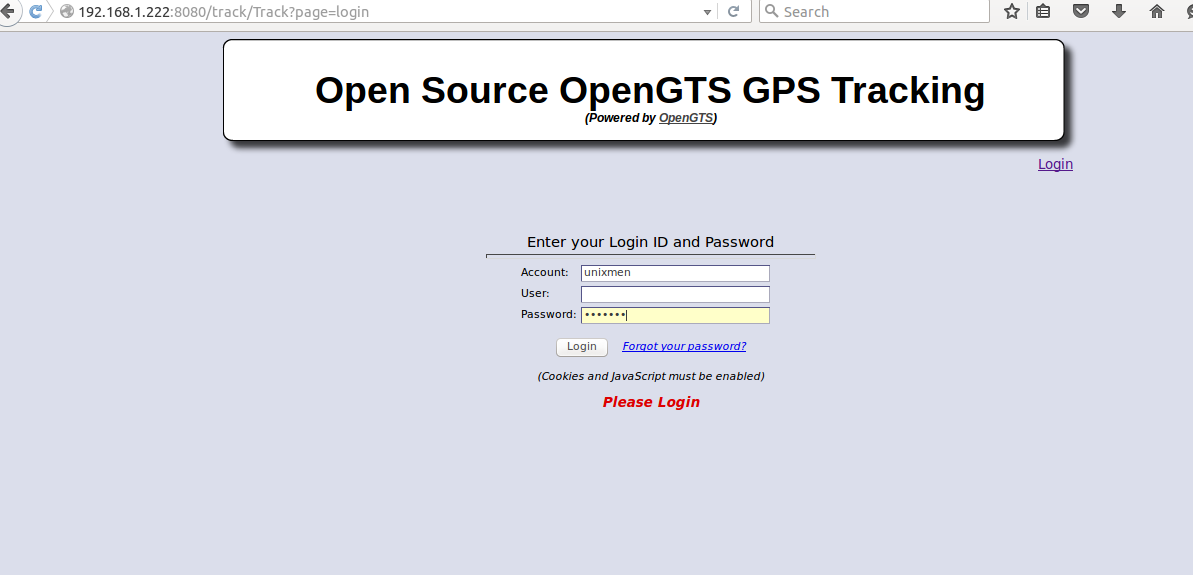
Now Provide these credentials and login

Selection_024

A welcome screen will appear:

Selection_025

Now installation and configuration part is over at this stage, configure your GPS tracking devices and you can use them with Open GTS.

Selection_026

Conclusion

As per my knowledge very fewer documentations related to OpenGTS installation are available, but official documentation will be sufficient to configure it. One problem which was faced by me during installation process is that OpenGTS show error when it was configured with latest version of Apache Tomcat.

Selection_017

It is recommended that you should use Apache tomcat version 7.0.x for that purpose. Although this practical guide was tested in Mint Linux 17, but I believe that it will also  work with Ubuntu 14.04/15.10.

Have fun!!

The post Install OpenGTS Tracking System In Linux Mint 17 appeared first on Unixmen.


Install Edusec College Management System On Linux Mint 17

$
0
0


Introduction

Edusec is an web based College Management Software used   for College/University/Schools/Institutions students and employee management, This ERP is developed by Indian based development Company named Rudrasoftech.

Features

Although Open Source version of Edusec is provided with limited features but still  it is very useful for Education based Industries. Highlighted features of Open Source version as as follows

Course Management Module

Under this module user can mange Batch, Section and course(B.Tech, MBA etc) wise details.

Students Management Module

You can add students to different courses, you can download excel or pdf lists, reports can be generated easily.

Employee Management Module

Department or designation wide management of employees, Qualification related details can be added along with employee details.

Fee Management

Can collect fee, generate slips and bulk reports are also available as and when required.

Message and Notices

User can have their own accounts with limited authentications, Admin can send them message of day, notices or some another information.

Events  Calendar

Events calendar is provided on dash boar.

Installation

We will be using a Linux Mint 17 virtual box. To run erp in real life minimum 8 GB RAM, Core i5 processor and 40 GB Hard drive is recommended. LAMP stalk is required.

Update System:

# apt-get update

Install MySQL.

# apt-get install mysql-server

Assign password for MySQL root:

# mysqladmin -u root password password

Install web server:

# apt-get install apache2

Install php package:

# sudo apt-get install php5 php5-gd php5-mysql php-pear php5-dev libmysqlclient15-dev

Create new database user and  do not create a database because it will created  during software installation automatically.

Sample output:

# mysql -u root -p
mysql> create user  'edusec'@'localhost' identified by 'password';
Query OK, 0 rows affected (0.02 sec)
mysql> exit
Bye

Create a new directory under /var/www/html named as edusec.

# mkdir /var/www/html/edusec

Download edusec package and extract to /var/www/html/edusec.

# cp /tmp && wget http://ncu.dl.sourceforge.net/project/edusec/EduSec4.2.4.zip
# unzip EduSec4.2.4.zip -d /var/www/html/edsec

Change ownership of that newly created directory.

# chown www-data:www-data /var/www/html/edusec/ -R

Restart mysql and apache service:

# /etc/init.d/apache2 restart 
# /etc/init.d/mysql restart

Open a browser and type, system will check for all of the required dependencies.

  • http://127.0.0.1/edusec/install.php

Selection_028

As we can see in above snapshot one of the PDP MySQL extension related dependency is not fulfilled, let us resolve it first.

Open php.ini file:

# vim /etc/php5/apache2/php.ini

Put following entries in php.ini file.

extension=pdo.so
extension=pdo_mysql.so

Selection_044

When dependencies are resolved click to install edusec and proceed.

Selection_030

Provide database user and password.

Selection_031

You can use some sample data or can go with empty database, click next.

Selection_033

Installation is complete, click to finish/login.

Selection_034

Login with default user name ‘admin’ and password ‘admin’.

Selection_035

A dash board will appear after login.

Selection_037

Now installation is over at this stage, you can explore all of the modules. Add students details.

Selection_036

You can import PDF or excel format reports.

Selection_038

Manage Employee details:

Selection_041

Manage reports:Selection_042

Get fee deposited  and generate a slip:

Selection_043

Try various modules by yourself.

Conclusion

Edsec is a must have for any education based industry, very easy to use format. Students or users can have their accounts, no technical skill are required to handle various modules. You can import students/employee data in bulk.

Have Fun!!

The post Install Edusec College Management System On Linux Mint 17 appeared first on Unixmen.

Assign Multiple IP Addresses To One Interface On Ubuntu 15.10

$
0
0


Some times you might want to use more than one IP address for your network interface card. What will you do in such cases? Buy an extra network card and assign new IP? No, It’s not necessary(at least in the small networks). We can now assign multiple IP addresses to one interface on Ubuntu systems. Curious to know how? Well, Follow me, It is not that difficult.

This method will work on Debian and it’s derivatives too.

Add additional IP addresses temporarily

First, let us find the IP address of the network card. In my Ubuntu 15.10 server, I use only one network card.

Run the following command to find out the IP address:

sudo ip addr

Sample output:

1: lo: <LOOPBACK,UP,LOWER_UP> mtu 65536 qdisc noqueue state UNKNOWN group default 
 link/loopback 00:00:00:00:00:00 brd 00:00:00:00:00:00
 inet 127.0.0.1/8 scope host lo
 valid_lft forever preferred_lft forever
 inet6 ::1/128 scope host 
 valid_lft forever preferred_lft forever
2: enp0s3: <BROADCAST,MULTICAST,UP,LOWER_UP> mtu 1500 qdisc pfifo_fast state UP group default qlen 1000
 link/ether 08:00:27:2a:03:4b brd ff:ff:ff:ff:ff:ff
 inet 192.168.1.103/24 brd 192.168.1.255 scope global enp0s3
 valid_lft forever preferred_lft forever
 inet6 fe80::a00:27ff:fe2a:34e/64 scope link 
 valid_lft forever preferred_lft forever

Or

sudo ifconfig

Sample output:

enp0s3 Link encap:Ethernet HWaddr 08:00:27:2a:03:4b 
 inet addr:192.168.1.103 Bcast:192.168.1.255 Mask:255.255.255.0
 inet6 addr: fe80::a00:27ff:fe2a:34e/64 Scope:Link
 UP BROADCAST RUNNING MULTICAST MTU:1500 Metric:1
 RX packets:186 errors:0 dropped:0 overruns:0 frame:0
 TX packets:70 errors:0 dropped:0 overruns:0 carrier:0
 collisions:0 txqueuelen:1000 
 RX bytes:21872 (21.8 KB) TX bytes:9666 (9.6 KB)

lo Link encap:Local Loopback 
 inet addr:127.0.0.1 Mask:255.0.0.0
 inet6 addr: ::1/128 Scope:Host
 UP LOOPBACK RUNNING MTU:65536 Metric:1
 RX packets:217 errors:0 dropped:0 overruns:0 frame:0
 TX packets:217 errors:0 dropped:0 overruns:0 carrier:0
 collisions:0 txqueuelen:0 
 RX bytes:38793 (38.7 KB) TX bytes:38793 (38.7 KB)

As you see in the above output, my network card name is enp0s3, and its IP address is 192.168.1.103.

Now let us add an additional IP address, for example 192.168.1.104, to the Interface card.

Open your Terminal and run the following command to add additional IP.

sudo ip addr add 192.168.1.104/24 dev enp0s3

Now, let us check if the IP is added using command:

sudo ip address show enp0s3

Sample output:

2: enp0s3: <BROADCAST,MULTICAST,UP,LOWER_UP> mtu 1500 qdisc pfifo_fast state UP group default qlen 1000
 link/ether 08:00:27:2a:03:4e brd ff:ff:ff:ff:ff:ff
 inet 192.168.1.103/24 brd 192.168.1.255 scope global enp0s3
 valid_lft forever preferred_lft forever
 inet 192.168.1.104/24 scope global secondary enp0s3
 valid_lft forever preferred_lft forever
 inet6 fe80::a00:27ff:fe2a:34e/64 scope link 
 valid_lft forever preferred_lft forever

Similarly, you can add as many IP addresses as you want.

Let us ping the IP address to verify it.

sudo ping 192.168.1.104

Sample output:

PING 192.168.1.104 (192.168.1.104) 56(84) bytes of data.
64 bytes from 192.168.1.104: icmp_seq=1 ttl=64 time=0.901 ms
64 bytes from 192.168.1.104: icmp_seq=2 ttl=64 time=0.571 ms
64 bytes from 192.168.1.104: icmp_seq=3 ttl=64 time=0.521 ms
64 bytes from 192.168.1.104: icmp_seq=4 ttl=64 time=0.524 ms

Yeah, It’s working!!

To remove the IP, just run:

sudo ip addr del 192.168.1.104/24 dev enp0s3

Let us check if it is removed.

sudo ip address show enp0s3

Sample output:

2: enp0s3: <BROADCAST,MULTICAST,UP,LOWER_UP> mtu 1500 qdisc pfifo_fast state UP group default qlen 1000
 link/ether 08:00:27:2a:03:4e brd ff:ff:ff:ff:ff:ff
 inet 192.168.1.103/24 brd 192.168.1.255 scope global enp0s3
 valid_lft forever preferred_lft forever
 inet6 fe80::a00:27ff:fe2a:34e/64 scope link 
 valid_lft forever preferred_lft forever

See, It’s gone!!

Well, as you may know, the changes will lost after you reboot your system. How do I make it permanent? That’s easy too.

Add additional IP addresses permanently

The network card configuration file of your Ubuntu system is /etc/network/interfaces.

Let us check the details of the above file.

sudo cat /etc/network/interfaces

Sample output:

# This file describes the network interfaces available on your system
# and how to activate them. For more information, see interfaces(5).

source /etc/network/interfaces.d/*

# The loopback network interface
auto lo
iface lo inet loopback

# The primary network interface
auto enp0s3
iface enp0s3 inet dhcp

As you see in the above output, the Interface is DHCP enabled.

Okay, now we will assign an additional address, for example 192.168.1.104/24.

Edit file /etc/network/interfaces:

sudo nano /etc/network/interfaces

Add additional IP address as shown in the black letters.

# This file describes the network interfaces available on your system
# and how to activate them. For more information, see interfaces(5).

source /etc/network/interfaces.d/*

# The loopback network interface
auto lo
iface lo inet loopback

# The primary network interface
auto enp0s3
iface enp0s3 inet dhcp

iface enp0s3 inet static
 address 192.168.1.104/24

Save and close the file.

Run the following file to take effect the changes without rebooting.

sudo ifdown enp0s3 && sudo ifup enp0s3

Sample output:

Killed old client process
Internet Systems Consortium DHCP Client 4.3.1
Copyright 2004-2014 Internet Systems Consortium.
All rights reserved.
For info, please visit https://www.isc.org/software/dhcp/

Listening on LPF/enp0s3/08:00:27:2a:03:4e
Sending on LPF/enp0s3/08:00:27:2a:03:4e
Sending on Socket/fallback
DHCPRELEASE on enp0s3 to 192.168.1.1 port 67 (xid=0x225f35)
Internet Systems Consortium DHCP Client 4.3.1
Copyright 2004-2014 Internet Systems Consortium.
All rights reserved.
For info, please visit https://www.isc.org/software/dhcp/

Listening on LPF/enp0s3/08:00:27:2a:03:4e
Sending on LPF/enp0s3/08:00:27:2a:03:4e
Sending on Socket/fallback
DHCPDISCOVER on enp0s3 to 255.255.255.255 port 67 interval 3 (xid=0xdfb94764)
DHCPREQUEST of 192.168.1.103 on enp0s3 to 255.255.255.255 port 67 (xid=0x6447b9df)
DHCPOFFER of 192.168.1.103 from 192.168.1.1
DHCPACK of 192.168.1.103 from 192.168.1.1
bound to 192.168.1.103 -- renewal in 35146 seconds.

Note: It is very important to run the above two commands into one line if you are remoting into the server because the first one will drop your connection. Given in this way the ssh-session will survive.

Now, let us check if IP is added using command:

sudo ip address show enp0s3

Sample output:

2: enp0s3: <BROADCAST,MULTICAST,UP,LOWER_UP> mtu 1500 qdisc pfifo_fast state UP group default qlen 1000
 link/ether 08:00:27:2a:03:4e brd ff:ff:ff:ff:ff:ff
 inet 192.168.1.103/24 brd 192.168.1.255 scope global enp0s3
 valid_lft forever preferred_lft forever
 inet 192.168.1.104/24 brd 192.168.1.255 scope global secondary enp0s3
 valid_lft forever preferred_lft forever
 inet6 fe80::a00:27ff:fe2a:34e/64 scope link 
 valid_lft forever preferred_lft forever

Cool! Additional IP has been added.

Well then let us ping the IP address to verify.

sudo ping 192.168.1.104

Sample output:

PING 192.168.1.104 (192.168.1.104) 56(84) bytes of data.
64 bytes from 192.168.1.104: icmp_seq=1 ttl=64 time=0.137 ms
64 bytes from 192.168.1.104: icmp_seq=2 ttl=64 time=0.050 ms
64 bytes from 192.168.1.104: icmp_seq=3 ttl=64 time=0.054 ms
64 bytes from 192.168.1.104: icmp_seq=4 ttl=64 time=0.067 ms

Voila! It’s working. That’s it.

Want to know how to add additional IP addresses on CentOS/RHEL/Scientific Linux/Fedora systems, check the following link.

Happy weekend!

The post Assign Multiple IP Addresses To One Interface On Ubuntu 15.10 appeared first on Unixmen.

How To Setup DNS Server In Ubuntu 15.10

$
0
0


About DNS

DNS, stands for Domain Name System, translates hostnames or URLs into IP addresses. For example, if we typewww.unixmen.com in browser, the DNS server translates the domain name into its associated ip address. Since the IP addresses are hard to remember all time, DNS servers are used to translate the hostnames like www.unixmen.com to 173.xxx.xx.xxx. So it makes easy to remember the domain names instead of its IP address.

In this tutorial, we will see how to setup and configure DNS server on Ubuntu 15.10 server. Also, the same method will work on Debian and its derivatives.

Setup DNS Server In Ubuntu 15.10

Scenario

For the purpose of this tutorial, I will be using three systems. One will be acting as Master DNS server, the second system will be acting as Secondary DNS, and the third will be our DNS client. Here are my three systems details.

Primary (Master) DNS Server Details:

Operating System     : Ubuntu 15.10 64bit minimal server
Hostname             : masterdns.unixmen.local
IP Address           : 192.168.1.101/24

Secondary (Slave) DNS Server Details:

Operating System     : Ubuntu 15.10 64bit minimal server
Hostname             : secondarydns.unixmen.local
IP Address           : 192.168.1.102/24

Client Details:

Operating System     : Ubuntu 14.04 desktop
Hostname             : client.unixmen.local
IP Address           : 192.168.1.103/24

Setup Caching Server

In this configuration, BIND9 will find the answer to name queries and remember the answer for the next query. This can be useful for a slow internet connection. By caching DNS queries, you will reduce bandwidth and (more importantly) latency.

The default configuration is setup to act as a caching server. All that is required is simply adding the IP Addresses of your ISP’s DNS servers. Caching server is opt for low Internet connection.

Install bind9 packages using command:

sudo apt-get install bind9 bind9utils bind9-doc

Then edit /etc/bind/named.conf.options file,

sudo vi /etc/bind/named.conf.options

Simply uncomment and edit the following in /etc/bind/named.conf.options:

forwarders {
8.8.8.8;
};

Restart bind9 service.

sudo systemctl restart bind9

Test Caching Server

Run the following command to test it.

dig -x 127.0.0.1

Sample output:

; <<>> DiG 9.9.5-11ubuntu1-Ubuntu <<>> -x 127.0.0.1
;; global options: +cmd
;; Got answer:
;; ->>HEADER<<- opcode: QUERY, status: NOERROR, id: 60612
;; flags: qr aa rd ra; QUERY: 1, ANSWER: 1, AUTHORITY: 1, ADDITIONAL: 3
;; OPT PSEUDOSECTION:
; EDNS: version: 0, flags:; udp: 4096
;; QUESTION SECTION:
;1.0.0.127.in-addr.arpa.        IN    PTR
;; ANSWER SECTION:
1.0.0.127.in-addr.arpa.    604800    IN    PTR    localhost.
;; AUTHORITY SECTION:
127.in-addr.arpa.    604800    IN    NS    localhost.
;; ADDITIONAL SECTION:
localhost.        604800    IN    A    127.0.0.1
localhost.        604800    IN    AAAA    ::1
;; Query time: 4 msec
;; SERVER: 192.168.1.101#53(192.168.1.101)
;; WHEN: Mon Nov 23 17:48:36 IST 2015
;; MSG SIZE  rcvd: 132

Setup Primary (Master) DNS Server

You can use the same server for both Primary and Caching server.

Install bind9 packages on your server if not installed.

sudo apt-get install bind9 bind9utils bind9-doc

1. Configure Master DNS Server

DNS configuration files are stored in /etc/bind directory. Primary configuration file is /etc/bind/namd.conf.

Edit ‘/etc/bind/named.conf’ file.

sudo vi /etc/bind/named.conf

Make sure it contains the following lines. If not, add them.

include "/etc/bind/named.conf.options";
include "/etc/bind/named.conf.local";
include "/etc/bind/named.conf.default-zones";

Save and close the file.

Then, edit named.conf.local,

sudo vi /etc/bind/named.conf.local

Add the following lines:

zone "unixmen.local" {
        type master;
        file "/etc/bind/forward.unixmen";
        allow-transfer { 192.168.1.102; };
        also-notify { 192.168.1.102; };
 };
zone "1.168.192.in-addr.arpa" {
        type master;
        file "/etc/bind/reverse.unixmen";
        allow-transfer { 192.168.1.102; };
        also-notify { 192.168.1.102; };
 };

Here,

  • forward.unixmen – Forward zone file
  • reverse.unixmen – Reverse zone file
  • 192.168.1.102 – Slave DNS server IP address

2. Create Zone files

Create forward and reverse zone files which we defiend in the ‘/etc/bind/named.conf.local’ file.

2.1 Create Forward Zone

Create Forward Zone file name forward.unixmen in /etc/bind/zones,

sudo vi /etc/bind/forward.unixmen

Add the following lines:

$TTL 86400
@   IN  SOA     masterdns.unixmen.local. root.unixmen.local. (
        2011071001  ;Serial
        3600        ;Refresh
        1800        ;Retry
        604800      ;Expire
        86400       ;Minimum TTL
)
@       IN  NS          masterdns.unixmen.local.
@       IN  NS          secondarydns.unixmen.local.
@       IN  A           192.168.1.101
@       IN  A           192.168.1.102
@       IN  A           192.168.1.103
masterdns       IN  A   192.168.1.101
secondarydns    IN  A   192.168.1.102
client          IN  A   192.168.1.103

2.2 Create Reverse Zone

Create Forward Zone file name reverse.unixmen in /etc/bind/zones,

sudo vi /etc/bind/reverse.unixmen

Add the following lines:

$TTL 86400
@   IN  SOA     masterdns.unixmen.local. root.unixmen.local. (
        2011071002  ;Serial
        3600        ;Refresh
        1800        ;Retry
        604800      ;Expire
        86400       ;Minimum TTL
)
@       IN  NS          masterdns.unixmen.local.
@       IN  NS          secondarydns.unixmen.local.
@       IN  PTR         unixmen.local.
masterdns       IN  A   192.168.1.101
secondarydns    IN  A   192.168.1.102
client          IN  A   192.168.1.103
101     IN  PTR         masterdns.unixmen.local.
102     IN  PTR         secondarydns.unixmen.local.
103     IN  PTR         client.unixmen.local.

3. Configuring Permissions, Ownership for Bind

Run the following commands one by one:

sudo chmod -R 755 /etc/bind
sudo chown -R bind:bind /etc/bind

4. Test DNS configuration and zone files for any syntax errors

Check DNS default configuration file:

sudo named-checkconf /etc/bind/named.conf
sudo named-checkconf /etc/bind/named.conf.local

If it returns nothing, your configuration is valid.

Check Forward zone:

sudo named-checkzone unixmen.local /etc/bind/forward.unixmen

Sample output:

zone unixmen.local/IN: loaded serial 2011071001
OK

Check reverse zone:

sudo named-checkzone unixmen.local /etc/bind/reverse.unixmen 

Sample Output:

zone unixmen.local/IN: loaded serial 2011071002
OK

Restart bind9 service.

sudo systemctl restart bind9

Add the DNS Server details in your network interface config file.

sudo vi /etc/network/interfaces

Add the nameserver IP address:

auto enp0s3
iface enp0s3 inet static
        address 192.168.1.101
        netmask 255.255.255.0
        network 192.168.1.0
        broadcast 192.168.1.255
        gateway 192.168.1.1
        dns-nameservers 192.168.1.101
        dns-search unixmen.local

Reboot your system.

5. Test DNS Server

Method 1:

dig masterdns.unixmen.local

Sample Output:

; <<>> DiG 9.9.5-11ubuntu1-Ubuntu <<>> masterdns.unixmen.local
;; global options: +cmd
;; Got answer:
;; ->>HEADER<<- opcode: QUERY, status: NOERROR, id: 27712
;; flags: qr aa rd ra; QUERY: 1, ANSWER: 1, AUTHORITY: 2, ADDITIONAL: 2
;; OPT PSEUDOSECTION:
; EDNS: version: 0, flags:; udp: 4096
;; QUESTION SECTION:
;masterdns.unixmen.local.    IN    A
;; ANSWER SECTION:
masterdns.unixmen.local. 86400    IN    A    192.168.1.101
;; AUTHORITY SECTION:
unixmen.local.        86400    IN    NS    masterdns.unixmen.local.
unixmen.local.        86400    IN    NS    secondarydns.unixmen.local.
;; ADDITIONAL SECTION:
secondarydns.unixmen.local. 86400 IN    A    192.168.1.102
;; Query time: 4 msec
;; SERVER: 192.168.1.101#53(192.168.1.101)
;; WHEN: Mon Nov 23 17:55:00 IST 2015
;; MSG SIZE  rcvd: 125

Method 2:

nslookup unixmen.local

Sample Output:

Server:        192.168.1.101
Address:    192.168.1.101#53
Name:    unixmen.local
Address: 192.168.1.101
Name:    unixmen.local
Address: 192.168.1.102
Name:    unixmen.local
Address: 192.168.1.103

Now the Primary DNS server is ready to use.

It is time to configure our Secondary DNS server.

Setup Secondary(Slave) DNS Server

Secondary DNS server is optional, but recommended. If the master DNS server goes down, the Secondary DNS server will take charge and answer the queries. You need an additional server to setup Slave DNS server.

Install bind9 packages using the following command:

sudo apt-get install bind9 bind9utils bind9-doc

1. Configure Slave DNS Server

Edit ‘/etc/bind/named.conf’ file.

sudo vi /etc/bind/named.conf

Make sure it contains the following lines. If not, add them.

include "/etc/bind/named.conf.options";
include "/etc/bind/named.conf.local";
include "/etc/bind/named.conf.default-zones";

Save and close the file.

Then, edit named.conf.local,

sudo vi /etc/bind/named.conf.local

Add the lines as shown in bold:

zone "unixmen.local" {
        type slave;
        file "/var/cache/bind/forward.unixmen";
        masters { 192.168.5.101; };
 };
zone "1.168.192.in-addr.arpa" {
        type slave;
        file "/var/cache/bind/reverse.unixmen";
        masters { 192.168.5.101; };
 };

Here,

  • forward.unixmen – Forward zone file
  • reverse.unixmen – Reverse zone file
  • 192.168.1.101 – Master DNS server IP address

The zone file must be in /var/cache/bind/ because, by default, AppArmor only allows write access inside it.

3. Configuring Permissions, Ownership for Bind

Run the following commands one by one:

sudo chmod -R 755 /etc/bind
sudo chown -R bind:bind /etc/bind

Restart bind9 service.

sudo service bind9 restart

4. Add the DNS Server details

Add the DNS Server details in your network interface config file.

sudo vi /etc/network/interfaces
# This file describes the network interfaces available on your system
# and how to activate them. For more information, see interfaces(5).
# The loopback network interface
auto lo
iface lo inet loopback
# The primary network interface
auto enp0s3
iface enp0s3 inet static
address 192.168.1.102
netmask 255.255.255.0
network 192.168.1.0
broadcast 192.168.1.255
gateway 192.168.1.1
dns-nameservers 192.168.1.101
dns-nameservers 192.168.1.102
dns-search home

Save and close the file.

Reboot your system.

5. Test DNS Server

After logging in to your server, run the following commands to check if DNS server is really working or not.

Method 1:

dig masterdns.unixmen.local

Sample Output:

; <<>> DiG 9.9.5-3-Ubuntu <<>> masterdns.unixmen.local
;; global options: +cmd
;; Got answer:
;; ->>HEADER<<- opcode: QUERY, status: NOERROR, id: 20290
;; flags: qr aa rd ra; QUERY: 1, ANSWER: 1, AUTHORITY: 2, ADDITIONAL: 2
;; OPT PSEUDOSECTION:
; EDNS: version: 0, flags:; udp: 4096
;; QUESTION SECTION:
;masterdns.unixmen.local.    IN    A
;; ANSWER SECTION:
masterdns.unixmen.local. 86400    IN    A    192.168.1.101
;; AUTHORITY SECTION:
unixmen.local.        86400    IN    NS    masterdns.unixmen.local.
unixmen.local.        86400    IN    NS    secondarydns.unixmen.local.
;; ADDITIONAL SECTION:
secondarydns.unixmen.local. 86400 IN    A    192.168.1.102
;; Query time: 5 msec
;; SERVER: 192.168.1.101#53(192.168.1.101)
;; WHEN: Mon Nov 23 18:02:38 IST 2015
;; MSG SIZE  rcvd: 125

Method 2:

dig secondarydns.unixmen.local

Sample Output:

; <<>> DiG 9.9.5-3-Ubuntu <<>> secondarydns.unixmen.local
;; global options: +cmd
;; Got answer:
;; ->>HEADER<<- opcode: QUERY, status: NOERROR, id: 53461
;; flags: qr aa rd ra; QUERY: 1, ANSWER: 1, AUTHORITY: 2, ADDITIONAL: 2
;; OPT PSEUDOSECTION:
; EDNS: version: 0, flags:; udp: 4096
;; QUESTION SECTION:
;secondarydns.unixmen.local. IN A
;; ANSWER SECTION:
secondarydns.unixmen.local. 86400 IN A 192.168.1.102
;; AUTHORITY SECTION:
unixmen.local. 86400 IN NS masterdns.unixmen.local.
unixmen.local. 86400 IN NS secondarydns.unixmen.local.
;; ADDITIONAL SECTION:
masterdns.unixmen.local. 86400 IN A 192.168.1.101
;; Query time: 5 msec
;; SERVER: 192.168.1.101#53(192.168.1.101)
;; WHEN: Mon Nov 23 18:10:02 IST 2015
;; MSG SIZE rcvd: 125

Method 3:

nslookup unixmen.local

Sample Output:

Server:        192.168.1.101
Address:    192.168.1.101#53
Name:    unixmen.local
Address: 192.168.1.101
Name:    unixmen.local
Address: 192.168.1.103
Name:    unixmen.local
Address: 192.168.1.102

Note: A zone is only transferred if the Serial Number on the Primary DNS server is larger than the one on the Secondary DNS server.

Client Side Configuration

Add the DNS server details in ‘/etc/resolv.conf’ file in all client systems

vi /etc/resolv.conf
# Generated by NetworkManager
search unixmen.local
nameserver 192.168.1.101
nameserver 192.168.1.102

Restart network service or reboot the system.

Test DNS Server

Now, you can test the DNS server using any one of the following commands:

dig masterdns.unixmen.local
dig secondarydns.unixmen.local
dig client.unixmen.local
nslookup unixmen.local

That’s all about now. The primary and secondary DNS servers are ready to use.

If you want to setup DNS server on RHEL based systems, check the following links.

Cheers!

The post How To Setup DNS Server In Ubuntu 15.10 appeared first on Unixmen.

How To Install Zabbix On Ubuntu 15.10

$
0
0


Zabbix is an enterprise-class open source distributed monitoring solution that can be used to monitor and track performance and availability of network servers, devices and other IT resources. It supports distributed and WEB monitoring, auto-discovery, and more.

I tested this how-to On Ubuntu 15.10, although it should work on other Ubuntu distributions and it’s derivatives. For the testing purpose, I will use the following two machines.

Zabbix Server System:

  • Operating system : Ubuntu 15.10 64bit edition
  • Server IP Address : 192.168.1.103/24
  • Hostname : server.unixmen.local

Zabbix Client System:

  • Operating system : Ubuntu 14.04 LTS
  • IP Address : 192.168.1.104/24
  • Hostname : sk

First let us start from server side.

Prerequisites

Before installing Zabbix, we should have install and configure LAMP stack on server. To install and configure LAMP server On Ubuntu or Debian refer the following links.

Install Zabbix On Ubuntu 15.10 server

After installing LAMP stack, let us add the Zabbix repository to our Ubuntu

Zabbix is available in Ubuntu default repositories, however it might be bit outdated. So let us install most recent version from the official Zabbix repositories. At the time of writing this tutorial, the latest version was Zabbix 2.4.

Or you can download and add the repository as shown below.

sudo wget http://repo.zabbix.com/zabbix/2.4/ubuntu/pool/main/z/zabbix-release/zabbix-release_2.4-1+trusty_all.deb
sudo dpkg -i zabbix-release_2.4-1+trusty_all.deb

Now update package lists and  Zabbix server using commands:

sudo apt-get update
sudo apt-get install zabbix-server-mysql zabbix-frontend-php

During installation, you’ll be asked to answer couple of questions regarding database configuration.

Select Yes and press enter to configure database for Zabbix.

sk@server: ~_002

Provide a password for Zabbix to register with the MySQL database server.

sk@server: ~_003

Re-enter the password.

sk@server: ~_004

Enter the MySQL administrative account ‘root’ user password.

sk@server: ~_006
During installation, a new database called ‘zabbix’ will be created along with user ‘zabbix’.

After successfully installing Zabbix let us adjust some PHP settings for zabbix front-end.

To do that, edit file /etc/apache2/conf.d/zabbix,

sudo nano /etc/apache2/conf-available/zabbix.conf

Find the following lines and edit them as follows. If the lines doesn’t exists, add them.

[...]
php_value max_execution_time 300
php_value memory_limit 128M
php_value post_max_size 16M
php_value upload_max_filesize 2M
php_value max_input_time 300
php_value date.timezone Asia/Kolkata
[...]

It is mandatory, to adjust the correct time zone for you. Save and close the file.

Edit php.ini file,

sudo nano /etc/php5/apache2/php.ini

Find the following line and modify it from:

;always_populate_raw_post_data = -1

to (just take the quotes off):

always_populate_raw_post_data = -1

Save and close the file.

Restart apache2 service to apply the changes.

sudo systemctl restart apache2

Access Zabbix Web Console

Open web browser and access the zabbix web console with URL: http://ip-address/zabbix or http://domain-name/zabbix.

Click Next to continue:

Installation – Google Chrome_007

It will check all prerequisites. If everything OK, click  Next to continue.

Installation – Google Chrome_008

Next enter the mysql administrative password and click Test connection. The database called ‘zabbix’ will be created automatically during the installation. If it says Ok, click Next to continue.

Installation – Google Chrome_009

Click next:

Installation – Google Chrome_010

Check configuration parameters once again and click Next to continue if all correct. If you want to change anything, just hit Previous button and do the changes.

Installation – Google Chrome_011

Click Finish to complete the installation.

Installation – Google Chrome_012

Now you’ll be asked to enter the username and password. The default username/password is admin/zabbix.

Zabbix – Google Chrome_013

Congratulations! You’ve completed the zabbix server and front-end installation successfully.

Here it is how my zabbix server Dashboard looks like.

zabbix_dashboard.php

Install zabbix-agent On zabbix server

zabbix agent is used to send the reports to the server. Let us install this package on our server with following command:

sudo apt-get install zabbix-agent

At the server side you don’t have to configure agent, default values will work just fine.

Now go to the Dashboard and navigate to Configuration tab on the tab menu bar. Click on the Hosts tab. You’ll see that the zabbix server has been listed there.

Configuration of hosts – Google Chrome_014

Initially, the zabbix server will not monitor itself. You have to enable it manually to monitor itself.

Click on the name of the server and set host name, and check the box that says “Enabled” at the bottom and click Update button. Refer the screenshot.

zabbix_hosts.php

Wait for few minutes and you’ll see the zabbix server status will be changed to Enabled.

Configuration of hosts – Google Chrome_015

Zabbix Client Side Configuration

Install zabbix-agent package in your client system:

sudo apt-get install zabbix-agent

Next edit file /etc/zabbix/zabbix_agentd.conf,

sudo vi /etc/zabbix/zabbix_agentd.conf

Add the server ip address and client hostname.

[...]
Server=192.168.1.103
[...]
Hostname=sk
[...]

Where,

  • 192.168.1.103 – Ubuntu 15.10 server’s IP address (Zabbix server).
  • sk – Ubuntu 14.04 hostname (Zabbix client hostname).

Now restart zabbix-agent service with command:

sudo service zabbix-agent restart

Add Monitoring host – Method 1

Next go to the zabbix server’s Dashboard.

Navigate to Configuration -> Hosts and click on your Zabbix server name.

Click the Clone button at the bottom. Refer the following screenshot.

zabbix_hosts

Enter the client hostname, select the group type, and enter IP address etc. Finally click Add. Don’t forget to check the box that says: Enabled above the Add button.

zabbix_hosts1

Now you’ll see that the client is added to monitoring list.

Configuration of hosts – Google Chrome_001

Add Monitoring Host – Method 2

From the Dashboard, go to Configuration -> Hosts. Click on Create host on the right side.

Configuration of hosts – Google Chrome_002

Enter hostname, select Groups and enter IP address as shown below and click Add.

zabbix_hosts1

Next go to Templates section and click Select button to choose template depending upon the type of your Host.

Configuration of hosts – Google Chrome_004

Hence my Zabbix client is Ubuntu desktop, So I have selected Template OS Linux. Then click Select.

Templates – Google Chrome_008

After selecting the templates of your choice, click Add button followed by Update button.

Selection_009

Now the client will be added in the Hosts list.

Configuration of hosts – Google Chrome_010

That’s it. Happy monitoring!!

Links:

The post How To Install Zabbix On Ubuntu 15.10 appeared first on Unixmen.

Install OrangeHRM On Linux Mint 17

$
0
0


Introduction

OrangeHRM is a free open source HR management system, it provides all essentials modules required for HR management. It is very popular tool which comes with very rich features.

Features

Modules which are provided with Open Source version are as follows:

Dash Board and Administration

Dash board provides integrated and collective information from all of the modules in the form of real time trend graphs, it provides updated information regarding any pending task. Administration part provided a secure management system with the help of which admin user can manage employee information, organization information, organization’s property management etc.

Personal Information Management

Provides a centralized employee database, provide pay grades, salary and another information. Keep employee contact and travelling information updated,  you can search information of any particular employee as and when required.

Time off, Attendance  and Leave management

This module allow employee to apply for  a leave, admin can handle leave requests, define type of leaves, can send automatic email notifications.You can create time sheets to monitor employee information.

Recruitment and performance management

With the help of recruitment modules HR can streamline complete recruitment process.With the help of performance management module employee is enables for self assessment, he can understand management exceptions in terms of performance.

For more details: http://www.orangehrm.com/OpenSource#myModal_1

Install OrangeHRM On Linux

We will be using Linux Mint 17 for demonstration purpose but is can be installed easily to CentOS 7, or latest Ubuntu versions. Minimum 2 GB RAM, Dual Core Processor and Minimum  4 GB space will be sufficient.

Update system:

sudo su
# apt-get update

Install mysql-server, assign password during installation:

# apt-get install mysql-server

Install apache2:

# apt-get install apache2

Install php:

# apt-get install php5 php5-mysql

Download OrangeHRM package from this link

# cd /tmp && wget http://nchc.dl.sourceforge.net/project/orangehrm/stable/3.3.2/orangehrm-3.3.2.zip

Extract that package to web root directory:

# unzip orangehrm-3.3.2.zip /var/www/html

Rename orangehrm-3.3.2.zip to orangehrm:

# cd /var/www/html/
# mv orangehrm-3.3.2 orangehrm

Change permissions for that directory:

# chown -R www-data:www:data /var/www/html/orangehrm
# chmod -R 755 /var/www/html/orangehrm

Restart apach2 service:

# apt-get restart  apache2

Open a browser and type:

<ipaddress>/orangehrm

A welcome screen will appear click next:

Selection_001Accept license agreement and click next:

Selection_002

Provide database credentials and click next:

Selection_003 System will check all parameters, click next or make changes if required:

Selection_004 Provide Administrator password which will be used for web log in:

Selection_005

Verify confirmation step and click  install:

Selection_006

When installation is complete proceed to next:

Selection_007

Provide company name and proceed to finish:

Selection_008

Login with admin user and password:

Selection_009

A dash board will appear after logging in:

Selection_010

Installation process is over  at that step, let us explore some of the features.

Add employee details:

Open PIM tab -> Click Employee List -> Click Add.

Selection_011

Provide details of Employee:

Selection_012

Will look something like this:

Selection_013

Similarly explore Admin Panel in which you can edit Departments, designations, pay scale or other details:

Selection_014

Try rest of the modules by yourself.

Conclusion

OrangeHRM is a very simple and easy to use application, no technical expertises are required. It could be very helpful to manage HR resources in any SOHO or SMB level organisation.

Have fun!!

The post Install OrangeHRM On Linux Mint 17 appeared first on Unixmen.

Install Oracle VirtualBox And Manage It Using phpVirtualBox On Ubuntu 15.10 Headless Server

$
0
0


It is easy to install Oracle VirtualBox on any GUI Linux desktops, isn’t it? But, what about in a Linux Server that has no GUI? No worries! It is not that difficult either.

This step by step tutorial will teach you how to install Oracle VirtualBox on Ubuntu 15.10 headless server. The same procedure should work on Ubuntu 15.04 server and other older versions.

Here is my test box details:

  • Operating System: Ubuntu 15.10 64 bit Server (No GUI)
  • IP Address: 192.168.1.103/24

Preparing Ubuntu 15.10 Server

Before installing VirtualBox, we have to do a couple of tasks.

First of all, update your server with command:

sudo apt-get update && sudo apt-get upgrade -y

Now, install the following prerequisites which will need by oracle VirtualBox.

sudo apt-get install build-essential dkms unzip -y

Reboot your server once to take effect all the changes.

Install Oracle VirtualBox on Ubuntu 15.10 server

Edit /etc/apt/sources.list file:

sudo nano /etc/apt/sources.list

Add the latest oracle virtualbox repository to your Ubuntu server. You can download the oracle virtualbox latest repository from here.

I am running Ubuntu 15.10, so I added the following line.

[...]
deb http://download.virtualbox.org/virtualbox/debian wily contrib

Add the virtualbox public key:

wget -q http://download.virtualbox.org/virtualbox/debian/oracle_vbox.asc -O- | sudo apt-key add -

Now, update the repository and install latest oracle virtualbox version.

sudo apt-get update
sudo apt-get install virtualbox-5.0

After installing virtualbox, add the system user, for example sk, to the vboxusers group. sk is the system normal user that I have created already. You can create and use a separate new user of your choice. If you use different user, log out and log in back to that user and do the rest of the steps.

sudo usermod -aG vboxusers sk

Now, run the following command to check if virtualbox kernel modules are loaded or not.

sudo systemctl status vboxdrv

Or

sudo /etc/init.d/vboxdrv status

Sample output:

● vboxdrv.service - VirtualBox Linux kernel module
 Loaded: loaded (/usr/lib/virtualbox/vboxdrv.sh; enabled; vendor preset: enabled)
 Active: active (exited) since Thu 2015-11-26 16:38:30 IST; 42s ago

Nov 26 16:38:29 server systemd[1]: Starting VirtualBox Linux kernel module...
Nov 26 16:38:30 server systemd[1]: Started VirtualBox Linux kernel module.
Nov 26 16:38:30 server vboxdrv.sh[15008]: Starting VirtualBox kernel modules....
Hint: Some lines were ellipsized, use -l to show in full.

If it, not loaded, run the following command to load them:

sudo /etc/init.d/vboxdrv setup

Install Oracle VirtualBox Extension pack

Starting with VirtualBox 4.0, we should install Extension pack to manage and connect our remote guest consoles via web interface. This Extension pack provides the following functionalities to the VirtualBox guests.

  • The virtual USB 2.0 (EHCI) device
  • VirtualBox Remote Desktop Protocol (VRDP) support
  • Host webcam passthrough
  • Intel PXE boot ROM
  • Experimental support for PCI passthrough on Linux hosts

VirtualBox extension pack should be same version as VirtualBox base package. Download Extension pack for VirtualBox 5 from here.

wget http://download.virtualbox.org/virtualbox/5.0.10/Oracle_VM_VirtualBox_Extension_Pack-5.0.10-104061.vbox-extpack

Then, Install Extension pack as shown below.

sudo VBoxManage extpack install Oracle_VM_VirtualBox_Extension_Pack-5.0.10-104061.vbox-extpack

Sample output:

0%...10%...20%...30%...40%...50%...60%...70%...80%...90%...100%
Successfully installed "Oracle VM VirtualBox Extension Pack".

That’s it. Oracle VirtualBox and Extension pack have been installed successfully on our Ubuntu 15.04 server. Start using Oracle VirtualBox!

Create and manage VMs from command line

First, let us create a Ubuntu 14.04 server VM with 512MB RAM and 8GB virtual hdd.

To do that, run:

VBoxManage createvm --name "Ubuntu 14.04" --register

Sample output:

Virtual machine 'Ubuntu 14.04' is created and registered.
UUID: c5f89cfd-b0ee-40da-93b8-d4d3a5324bea
Settings file: '/home/sk/VirtualBox VMs/Ubuntu 14.04/Ubuntu 14.04.vbox'

Next, assign the RAM size and network card mode(Bridge or NAT).

VBoxManage modifyvm "Ubuntu 14.04" --memory 512 --acpi on --boot1 dvd --nic1 bridged --bridgeadapter1 eth0

Assign virtual hard drive size.

VBoxManage createhd --filename Ubuntu_14_04.vdi --size 8000

Sample Output:

0%...10%...20%...30%...40%...50%...60%...70%...80%...90%...100%
Disk image created. UUID: 8d48aef4-eb92-4181-aed1-63ccbae0f2b1

Add Storage controller:

VBoxManage storagectl "Ubuntu 14.04" --name "IDE Controller" --add ide

Attach the Virtual hard drive file(vdi) to the storage controller using command:

VBoxManage storageattach "Ubuntu 14.04" --storagectl "IDE Controller" --port 0 --device 0 --type hdd --medium /home/sk/Ubuntu_14_04.vdi

Now, Assign the Ubuntu ISO media using command:

VBoxManage storageattach "Ubuntu 14.04 Server" --storagectl "IDE Controller" --port 1 --device 0 --type dvddrive --medium /home/sk/ubuntu-14.04-server-i386.iso

That’s it. The new VM has been created.

To know about VBoxManage command, run:

VBoxManage --help

Or, refer the Official guide.

Now, start the VM using command:

VBoxHeadless --startvm "Ubuntu 14.04"

To stop a running VM, enter the following command:

VBoxManage controlvm "Ubuntu 14.04" poweroff

Similarly we can pause a VM, using command:

VBoxManage controlvm "Ubuntu 14.04" pause

To reset a VM, enter:

VBoxManage controlvm "Ubuntu 14.04" reset

To learn more about VBoxHeadless options, run:

VBoxHeadless --help

Sample output:

Oracle VM VirtualBox Headless Interface 4.3.28
(C) 2008-2015 Oracle Corporation
All rights reserved.

Usage:
   -s, -startvm, --startvm <name|uuid>   Start given VM (required argument)
   -v, -vrde, --vrde on|off|config       Enable (default) or disable the VRDE
                                         server or don't change the setting
   -e, -vrdeproperty, --vrdeproperty <name=[value]> Set a VRDE property:
                                         "TCP/Ports" - comma-separated list of ports
                                         the VRDE server can bind to. Use a dash between
                                         two port numbers to specify a range
                                         "TCP/Address" - interface IP the VRDE server
                                         will bind to
   --settingspw <pw>                     Specify the settings password
   --settingspwfile <file>               Specify a file containing the settings password
   -c, -capture, --capture               Record the VM screen output to a file
   -w, --width                           Frame width when recording
   -h, --height                          Frame height when recording
   -r, --bitrate                         Recording bit rate when recording
   -f, --filename                        File name when recording. The codec used
                                         will be chosen based on the file extension

For more details, refer the official manual.

Creating and managing VMs from the command line mode might be bit difficult and time consuming method for some lazy administrators. If you are one of them, there is another way to create and manage VMs in the headless from a Remote system web browser using a tool called “phpvirtualbox”.

What is phpVirtualBox?

phpVirtualBox is an open source, web-based client written using PHP. It can be used to manage and administer Oracle VirtualBox headless instances.

Install phpVirtualBox

Before installing phpVirtualBox, we have to install Apache web server and PHP.

sudo apt-get install apache2 php5 php5-mysql libapache2-mod-php5 php-soap

Restart the web server to take effect the changes.

sudo systemctl restart apache2

Or

sudo /etc/init.d/apache2 restart

Now, Download the latest version from the phpVirtualBox official site.

wget http://sourceforge.net/projects/phpvirtualbox/files/phpvirtualbox-5.0-3.zip

Extract the zip file using the following command:

unzip phpvirtualbox-5.0-3.zip

Move the extracted folder to your apache root folder.

sudo mv phpvirtualbox-5.0-3 /var/www/html/phpvirtualbox

Give full rights to the phpvirtualbox folder.

sudo chmod 777 /var/www/html/phpvirtualbox

Restart all services to take effect the changes.

sudo systemctl restart vboxweb-service
sudo systemctl restart vboxdrv
sudo systemctl restart apache2

Configure phpVirtualBox

Edit phpVirtualBox config.php file:

sudo cp /var/www/html/phpvirtualbox/config.php-example /var/www/html/phpvirtualbox/config.php
sudo nano /var/www/html/phpvirtualbox/config.php

Change the username/password for system user that runs VirtualBox. In our case, the username/password is sk/ubuntu.

[...]
var $username = 'sk';
var $password = 'ubuntu';
[...]

Save and close the file.

Create a file called /etc/default/virtualbox:

sudo nano /etc/default/virtualbox

Append the following line:

VBOXWEB_USER=sk

Now, start vboxweb-service, and make it to start automatically on every reboot.

sudo systemctl status vboxweb-service

Or

sudo /etc/init.d/vboxweb-service start

Sample output:

Starting VirtualBox web service ...done.

Access phpVirtualBox Web console

Now, go to any client systems that has installed with GUI desktop environements, and try to access the URL http://ip-address-of-virtualbox-headless-server/phpvirtualbox from the web browser.

Now, try again the same URL mentioned above. The following screen should appear. Enter the username/password.

The default username/password is admin/admin.

phpVirtualBox – VirtualBox Web Console – Google Chrome_001

Here it is how my phpVirtualBox dashboard looks like.

phpVirtualBox – VirtualBox Web Console – Google Chrome_002

From here, you can create, modify, delete, and manage virtual machines as the way you do in the normal VirtualBox GUI application.

Creating sample Virtual Machine

Let us create a sample virtual machine to install Ubuntu 14.04 Server.

Click on the New button on the top left corner and enter the Virtual machine name.

phpVirtualBox – VirtualBox Web Console – Google Chrome_002

Enter the VM name and select version etc.

phpVirtualBox – VirtualBox Web Console – Google Chrome_003

Set the Memory size for the virtual machine.

phpVirtualBox – VirtualBox Web Console – Google Chrome_004

You can either create a new hard drive file or select one from the list or from another location using the folder icon. The recommended size of the hard drive is 8 GB.

Here, I am going to create a new hard drive. So, Select “Create a virtual hard drive now” option.

phpVirtualBox – VirtualBox Web Console – Google Chrome_005

Please choose the type of file that you would like to use for the new virtual hard drive. If you do not need to use it with other virtualization software you can leave this setting unchanged.

phpVirtualBox – VirtualBox Web Console – Google Chrome_006

Choose whether the new virtual hard drive file should grow as it is used (dynamically allocated) or it should be created at its maximum size (fixed size).

phpVirtualBox – VirtualBox Web Console – Google Chrome_007

Enter the size of the virtual hdd.

phpVirtualBox – VirtualBox Web Console – Google Chrome_008

That’s it. The virtual machine has been created. Start installing the OS, and use the virtual machine.

phpVirtualBox – VirtualBox Web Console – Google Chrome_009

phpVirtualBox tool will definitely help the system administrators who are working on headless remote Ubuntu server. Using phpVirtualBox, you can easily run virtual machines as many as your hardware supports from your headless Ubuntu server. Unfortunately, phpVirtualBox only allows you to create 32bit guests at present. if you want to deploy, 64bit guests, follow the command line way. It was not difficult either.

Reference Links:

The post Install Oracle VirtualBox And Manage It Using phpVirtualBox On Ubuntu 15.10 Headless Server appeared first on Unixmen.

Install OpenLDAP In Ubuntu 15.10 And Debian 8

$
0
0


About OpenLDAP

OpenLDAP is a free open source Light Weight Directory Access protocol developed by the OpenLDAP project. It is a platform independent protocol, so that it runs on all Linux/Unix like systems, Windows, AIX, Solaris and Android.

OpenLDAP includes:

  • slapd – stand-alone LDAP daemon (server)
  • libraries implementing the LDAP protocol, and utilities, tools, and sample clients.

In this tutorial, let us see how to install OpenLDAP and how to configure it in Ubuntu / Debian server. I tested this tutorial in Ubuntu 15.10, however this steps should work on Debian 7/8 and previous versions of Ubuntu, including Ubuntu 15.04/14.10/14.04 etc.

Here is my testing system’s details:

  • Operating System : Ubuntu 15.10 64 bit server
  • Hostname : server.unixmen.local
  • IP Address : 192.168.1.103/24

First let us see how to install openLDAP.

1. Install OpenLDAP in Ubuntu 15.10 / Debian 8

Enter the following command in Terminal to install openldap.

Switch to root user:

sudo su

Or

su

Run the following command to install OpenLDAP.

apt-get install slapd ldap-utils

During the installation, you’ll be asked to set password for the LDAP admin account. Enter your admin password here.

root@server: -home-sk_001

Re-enter the password.

root@server: -home-sk_002

OpenLDAP is installed now. Let’s go to the configuration task.

2. Configure OpenLDAP

Edit “/etc/ldap/ldap.conf” file,

vi /etc/ldap/ldap.conf

Find, uncomment and replace ‘BASE’ and ‘ URI’ values with your domain name and IP Address as shown below.

#
# LDAP Defaults
#
# See ldap.conf(5) for details
# This file should be world readable but not world writable.
BASE    dc=unixmen,dc=local
URI     ldap://server.unixmen.local ldap://server.unixmen.local:666
#SIZELIMIT      12
#TIMELIMIT      15
#DEREF          never
# TLS certificates (needed for GnuTLS)
TLS_CACERT      /etc/ssl/certs/ca-certificates.crt

Save and close the file.

Next, we should reconfigure the slapd with the updated values.

dpkg-reconfigure slapd

The following screen should appear. Select “No” and press Enter.

root@server: -home-sk_003

Enter the DNS domain name.

root@server: -home-sk_004

Enter the Organization name (i.e your company name).

root@server: -home-sk_005

Enter the LDAP admin password which you created in the earlier step.

root@server: -home-sk_006

Re-enter the password.

root@server: -home-sk_007

Select the backend database. I go with defaults.

root@server: -home-sk_003

Select whether you want to delete the database automatically or keep it when slapd is removed. Here I want to keep my old database, so I clicked No.

root@server: -home-sk_009

Select Yes to move old database.

root@server: -home-sk_010

Select No and Press Enter.

root@server: -home-sk_011

That’s it. We have successfully configured OpenLDAP. Let us go ahead and check whether it’s working or not.

Test LDAP Server

Run the following command to test OpenLDAP:

ldapsearch -x

Sample output:

# extended LDIF
#
# LDAPv3
# base <dc=unixmen,dc=local> (default) with scope subtree
# filter: (objectclass=*)
# requesting: ALL
#

# unixmen.local
dn: dc=unixmen,dc=local
objectClass: top
objectClass: dcObject
objectClass: organization
o: unixmen
dc: unixmen

# admin, unixmen.local
dn: cn=admin,dc=unixmen,dc=local
objectClass: simpleSecurityObject
objectClass: organizationalRole
cn: admin
description: LDAP administrator

# search result
search: 2
result: 0 Success

# numResponses: 3
# numEntries: 2

If you see the ‘Success’ message in your output, then Congratulations! LDAP Server is working!!

LDAP Server Administration

Administration of LDAP server from command line mode is bit difficult. We can’t memorize all LDAP commands. So, we will use an easier GUI administration tool called “phpldapadmin” to manage, configure, and administer LDAP server.

Install phpLDAPadmin

phpLDAPadmin is a web-based LDAP administration tool for managing your LDAP server. Using phpLDAPadmin, you can browse your LDAP tree, view LDAP schema, perform searches, create, delete, copy and edit LDAP entries. You can even copy entries between servers.

Enter the following command to install phpLDAPAdmin:

apt-get install phpldapadmin

Create a symbolic link for phpldapadmin directory.

ln -s /usr/share/phpldapadmin/ /var/www/html/phpldapadmin

On Ubuntu 14.10 and lower versions, run:

ln -s /usr/share/phpldapadmin/ /var/www/phpldapadmin

Edit “/etc/phpldapadmin/config.php” file,

vi /etc/phpldapadmin/config.php

Set the correct timezone. To do that, find and uncomment the following line and set your Timezone.

[...]
$config->custom->appearance['timezone'] = 'Asia/Kolkata';
[....]

Scroll down further and Replace the domain names with your own values.

To do that, Find “Define LDAP Servers” section in the config file and edit the following lines as shown below.

[...]
// Set your LDAP server name //
$servers->setValue('server','name','Unixmen LDAP Server');
[...]
// Set your LDAP server IP address // 
$servers->setValue('server','host','192.168.1.103');
[...]
// Set Server domain name //
$servers->setValue('server','base',array('dc=unixmen,dc=local'));
[...]
// Set Server domain name again//
$servers->setValue('login','bind_id','cn=admin,dc=unixmen,dc=local');
[...]

Restart the apache service.

systemctl restart apache2

On Ubuntu 14.10 and older versions, run:

service apache2 restart

Make sure that you have opened apache server port “80” and LDAP default port “389” in your firewall/router configuration.

ufw allow 80

Sample output:

Rules updated
Rules updated (v6)
ufw allow 389

Sample output:

Rules updated
Rules updated (v6)

The above steps are not necessary for Debian systems.

Test phpLDAPadmin

Open your web browser and navigate to: “http://IP-Address/phpldapadmin”.

The following screen should appear.

phpLDAPadmin (1.2.2) – – Google Chrome_004

Click “login” on the left pane. Enter the LDAP admin password that you have created during OpenLDAP installation, and click “Authenticate”.

phpLDAPadmin (1.2.2) – – Google Chrome_005

Now the main console screen of phpldapadmin will open.

You can see the LDAP domain “unixmen.local” and other details on the left.

phpLDAPadmin (1.2.2) – – Google Chrome_006

From here, you can add additional objects, such as Organizational Unit, Users and groups etc.

Creating Objects

1. Create Organizational Unit(OU):

Lets create some sample objects from the phpldapadmin console. First, we will create an OU.

Click on the “+” sign near the line “dc=unixmen” and click “Create new entry here” link.

Selection_007

Scroll down and Select “Generic-Organizational Unit”.

Selection_008

Enter the name of the Organizational unit (Ex.sales) and Click “Create Object”.

Selection_009

Finally, click “Commit”.

Selection_010

Now, you will see the newly created OU in main LDAP section on the left pane.

Selection_011

2. Create Group:

Click on the sales OU on the left pane and click on “Create a child entry” link.

phpLDAPadmin (1.2.2) – – Google Chrome_012

In the next window, Select “Generic: Posix Group”.

Selection_013

Enter the name of the group and click Create Object button. For example, here i enter the group name as “sales-group”.

Selection_014

Click Commit to save changes.

Selection_015

Now you can see that the newly created group called “sales-group” under the sales OU.

Selection_016

3. Create User:

Now, let us create a new user under sales-group.

Click on the sales-group on the left. Select Create a child entry link button.

phpLDAPadmin (1.2.2) – – Google Chrome_017

In the next window, Select “Generic: User Account”.

Selection_018

Enter the user details such as common name, GID number, last name, Login shell, user password and user id etc., as shown in the below screen shot and click Create object. For example. here I am going to create a user called “kumar”.

phpldapadmin_cmd

And then Click “Commit” to save the changes.

Selection_019

Now the newly created user “kumar” will be found under “sales-group” object.

Selection_020

Also, you can verify the newly created objects are really existing with command:

ldapsearch -x

Sample output:

# extended LDIF
#
# LDAPv3
# base <dc=unixmen,dc=local> (default) with scope subtree
# filter: (objectclass=*)
# requesting: ALL
#

# unixmen.local
dn: dc=unixmen,dc=local
objectClass: top
objectClass: dcObject
objectClass: organization
o: unixmen
dc: unixmen

# admin, unixmen.local
dn: cn=admin,dc=unixmen,dc=local
objectClass: simpleSecurityObject
objectClass: organizationalRole
cn: admin
description: LDAP administrator

# sales, unixmen.local
dn: ou=sales,dc=unixmen,dc=local
objectClass: organizationalUnit
objectClass: top
ou: sales

# sales-group, sales, unixmen.local
dn: cn=sales-group,ou=sales,dc=unixmen,dc=local
gidNumber: 500
cn: sales-group
objectClass: posixGroup
objectClass: top

# kumar, sales-group, sales, unixmen.local
dn: cn=kumar,cn=sales-group,ou=sales,dc=unixmen,dc=local
cn:: IGt1bWFy
gidNumber: 500
homeDirectory: /home/users/kumar
sn: kumar
loginShell: /bin/sh
objectClass: inetOrgPerson
objectClass: posixAccount
objectClass: top
uidNumber: 1000
uid: kumar

# search result
search: 2
result: 0 Success

# numResponses: 6
# numEntries: 5

As you see in the above output, the new objects, namely ‘sales’, ‘sales-group’, and ‘kumar’ have been successfully created under the main LDAP domain. Similarly, you can create as many as objects you wanted.

Installing and configuring OpenLDAP in Debian and Ubuntu and derivatives is really easy and straight forward. Even a novice users can easily setup a working LDAP server within an hour.

Now OpenLDAP Server is ready to use.

I have successfully installed and configured LDAP server, what now? Please refer our next article How To Configure Linux Clients To Authenticate Using OpenLDAP.

Good luck! Happy Week end!!

The post Install OpenLDAP In Ubuntu 15.10 And Debian 8 appeared first on Unixmen.


How To Install Nagios Core 4.1.1 In Ubuntu 15.10

$
0
0


About Nagios

Nagios is an enterprise class, open source software that can be used for network and infrastructure monitoring. Using Nagios, we can monitor servers, switches, applications and services etc. It alerts the System Administrator when something goes wrong and also alerts back when the issues have been rectified.

Features

Using Nagios, you can:

  • Monitor your entire IT infrastructure.
  • Identify problems before they occur.
  • Know immediately when problems arise.
  • Share availability data with stakeholders.
  • Detect security breaches.
  • Plan and budget for IT upgrades.
  • Reduce downtime and business losses.

Scenario

For the purpose of this tutorial, I will be using the following two systems.

Nagios server:

  • Operating system : Ubuntu 15.10 Server
  • IP Address : 192.168.1.103/24

Nagios client:

  • Operating System : Ubuntu 14.04 Server
  • IP Address : 192.168.1.104/24
  • Hostname : server.unixmen.local

Prerequisites

Make sure your server have installed with fully working LAMP stack. If not, follow the below link to install LAMP server.

Then install the following prerequisites:

sudo apt-get install build-essential libgd2-xpm-dev apache2-utils unzip

Create Nagios User And Group

Create a new nagios user account:

sudo useradd -m nagios
sudo passwd nagios

Create a new nagcmd group for allowing external commands to be submitted through the web interface. Add both the nagios user and the apache user to the group.

sudo groupadd nagcmd
sudo usermod -a -G nagcmd nagios
sudo usermod -a -G nagcmd www-data

Download Nagios And Plugins

Go to the nagios download page, and get the latest version. As of writing this, the latest version was 4.1.1.

wget https://assets.nagios.com/downloads/nagioscore/releases/nagios-4.1.1.tar.gz

And, download nagios plugins too. Nagios plugins allow you to monitor hosts, devices, services, protocols, and applications with Nagios

wget http://www.nagios-plugins.org/download/nagios-plugins-2.1.1.tar.gz

Install Nagios And Plugins

Install nagios:

Go to the folder where you’ve downloaded nagios, and extract it using command:

tar xzf nagios-4.1.1.tar.gz

Change to the nagios directory:

cd nagios-4.1.1/

Run the following commands one by one from the Terminal to compile and install nagios.

sudo ./configure --with-command-group=nagcmd
sudo make all
sudo make install
sudo make install-init
sudo make install-config
sudo make install-commandmode
Install Nagios Web interface:

Enter the following commands to compile and install nagios web interface.

sudo make install-webconf

You may get the following error:

/usr/bin/install -c -m 644 sample-config/httpd.conf /etc/httpd/conf.d/nagios.conf
 /usr/bin/install: cannot create regular file ‘/etc/httpd/conf.d/nagios.conf’: No such file or directory
 Makefile:296: recipe for target 'install-webconf' failed
 make: *** [install-webconf] Error 1

The above error message describes that nagios is trying to create the nagios.conf file inside the /etc/httpd.conf/directory. But, in Ubuntu systems the nagios.conf file should be placed in /etc/apache2/sites-enabled/directory.

So, run the following command instead of using sudo make install-webconf.

sudo /usr/bin/install -c -m 644 sample-config/httpd.conf /etc/apache2/sites-enabled/nagios.conf

Check if nagios.conf is placed in /etc/apache2/sites-enabled directory.

sudo ls -l /etc/apache2/sites-enabled/

Sample output:

total 4
lrwxrwxrwx 1 root root 35 Nov 28 16:49 000-default.conf -> ../sites-available/000-default.conf
-rw-r--r-- 1 root root 1679 Nov 28 17:02 nagios.conf

Create a nagiosadmin account for logging into the Nagios web interface. Remember the password you assign to this account. You’ll need it while logging in to nagios web interface..

sudo htpasswd -c /usr/local/nagios/etc/htpasswd.users nagiosadmin

Restart Apache to make the new settings take effect.

In Ubuntu 15.10/15.04:

sudo systemctl restart apache2

In Ubuntu 14.10 and previous versions:

sudo service apache2 restart
Install Nagios plugins:

Go to the directory where you downloaded the nagios plugins, and extract it.

tar xzf nagios-plugins-2.1.1.tar.gz

Change to the nagios plugins directory:

cd nagios-plugins-2.1.1/

Run the following commands one by one to compile and install it.

sudo ./configure --with-nagios-user=nagios --with-nagios-group=nagios
sudo make
sudo make install

Wait, We are not finished yet.

Configure Nagios

Nagios sample configuration files will be found in the /usr/local/nagios/etc directory. These sample files should work fine for getting started with Nagios. However, if you want, you’ll need to put your actual email ID to receive alerts.

To do that, Edit the /usr/local/nagios/etc/objects/contacts.cfg config file with your favorite editor and change the email address associated with the nagiosadmin contact definition to the address you’d like to use for receiving alerts.

sudo nano /usr/local/nagios/etc/objects/contacts.cfg

Find the following line and enter the email id:

[...]
define contact{
        contact_name                    nagiosadmin             ; Short name of user
        use                             generic-contact         ; Inherit default values from generic-contact template (defined above)
        alias                           Nagios Admin            ; Full name of user

        email                           sk@unixmen.com  ; <<***** CHANGE THIS TO YOUR EMAIL ADDRESS ******
        }
[...]

Save and close the file.

Then, Edit file /etc/apache2/sites-enabled/nagios.conf,

sudo nano /etc/apache2/sites-enabled/nagios.conf

And edit the following lines if you want to access nagios administrative console from a particular IP series.

Here, I want to allow nagios administrative access from 192.168.1.0/24 series only. So, I edited this file as shown below.

[...]
## Comment the following lines ##
#   Order allow,deny
#   Allow from all

## Uncomment and Change lines as shown below ##
Order deny,allow
Deny from all
Allow from 127.0.0.1 192.168.1.0/24
[...]

Enable Apache’s rewrite and cgi modules:

sudo a2enmod rewrite
sudo a2enmod cgi

Restart apache service.

sudo systemctl restart apache2

Or,

sudo service apache2 restart

Check nagios,conf file for any syntax errors:

sudo /usr/local/nagios/bin/nagios -v /usr/local/nagios/etc/nagios.cfg

If there are no errors, start nagios service and make it to start automatically on every boot.

sudo service nagios start
sudo ln -s /etc/init.d/nagios /etc/rcS.d/S99nagios

Note: In Ubuntu 15.10/15.04, you will see the following error message while starting nagios service.

Failed to start nagios.service: Unit nagios.service failed to load: No such file or directory.

Or

[....] Starting nagios (via systemctl): nagios.serviceFailed to start nagios.service: Unit nagios.service failed to load: No such file or directory.
 failed!

To fix this error, copy /etc/init.d/skeleton to /etc/init.d/nagios using the following command:

sudo cp /etc/init.d/skeleton /etc/init.d/nagios

Edit file /etc/init.d/nagios:

sudo nano /etc/init.d/nagios

Add the following lines:

DESC="Nagios"
NAME=nagios
DAEMON=/usr/local/nagios/bin/$NAME
DAEMON_ARGS="-d /usr/local/nagios/etc/nagios.cfg"
PIDFILE=/usr/local/nagios/var/$NAME.lock

Save and close the file.

Finally you need to change the permissions of the file

sudo chmod +x /etc/init.d/nagios

Now, you can start nagios service using command:

sudo /etc/init.d/nagios start

Access Nagios Web Interface

Open up your web browser and navigate to http://nagios-server-ip/nagios and enter the username as nagiosadmin and its password which we created in the earlier steps.

192.168.1.103-nagios – Google Chrome_001

Here it is how Nagios administrative console looks like:

Nagios Core – Google Chrome_002

Click on the “Hosts” section in the left pane of the console. You will see there the no of hosts being monitored by Nagios server. We haven’t added any hosts yet. So it simply monitors the localhost itself only.

Nagios Core – Google Chrome_003

Click on the localhost to display more details:

Nagios Core – Google Chrome_004

That’s it. We have successfully installed and configure Nagios core in our Ubuntu 15.04 server.

Add Monitoring targets to Nagios server

Now, let us add some clients to monitor by Nagios server.

To do that we have to install nrpe and nagios-plugins in our monitoring targets.

On CentOS/RHEL/Scientifc Linux clients:

Add EPEL repository in your CentOS/RHEL/Scientific Linux 6.x or 7 clients to install nrpe package.

To install EPEL on CentOS 7, run the following command:

yum install epel-release

On CentOS 6.x systems, refer the following link.

Install “nrpe” and “nagios-plugins” packages in client systems:

yum install nrpe nagios-plugins-all openssl
On Debian/Ubuntu clients:
sudo apt-get update
sudo apt-get install nagios-nrpe-server nagios-plugins

Configure Monitoring targets

Edit /etc/nagios/nrpe.cfg file,

sudo nano /etc/nagios/nrpe.cfg

Add your Nagios server ip address:

[...]
## Find the following line and add the Nagios server IP ##
allowed_hosts=127.0.0.1 192.168.1.103
[...]

Start nrpe service on CentOS clients:

CentOS 7:

systemctl start nrpe
chkconfig nrpe on

CentOS 6.x:

service nrpe start
chkconfig nrpe on

For Debian/Ubuntu Clients, start nrpe service as shown below:

sudo /etc/init.d/nagios-nrpe-server restart

Now, go back to your Nagios server, and add the clients ( in the configuration file.

To do that, Edit “/usr/local/nagios/etc/nagios.cfg” file,

sudo nano /usr/local/nagios/etc/nagios.cfg

and uncomment the following lines.

## Find and uncomment the following line ##
cfg_dir=/usr/local/nagios/etc/servers

Create a directory called “servers” under “/usr/local/nagios/etc/”.

sudo mkdir /usr/local/nagios/etc/servers

Create config file to the monitoring target (client):

sudo nano /usr/local/nagios/etc/servers/clients.cfg

Add the following lines:

define host{

use                             linux-server

host_name                       server.unixmen.local

alias                           server

address                         192.168.1.104

max_check_attempts              5

check_period                    24x7

notification_interval           30

notification_period             24x7

}

Here, 192.168.1.104 is my nagios client IP address and server.unixmen.local is the client system’s hostname.

Finally, restart nagios service.

sudo /etc/init.d/nagios restart

Or

sudo service nagios restart

Wait for few seconds, and refresh nagios admin console in the browser and navigate to “Hosts” section in the left pane. Now, You will see the newly added client will be visible there. Click on the host to see if there is anything wrong or any alerts it has.

Nagios Core – Google Chrome_005

Click on the monitoring target (client system) to view the detailed output:

Nagios Core – Google Chrome_006

Similarly, you can define more clients by creating a separate config files “/usr/local/nagios/etc/servers”directory for each client.

Define services

We have just defined the monitoring host. Now, let us add some services of the monitoring host. For example, to monitor thessh service, add the following lines shown in bold in the“/usr/local/nagios/etc/servers/clients.cfg” file.

sudo nano /usr/local/nagios/etc/servers/clients.cfg

Add the following lines shown in bold:

define host{

use                             linux-server

host_name                       server.unixmen.local

alias                           server

address                         192.168.1.104

max_check_attempts              5

check_period                    24x7

notification_interval           30

notification_period             24x7

}

define service {
        use                             generic-service
        host_name                       server.unixmen.local
        service_description             SSH
        check_command                   check_ssh
        notifications_enabled           0
        }

Save and close the file. Restart Nagios.

sudo /etc/init.d/nagios restart

Or,

sudo service nagios restart

Wait for few seconds (90 seconds by default), and check for the added services (i.e ssh) in the nagios web interface. Navigate to Services section on the left side bar, you’ll see the ssh service there.

Nagios Core – Google Chrome_007

To know more about object definitions such as Host definitions, service definitions, contact definitions, please visit here. This page will explain you the description and format of all object definitions.

Additional Tip:

If you’re trying to use check_http with the -S flag (for https), this guide misses a big step.

Make sure you install openssl and libssl-dev first. And yes, even if your Nagios server is checking a remote client, you need openssl and libssl-dev locally.

The when you get to configuring the Nagios plugins, add –with-openssl so you end up with:

./configure --with-nagios-user=nagios --with-nagios-group=nagios --with-openssl

That’s it. Cheers!

Further reading:

Check out the following official documents for how to monitoring other things.

Reference links:

The post How To Install Nagios Core 4.1.1 In Ubuntu 15.10 appeared first on Unixmen.
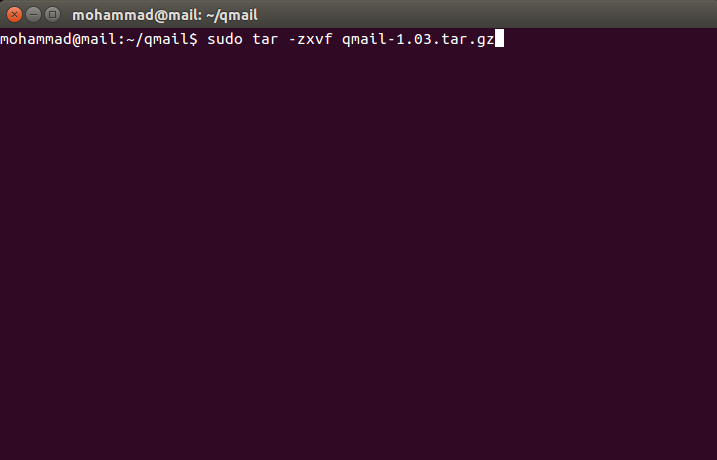
How To Install Linux Kernel 4.3.0

$
0
0


The Linux Kernel development team has announced the latest stable Kernel version 4.3.0 on November 1, 2015. Linux Torvolds wrote in the release notes:

So it *felt* like the last week of the rc series was busy, to the
point where I got a bit worried about the release. But doing the
actual numbers shows that that really was just my subjective feeling,
probably due to the kernel summit and travel back home from Korea. It
wasn't actually a particularly busy week, it's just that the pull
requests were more noticeable in the last couple of days.

We had a network update and a late fix for a x86 vm86 mode bug
introduced by the vm86 cleanups, but other than that it's just a
collection of various small oneliners all over. Ok, the vm86 mode
thing was a one-liner too, it was just slightly more nerve-wracking
because it looked scarier than it was before people (Andy) figured out
what was going on.

The changes from rc7 are dominated by the network stuff, but as you
can tell from the appended shortlog it's not anything particularly
scary.

So on the whole, this remains a rather calm release cycle until the
very end. And with the release of 4.3, obviously the merge window for
4.4 is open, and let's keep our fingers crossed that that will be an
equally calm release. Especially since apparently Greg has decided
ahead of time (as an experiment brought on by discussion at the kernel
summit) that 4.4 will be another LTS release.

Install Linux Kernel 4.3.0

In this tutorial, we will see how to compile and install Linux Kernel 4.3.0 latest stable version in Ubuntu and CentOS.

First, we will see how to install Kernel 4.3.0 in Ubuntu 15.10 server.

1. Install Linux Kernel 4.3.0 in Ubuntu

The following steps are tested in Ubuntu 15.10 server edition. However, the same steps might work on Debian, and other Ubuntu derivatives such as Linux Mint, Elementary OS etc.

Run the following command to find the current Linux kernel version installed on your system:

uname -r

Sample output:

4.2.0-16-generic

As you see in the above input, the currently installed version is 4.2.0. Let us upgrade it to 4.3.0.

To do that, first download the Kernel 4.3.0 stable version from the official website using the following command.

On 64bit Ubuntu systems:

wget http://kernel.ubuntu.com/~kernel-ppa/mainline/v4.3-wily/linux-headers-4.3.0-040300-generic_4.3.0-040300.201511020949_amd64.deb
wget http://kernel.ubuntu.com/~kernel-ppa/mainline/v4.3-wily/linux-headers-4.3.0-040300_4.3.0-040300.201511020949_all.deb
wget http://kernel.ubuntu.com/~kernel-ppa/mainline/v4.3-wily/linux-image-4.3.0-040300-generic_4.3.0-040300.201511020949_amd64.deb

On 32bit Ubuntu systems:

wget http://kernel.ubuntu.com/~kernel-ppa/mainline/v4.3-wily/linux-headers-4.3.0-040300_4.3.0-040300.201511020949_all.deb
wget http://kernel.ubuntu.com/~kernel-ppa/mainline/v4.3-wily/linux-headers-4.3.0-040300-generic_4.3.0-040300.201511020949_i386.deb
wget http://kernel.ubuntu.com/~kernel-ppa/mainline/v4.3-wily/linux-image-4.3.0-040300-generic_4.3.0-040300.201511020949_i386.deb

After downloading the necessary Kernel packages depending upon your Ubuntu system’s architecture, run the following commands to install Kernel 4.3.0:

sudo dpkg -i *.deb

If the above command doesn’t work, run the following commands instead.

sudo apt-get install gdebi
sudo gdebi linux-headers-4.3*.deb linux-image-4.3*.deb

Update the Grub boot loader using command:

sudo update-grub

Sample output:

Generating grub configuration file ...
Found linux image: /boot/vmlinuz-4.3.0-040300-generic
Found initrd image: /boot/initrd.img-4.3.0-040300-generic
Found linux image: /boot/vmlinuz-4.2.0-16-generic
Found initrd image: /boot/initrd.img-4.2.0-16-generic
Found memtest86+ image: /boot/memtest86+.elf
Found memtest86+ image: /boot/memtest86+.bin

If you’re using BURG boot loader, then run:

sudo update-burg

That’s it. Reboot your system to log in to your new Kernel.

After successful log in, run the following command to check if the new Kernel has been updated.

uname -r

Sample output:

4.3.0-040300-generic

Or, use -a flag to view the complete details:

uname -a

Sample output:

Linux server 4.3.0-040300-generic #201511020949 SMP Mon Nov 2 14:50:44 UTC 2015 x86_64 x86_64 x86_64 GNU/Linux

In case, you have some issues or end up with an unresponsive system after installing new Kernel, just reboot your system and login with your old Kernel.

Select ‘Advanced options for Ubuntu’ from the Boot menu to log in to your old Kernel.

Ubuntu 14.04 64bit Server [Running] – Oracle VM VirtualBox_017

Select the previous working kernel version, which is 4.2.0 in our case.

Ubuntu 15.10 server [Running] – Oracle VM VirtualBox_001

Then, run the following command to remove the newly installed Kernel:

sudo apt-get remove linux-header-4.3* linux-image-4.3*

Reboot your Ubuntu system to apply the changes.

2. Install Linux Kernel 4.3.0 in CentOS

Now, we will see how to install/update Linux Kernel 4.3.0 in CentOS. The steps are tested in CentOS 7, however the same steps should work on RHEL 7, Scientific Linux 7 and Fedora etc.

Kernel 4.3.0 is not included in the CentOS default repositories. In order to install the Latest stable Kernel version, we will add ELRepo. ELRepo is an RPM repository for Enterprise Linux packages. ELRepo supports Red Hat Enterprise Linux (RHEL) and its derivatives (Scientific Linux, CentOS & others).

To install ELRepo, follow the steps given below.

First of all, Import the public key:

rpm --import https://www.elrepo.org/RPM-GPG-KEY-elrepo.org

To install ELRepo for RHEL/Scientific Linux/CentOS-7:

rpm -Uvh http://www.elrepo.org/elrepo-release-7.0-2.el7.elrepo.noarch.rpm

To make use of ELRepo mirror system, please also install yum-plugin-fastestmirror too.

yum install yum-plugin-fastestmirror

On Fedora 22 or later:

dnf install yum-plugin-fastestmirror

To install ELRepo for RHEL/Scientific Linux/CentOS-6:

rpm -Uvh http://www.elrepo.org/elrepo-release-6-6.el6.elrepo.noarch.rpm

To make use of ELRepo mirror system, please also install yum-plugin-fastestmirror too.

yum install yum-plugin-fastestmirror

To install ELRepo for RHEL/Scientific Linux/CentOS-5:

rpm -Uvh http://www.elrepo.org/elrepo-release-5-5.el5.elrepo.noarch.rpm

To make use of ELRepo mirror system, please also install yum-plugin-fastestmirror too.

yum install yum-plugin-fastestmirror

After installing ELRepo, let us find out the current Kernel version using command:

uname -r

Sample output:

3.10.0-123.9.3.el7.x86_64

Now, let us install the latest stable Kernel version 4.3.0 using command:

yum --enablerepo=elrepo-kernel install kernel-ml

Note: Here, Kernel-ml refers the current mainline stable version i.e 4.3.0. the letter “ml” is the short form of mainline. The kernel-ml packages are built from the sources available from the “mainline stable” branch of The Linux Kernel Archives.

Sample output:

Type ‘Y’ to continue.

Loaded plugins: fastestmirror
elrepo-kernel | 2.9 kB 00:00:00 
elrepo-kernel/primary_db | 824 kB 00:00:04 
Loading mirror speeds from cached hostfile
 * base: centos.excellmedia.net
 * elrepo: mirrors.thzhost.com
 * elrepo-kernel: mirrors.thzhost.com
 * extras: centos.excellmedia.net
 * updates: centos.excellmedia.net
Resolving Dependencies
--> Running transaction check
---> Package kernel-ml.x86_64 0:4.3.0-1.el7.elrepo will be installed
--> Finished Dependency Resolution

Dependencies Resolved

========================================================================================================================================================================
 Package Arch Version Repository Size
========================================================================================================================================================================
Installing:
 kernel-ml x86_64 4.3.0-1.el7.elrepo elrepo-kernel 37 M

Transaction Summary
========================================================================================================================================================================
Install 1 Package

Total download size: 37 M
Installed size: 169 M
Is this ok [y/d/N]: Y

That’s it. Reboot your system after the installation is completed.

Now, you’ll see the Kernel 4.3.0 entry is added to the Boot menu. Select it and hit enter to log in with new Kernel.

CentOS 7 -1 [Running] – Oracle VM VirtualBox_002

To check the Kernel details, run:

uname -r

Sample output:

4.3.0-1.el7.elrepo.x86_64

Or,

uname -a

Sample output:

Linux server1.unixmen.local 4.3.0-1.el7.elrepo.x86_64 #1 SMP Tue Nov 3 20:15:39 EST 2015 x86_64 x86_64 x86_64 GNU/Linux

If you have any problem after updating the latest Kernel and want to remove it, then reboot your system. Select your previous working Kernel from the boot menu:

Then, run the following command to remove the newly installed Kernel:

yum remove kernel-ml -y

Reboot once to use the old Kernel.

That’s all for now. Hope this tutorial will be useful for you.

Cheers!

The post How To Install Linux Kernel 4.3.0 appeared first on Unixmen.

Viewing all 457 articles
Browse latest View live