Quantcast
Channel: Unixmen » Linux Mint
Viewing all 457 articles
Browse latest View live

How To Install PostgreSQL 9.4 And phpPgAdmin On Ubuntu 14.10

$
0
0

Introduction

PostgreSQL is a powerful, open-source object-relational database system. It runs under all major operating systems, including Linux, UNIX (AIX, BSD, HP-UX, SGI IRIX, Mac OS, Solaris, Tru64), and Windows OS.

PostgreSQL 9.4 has been released last week with major enhancements, fixes, and features. Read what is new in PostgreSQL 9.4 here.

In this handy tutorial, let us see how to install PostgreSQL 9.4 on Ubuntu 14.10 server.

Install PostgreSQL

PostgreSQL is available in the default repositories. So enter the following command from the Terminal to install it.

sudo apt-get install postgresql postgresql-contrib

If you’re looking for other versions, add the PostgreSQL repository, and install it as shown below.

On Ubuntu 14.10 systems:

Create the file /etc/apt/sources.list.d/pgdg.list;

vi /etc/apt/sources.list.d/pgdg.list

Add a line for the repository:

 deb http://apt.postgresql.org/pub/repos/apt/ utopic-pgdg main

On Ubuntu 14.04, add the following line:

deb http://apt.postgresql.org/pub/repos/apt/ trusty-pgdg main

On Ubuntu 12.04, add the following line:

deb http://apt.postgresql.org/pub/repos/apt/ precise-pgdg main

Import the repository signing key:

wget --quiet -O - https://www.postgresql.org/media/keys/ACCC4CF8.asc
sudo apt-key add -

Update the package lists:

sudo apt-get update

Then install the required version.

sudo apt-get install postgresql-9.4

Access PostgreSQL command prompt

The default database name and database user are “postgres”. Switch to postgres user to perform postgresql related operations:

sudo -u postgres psql postgres

Sample Output:

psql (9.4rc1)
Type "help" for help.

postgres=#

To exit from posgresql prompt, type \q in the psql prompt return back to the Terminal.

Set “postgres” user password

Login to postgresql prompt,

sudo -u postgres psql postgres

.. and set postgres password with following command:

postgres=# \password postgres 
Enter new password: 
Enter it again: 
postgres=# \q

To install PostgreSQL Adminpack, enter the command in postgresql prompt:

postgres=# CREATE EXTENSION adminpack;
CREATE EXTENSION

Create New User and Database

For example, let us create a new user called “senthil” with password “ubuntu”, and database called “mydb”.

sudo -u postgres createuser -D -A -P senthil
sudo -u postgres createdb -O senthil mydb

Delete Users and Databases

To delete the database, switch to postgres user:

sudo -u postgres psql postgres

Enter command:

$ drop database <database-name>

To delete a user, enter the following command:

$ drop user <user-name>

Configure PostgreSQL-MD5 Authentication

MD5 authentication requires the client to supply an MD5-encrypted password for authentication. To do that, edit /etc/postgresql/9.4/main/pg_hba.conf file:

sudo vi /etc/postgresql/9.4/main/pg_hba.conf

Add or Modify the lines as shown below

[...]
# TYPE  DATABASE        USER            ADDRESS                 METHOD

# "local" is for Unix domain socket connections only
local   all             all                                     md5
# IPv4 local connections:
host    all             all             127.0.0.1/32            md5
host    all             all             192.168.1.0/24          md5
# IPv6 local connections:
host    all             all             ::1/128                 md5
[...]

Restart postgresql service to apply the changes:

sudo service postgresql restart

Configure PostgreSQL-Configure TCP/IP

By default, TCP/IP connection is disabled, so that the users from another computers can’t access postgresql. To allow to connect users from another computers, Edit file /etc/postgresql/9.4/main/postgresql.conf:

sudo vi /etc/postgresql/9.4/main/postgresql.conf

Find the lines:

[...]
#listen_addresses = 'localhost'
[...]
#port = 5432
[...]

Uncomment both lines, and set the IP address of your postgresql server or set ‘*’ to listen from all clients as shown below:

listen_addresses = '*'
port = 5432

Restart postgresql service to save changes:

sudo service postgresql restart

Manage PostgreSQL with phpPgAdmin

phpPgAdmin is a web-based administration utility written in PHP for managing PosgreSQL.

phpPgAdmin is available in default repositories. So, Install phpPgAdmin using command:

sudo apt-get install phppgadmin

By default, you can access phppgadmin using http://localhost/phppgadmin from your local system only. To access remote systems, do the following.

Edit file /etc/apache2/conf.d/phppgadmin:

sudo nano /etc/apache2/conf.d/phppgadmin

Comment the following line:

[...]
#allow from 127.0.0.0/255.0.0.0 ::1/128

Uncomment the following line to make phppgadmin from all systems.

allow from all

Edit /etc/apache2/apache2.conf:

sudo vi /etc/apache2/apache2.conf

Add the following line:

Include /etc/apache2/conf.d/phppgadmin

Then, restart apache service.

sudo service apache2 restart

Configure phpPgAdmin

Edit file /etc/phppgadmin/config.inc.php, and do the following changes. Most of these options are self-explanatory. Read them carefully to know why do you change these values.

sudo nano /etc/phppgadmin/config.inc.php

Find the following line:

$conf['servers'][0]['host'] = '';

Change it as shown below:

$conf['servers'][0]['host'] = 'localhost';

And find the line:

$conf['extra_login_security'] = true;

Change the value to false:

$conf['extra_login_security'] = false;

Find the line:

$conf['owned_only'] = false;

Set the value as true.ru

$conf['owned_only'] = true;

Save and close the file. Restart postgresql service and Apache services.

sudo service postgresql restart
sudo service apache2 restart

Now open your browser and navigate to http://ip-address/phppgadmin. You will see the following screen.

phpPgAdmin - Mozilla Firefox_001

Login with users that you’ve created earlier. I already have created a user called “senthil” with password “ubuntu” before, so I log in with user “senthil”.

phpPgAdmin - Mozilla Firefox_002

Now, you will access the phppgadmin dashboard.

phpPgAdmin - Mozilla Firefox_003

Log in with postgres user:

phpPgAdmin - Mozilla Firefox_004

That’s it. Now you’ll able to create, delete and alter databases graphically using phppgadmin easily.

Cheers!

---------------------------------------------------------------------
How To Install PostgreSQL 9.4 And phpPgAdmin On Ubuntu 14.10


Makagiga – A Free, Cross-platform To-do Manager, Notepad, And RSS Reader

$
0
0

Introduction

Makagiga is a free, cross-platform software to do various tasks such as to-do listing, text editing, and RSS reading etc. It is also available as portable version. You need Java 8 to run it. It currently supports Linux, Windows, Solaris, and Mac OS X. There are many plugins are available to do various tasks. You can find all the plugins here.

Installation

Go to Makagiga download page, and get the version of your distributions choice. As I mentioned before, Makagiga is available as portable version. To use portable version, make sure you have installed JRE 8.

To install Java on RPM based systems, refer the following link.

To install Java on DEB based systems, refer the following link.

After installing Java 8, download the portable edition, unzip it, and run makagiga.sh script.

If you want to install it on your system permanently, do the following steps.

On Debian based systems, download the .deb file and install it as shown below.

sudo apt-get install gdebi 
sudo gdebi makagiga_5.2-1_all.deb

On RHEL based systems, download the .rpm file and install it as shown below.

sudo rpm -ivh makagiga-5.2-1.noarch.rpm

Usage

Makagiga is simple and straight forward in usage. Launch it either from Dash or Menu. Mostly it will be found under the Office section in the Menu.

This is how Makagiga dashboard looks.

Widgets - Makagiga_001

From here, you can create tasks, to-do lists, schedules, and put your favourite websites RSS feeds altogether.

The dashboard has three categories on the left and one Widgets section on the right.

Here is the list of categories on the left menu.

  1. Files and Folders;
  2. Feeds;
  3. Trash.

Each time you open something, for example RSS feeds, it will be opened in a new tab. After using that application, just right click on the tab and click Close button.

Files and Folders:

This section includes the following example applications by default. If you want more, just right click, and create to-do, image, link, folder or whatever you want.

  • Image(viewer and editor);
  • Link(RSS feeds);
  • Notepad;
  • To-do list manager with inbuilt text editor;

Todo - Makagiga_002

Feeds:

You can add your favourite websites RSS feeds here. By default, Makagiga has added some sites RSS feeds. Just click on the feed you want to read. A new tab will open on the right side. After reading the news, simply right click on the tab and click Close button.

Leo Rosten - Makagiga_003

You can also import the feed list to your Makagiga feed list. To do that, right click on the Feeds widget on the left menu bar, select Import -> Import Feed list. Select the .ml feed list, and you’re done!

Widgets - Makagiga_012

The new feed lists will be added to your feeds section.

The last section is Trash. Anything you delete goes here.

Adding More Widgets

If you want to add additional widgets, you can use the Add Widget button on the right. You can add any kind of widgets such as to-do list, Calendar, Notes, Internet search or more widgets from the official website.

Tooltip_006

For example, let us add the Calender widget. To do that, Click on the Add Widget button, and select Calender.

Widgets - Makagiga_007

We can easily create a task from the Calender widget itself. Just click on any date of your choice and select Add task button.

Tooltip_008

Enter the task name in the Summary section, select time or change date, set the Priority from the Priority drop down box and finally click Add Task button.

Add Task_010

Now the task will be found in the ToDo section of your dashboard. After completing your task, you can set the complete level as 100% or just delete that task.

Conclusion

Makagiga will be definitely useful to keep you updated and organized. It could help you to easily add your todo tasks, schedule them, or read important updates from your favourite websites RSS feeds. It’s not necessary to multiple applications to get all these things done. Makagiga is an all in one tool for your day to day activities. Give it a try, you won’t be disappointed.

Cheers!

Reference:

---------------------------------------------------------------------
Makagiga – A Free, Cross-platform To-do Manager, Notepad, And RSS Reader

Linux Troubleshooting: How To Keep A Process Running After Putty Or SSH Session Closed?

$
0
0

Mostly, I use SSH command to connect to my remote server. Unfortunately, today the power is gone and the Ethernet hub is turned off, so my SSH session was lost. What do you do if an important task is going on after losing your SSH session? Here is the simple tool called Tmux to keep a process running  after the SSH or Putty session lost.

Tmux is a terminal multiplexer. it enables a number of terminals to be created, accessed, and controlled from a single screen.  tmux may be detached from a screen and continue running in the background, then later reattached.

First install Tmux on your remote systems.

In RPM based systems:

yum install tmux

In DEB based systems:

sudo apt-get install tmux

After tmux, SSH to your remote server, for example CentOS 7 in my case.

ssh root@ip-address

Open your terminal, and run tmux.

tmux

Then run the task you want to perform.

Let me run a task, for example, I am going to update my CentOS 7 server.

yum update

Sample output:

root@server1:~_001

Now the update process is going on. Then, press ‘CTRL+B’ followed by ‘D’ keys to detach or leave from the tmux session.

Now, you’re back to your actual Terminal, but the process will be still running in the tmux session. Log off and log in again to remote system using SSH. Type tmux attach in the terminal.

tmux attach

You see there, the same process will still be running!!

root@server1:~_002

Similarly, you run as many as tasks you want inside the tmux session. Ofcourse, you can name each session by pressing Ctrl-B and $.

You can list out the number running tmux sessions from the actual Terminal using command:

tmux list-sessions

Sample output:

0: 1 windows (created Thu Jan  8 15:13:42 2015) [80x23]
1: 1 windows (created Thu Jan  8 15:20:05 2015) [80x23]

Tmux can do much more than described here. We can start long running scripts from remote system and detach. after certain time later we can attach and view the status. Check our previous article about tmux.

Also check the man pages.

man tmux

That’s it. Stay happy!

Cheers!

---------------------------------------------------------------------
Linux Troubleshooting: How To Keep A Process Running After Putty Or SSH Session Closed?

How To Install Telegram Desktop Via PPA?

$
0
0

Everybody knows what is Telegram, right? Well, Telegram is a popular free Instant messenger application that can be used to chat with your friends all over the world. Unlike Whatsapp, Telegram is free forever, no ads, no subscription fees. And, the Telegram client is open source too. Telegram is available for many different platforms, including Linux, Android, iOS, Windows Phone, Windows, and Mac OS X. The messages which are sending using telegram are highly encrypted and self-destructive. It is very secure, and there is no limit on the size of your media and chats.

Now, the good news is someone has created a PPA for Telegram desktop. So that we can easily install it under Ubuntu, and derivatives. To install telegram on DEB based systems, run the following commands:

sudo add-apt-repository ppa:atareao/telegram
sudo apt-get update
sudo apt-get install telegram

That’s it. Now launch the Telegram app either from Unity Dash or Menu.

Telegram_003

Telegram (127)_004

Start Chatting with your dears and nears!!

Telegram (9)_005

Source

---------------------------------------------------------------------
How To Install Telegram Desktop Via PPA?

[Quick Tip] How To Restart Cinnamon After Crash

$
0
0

Cinnamon is a Linux desktop environment which provides advanced innovative features and a traditional user experience. The desktop layout is similar to Gnome 2. The underlying technology is similar from Gnome Shell. The emphasis is put on making users feel at home and providing them with an easy to use and comfortable desktop experience.

In this post, we’re going  to look at a quick way to restart Cinnamon without logging out or rebooting when it crashes.

The image below is an example of Cinnamon crashed desktop where text and icons vanish from Menu and panel.

cinnamon_crash

To restart Cinnamon

Press Alt + F2 this brings out a command menu. Type r and press Enter.

type_r

Cinnamon should restart displaying icons and text in panel and menu.

linux_mint_cinnamon_menu

Enjoy!

---------------------------------------------------------------------
[Quick Tip] How To Restart Cinnamon After Crash

Syncthing: A Private, And Secure Tool To Sync Files/Folders Between Computers

$
0
0

Introduction

Syncthing is a free, Open Source tool that can be used to sync files/folders between your networked computers. Unlike other sync tools, such as BitTorrent Sync or Dropbox, Syncthing transfers data directly from one system to another system, and It is completely open source, secure and private. All of your precious data will be stored in your system so that you can have full control over your files and folders, and none of them are stored in any third party systems. Also, you deserve to choose where it is stored, if it is shared with some third party and how it’s transmitted over the Internet.

All communication is encrypted using TLS, so your data is very secure from the prying eyes. Syncthing has a responsive and powerful WebGUI which will help the users to easily add, delete and manage directories to be synced over network. Using Syncthing, you can sync multiple folders to multiple systems at a time. Syncthing is very simple, portable, yet powerful tool in terms of installation and usage. Since all files/folders are directly transferred from one computer to another computer, you don’t have to worry about purchasing extra space from your Cloud provider. All you need is very stable LAN/WAN connection and enough disk space on your systems. It supports all modern operating systems, including GNU/Linux, Windows, Mac OS X, and ofcourse Android.

Installation

For the purpose of this tutorial, We will be using two systems, one is running with Ubuntu 14.04 LTS, and another one is running with Ubuntu 14.10 server. To easily recognize these two systems, we will be calling them using names system1, and system2.

System1 Details:

  • OS: Ubuntu 14.04 LTS server;
  • Hostname: server1.unixmen.local;
  • IP Address: 192.168.1.150.
  • System user: sk (You can use your own)
  • Sync Directory: /home/Sync/ (Will be created by default by Syncthing)

System2 Details:

  • OS: Ubuntu 14.10 server;
  • Hostname: server.unixmen.local;
  • IP Address: 192.168.1.151.
  • System user: sk (You can use your own)
  • Sync Directory: /home/Sync/ (Will be created by default by Syncthing)

Creating User For Syncthing On System 1 & System2:

Run the following commands on both system to create the user for Syncthing and the directory to be synced between two systems:

sudo useradd sk
sudo passwd sk

Install Syncthing On System1 And System2:

You should do the following steps on both System 1 and System 2.

Download the latest version from the official download page. As I am using 64bit system, I downloaded the 6bbit package.

wget https://github.com/syncthing/syncthing/releases/download/v0.10.20/syncthing-linux-amd64-v0.10.20.tar.gz

Extract the download file:

tar xzvf syncthing-linux-amd64-v0.10.20.tar.gz

Cd to the extracted folder:

cd syncthing-linux-amd64-v0.10.20/

Copy the excutable file “syncthing” to $PATH:

sudo cp syncthing /usr/local/bin/

Now, run the following command to run the syncthing for the first time.

syncthing

When you run the above command, syncthing will generate a configuration and some keys and then start the admin GUI in your browser. You should see something like below.

Sample output:

[monitor] 15:40:27 INFO: Starting syncthing
 15:40:27 INFO: Generating RSA key and certificate for syncthing...
 [BQXVO] 15:40:34 INFO: syncthing v0.10.20 (go1.4 linux-386 default) unknown-user@syncthing-builder 2015-01-13 16:27:47 UTC
 [BQXVO] 15:40:34 INFO: My ID: BQXVO3D-VEBIDRE-MVMMGJI-ECD2PC3-T5LT3JB-OK4Z45E-MPIDWHI-IRW3NAZ
 [BQXVO] 15:40:34 INFO: No config file; starting with empty defaults
 [BQXVO] 15:40:34 INFO: Edit /home/sk/.config/syncthing/config.xml to taste or use the GUI
 [BQXVO] 15:40:34 INFO: Starting web GUI on http://127.0.0.1:8080/
 [BQXVO] 15:40:34 INFO: Loading HTTPS certificate: open /home/sk/.config/syncthing/https-cert.pem: no such file or directory
 [BQXVO] 15:40:34 INFO: Creating new HTTPS certificate
 [BQXVO] 15:40:34 INFO: Generating RSA key and certificate for server1...
 [BQXVO] 15:41:01 INFO: Starting UPnP discovery...
 [BQXVO] 15:41:07 INFO: Starting local discovery announcements
 [BQXVO] 15:41:07 INFO: Starting global discovery announcements
 [BQXVO] 15:41:07 OK: Ready to synchronize default (read-write)
 [BQXVO] 15:41:07 INFO: Device BQXVO3D-VEBIDRE-MVMMGJI-ECD2PC3-T5LT3JB-OK4Z45E-MPIDWHI-IRW3NAZ is "server1" at [dynamic]
 [BQXVO] 15:41:07 INFO: Completed initial scan (rw) of folder default

Syncthing has been successfully initialized, and the Web admin interface can be accessed using URL: http://localhost:8080 from your browser. As you see in the above output, syncthing has automatically created a folder called default for you, in a directory called Sync in your home directory.

By default, Syncthing WebGUI will only be accessed from the localhost itself. To access the WebGUI from the remote systems, you need to do the following changes on both systems.

First, stop the Syncthing initialization process by pressing the CTRL+C. Now, you will be returned back to the Terminal.

Edit file config.xml,

sudo nano ~/.config/syncthing/config.xml

Find this directive:

[...]
<gui enabled="true" tls="false">
 <address>127.0.0.1:8080</address>
 <apikey>-Su9v0lW80JWybGjK9vNK00YDraxXHGP</apikey>
</gui>
[...]

In the <address> field, change 127.0.0.1:8080 to 0.0.0.0:8080. So, your config.xml will look like below.

<gui enabled="true" tls="false">
 <address>0.0.0.0:8080</address>
 <apikey>-Su9v0lW80JWybGjK9vNK00YDraxXHGP</apikey>
</gui>

Save and close the file.

Now, start again the Syncthing initialization on both systems by entering the following command:

syncthing

Access the WebGUI

Now, open your browser http://ip-address:8080/. You will see the following screen,

Syncthing | server1 - Mozilla Firefox_001

The WebGUI has two panes. In the left pane, you may see the list of folders to be synced. As I mentioned before, the folder default has been automatically created for you while initializing Syncthing. If you want to sync more folders, you can add using Add Folder button.

In the right pane, you see the number of devices connected. Currently there is only one device, the computer you are running this on.

Configure Syncthing Web GUI

For the security enhancement, let us enable TLS, and setup administrative user and password to access the WebGUI. To od that, click on the gear button and select Settings on the top right corner.

Menu_002

Enter the admin username/password. In my case it is admin/ubuntu. You should use some strong password. And, check the box that says: Use HTTPS for GUI.

Syncthing | server1 - Mozilla Firefox_004

Click Save button. Now, you’ll be asked to restart the Syncthing to activate the changes. Click Restart.

Selection_005Refresh you web browser. You’ll see the SSL warning like below. Click on the button that says: I understand the Risks. And, click Add Exception button to add this page to the browser trusted lists.

Untrusted Connection - Mozilla Firefox_006

Enter the administrative user and password which we configured in the previous steps. In my case it’s admin/ubuntu.

Authentication Required_007

We have secured the WebGUI now. Don’t forget to do the same steps on both server.

Connect Servers To Each Other

To sync folders between systems, you must told them about each other. This is accomplished by exchanging “device IDs”. You can find it in the web GUI by selecting the “gear menu” (top right) and “Show ID”.

For example, here is my System 1 ID.

Syncthing | server1 - Mozilla Firefox_008

Copy the ID, and go to the another system (system 2) WebGUI. From the second system (system 2) WebGUI window, click on the Add Device on the right side.

Syncthing | server - Mozilla Firefox_010

The following screen should appear. Paste the System 1 ID in the Device section. Enter the Device name(optional). In the Addresses field, you can either enter the IP address of the other system or leave it as default. The default value is dynamic. Finally, select the folder to be synced. In our case, the sync folder is default.

Syncthing | server - Mozilla Firefox_009

Once you done, click on the save button. You’ll be asked to restart the Syncthing. Click Restart button to activate the changes.

Now, go to the System 1 WebUI, you’ll see a request has been sent from the System 2 to connect and sync. Click Add button. Now, the System 2 will ask the System 1 to share and sync the folder called “default”. Click Share button.

Selection_013

Next restart the Syncthing service on the System 1 to activate the changes.

Selection_014

Wait for few seconds, approximately 60 seconds, and you’ll see the two systems have been successfully connected and synced to each other.

You can verify it under the Add Device section of the WebGUI.

System 1 WebGUI console after adding System 2:

Syncthing | server - Mozilla Firefox_016

System 2 WebGUI console after adding System 1:

Syncthing | server - Mozilla Firefox_018

Now, put any file or folder in any one of the systems “default” folder. You may see the file/folder will be synced to the other system automatically.

That’s it! Happy Sync’ing!!

Cheers!!!

Reference:

---------------------------------------------------------------------
Syncthing: A Private, And Secure Tool To Sync Files/Folders Between Computers

iptraf: A TCP/UDP Network Monitoring Utility

$
0
0

iptraf is an ncurses-based IP LAN monitor that generates various network statistics including TCP info, UDP counts, ICMP and OSPF information, Ethernet load info, node stats, IP checksum errors, and others.

Its ncurses-based user interface also saves users from remembering command line switches.

Features

  • An IP traffic monitor that shows information on the IP traffic passing over your network. Includes TCP flag information, packet and byte counts, ICMP details, OSPF packet types.
  • General and detailed interface statistics showing IP, TCP, UDP, ICMP, non-IP and other IP packet counts, IP checksum errors, interface activity, packet size counts.
  • A TCP and UDP service monitor showing counts of incoming and outgoing packets for common TCP and UDP application ports
  • A LAN statistics module that discovers active hosts and shows statistics showing the data activity on them
  • TCP, UDP, and other protocol display filters, allowing you to view only traffic you’re interested in.
  • Logging
  • Supports Ethernet, FDDI, ISDN, SLIP, PPP, and loopback interface types.
  • Utilizes the built-in raw socket interface of the Linux kernel, allowing it to be used over a wide range of supported network cards.
  • Full-screen, menu-driven operation.

Installation

Ubuntu and it’s derivatives:

sudo apt-get install iptraf

Arch Linux and Its derivatives:

sudo pacman -S iptraf-ng

Fedora and its derivatives:

sudo yum install iptraf

Usage

If the iptraf command is issued without any command-line options, the program comes up in interactive mode, with the various facilities accessed through the main menu.
iptraf_1

Menu for easy navigation.

iptraf_2Selecting interfaces to monitor.

iptraf_3

Traffic from interface ppp0

iptraf_4

Enjoy!


Advertise here with BSA

---------------------------------------------------------------------
iptraf: A TCP/UDP Network Monitoring Utility

Installing Cisco Packet tracer in Linux

$
0
0

What is Cisco Packet tracer ?

Cisco Packet tracer is a powerful network simulator tool which used to trained while we do some Cisco certifications. It provide us good Interface view for every router’s, and networking devices which with many options same as using the physical machines we can use unlimited devices in a network. We can create multiple network in single project to get trained like a professionals. packet tracer will provide us with simulated application layer protocols such as HTTP, DNS, Routing with RIP, OSPF, EIGRP etc.

Now it has been released including ASA 5505 firewall with command line configurations. Packet tracer available commonly for Windows, but not for Linux distributions. Here we can download and get install Cisco package tracer.

Newly released version of Cisco packet tracer:

The next Cisco Packet Tracer version will be Cisco Packet Tracer 6.2 currently it’s under development.

My Environment Setup:

Hostname                :           desktop1.unixmen.com

IP address               :           192.168.0.167

Operating system    :           Ubuntu 14.04 LTS Desktop

The following commands will give the above details.

hostname
ifconfig | grep inet
lsb_release -a

Step 1: First we need to download the Cisco Packet tracer.

To download Packet Tracer from official website we need to have a token, sign into Cisco NetSpace and select CCNA > Cisco Packet Tracer from the Offerings menu to start the download. If we don’t have a token you can get from below link which i have uploaded in Dropbox.

Official Website: https://www.netacad.com/

Many of them don’t have a token to download packet tracer. For that i have uploaded it in dropbox you can get packet tracer from below URL.

Download Cisco Packet Tracer 6.1.1

Packet tracer Download

Step 2: Install Java:

To get install packet tracer we need to have install Java, To get install java we can use the default or add the PPA repository and update the package cache to get install java.
Install the default jre using

sudo apt-get install default-jre

Packet tracer java

(or)

Use the below step to get install Java Run-time and set the Environment.

Download Java from official website : Download Java

tar -zxvf jre-8u31-linux-x64.tar.gz
sudo mkdir -p /usr/lib/jvm
sudo mv -v jre1.8.0_31 /usr/lib/jvm/
cd /usr/lib/jvm/
sudo update-alternatives --install "/usr/bin/java" "java" "/usr/lib/jvm/jre1.8.0_31/bin/java" 1
sudo update-alternatives --set "java" "/usr/lib/jvm/jre1.8.0_31/bin/java"

Set the environment for java by editing the profile file and add the location. While we adding in profile file java will available for every user’s in our machine.

sudo vi /etc/profile

Add the following entries to the bottom of your /etc/profile file:

export JAVA_HOME=/usr/lib/jvm/jre1.8.0_31
export PATH=$PATH:/usr/java/jre1.8.0_31/bin

Run the below command to activate java path immediately.

. /etc/profile

Check for the Java version and Environment:

echo $JAVA_HOME
java -version

packet tracer java installed

Step 3: Enable 32bit architecture support:

For Packet tracer we need some of 32bit packages. To get install 32bit packages we need to install some of dependencies using below commands.

sudo dpkg --add-architecture i386
sudo apt-get update

32 bit arch

sudo apt-get install libc6:i386
sudo apt-get install lib32z1 lib32ncurses5 lib32bz2-1.0
sudo apt-get install libnss3-1d:i386 libqt4-qt3support:i386 libssl1.0.0:i386 libqtwebkit4:i386 libqt4-scripttools:i386

packet tracer dependencies

Step 4: Extract and install the package:

Extract the downloaded package using tar command.

mv Cisco\ Packet\ Tracer\ 6.1.1\ Linux.tar.gz\?dl\=0 Cisco_Packet_tracer.tar.gz
tar -zxvf Cisco_Packet_tracer.tar.gz

extract pt
Navigate to the extracted directory:

cd PacketTracer611Student

Now it’s time to start the installation , Installation is very simple and just take few seconds.

sudo ./install

Install packet tracer

Packet tracer installed
To working with Package tracer we need to set the environment for that Cisco have provided the environment script, We need to run the script using root user to set the environment variable.

sudo ./set_ptenv.sh

packet tracer env setup
That’s it for installation step’s. next we need to create a Desktop Icon for Packet tracer.
Create the Desktop Icon by creating desktop file under.

sudo su
cd /usr/share/applications
sudo vim packettracer.desktop

Packet tracer 01
Append the Below content to the file using vim editor or your favourite one.

 [Desktop Entry]
 Name= Packettracer
 Comment=Networking
 GenericName=Cisco Packettracer
 Exec=/opt/packettracer/packettracer
 Icon=/usr/share/icons/packettracer.jpeg
 StartupNotify=true
 Terminal=false
 Type=Application

Save and quit using wq!

pt icon

Step 5: Run the packet tracer

sudo packettracer

That’s it we have successfully installed the packet tracer in Linux, These above steps are suitable for every debian based Linux distributions.
packet tracer first launch

packet tracer first launch main window

Resources:

Home page: Netacad

Conclusion:

Here we have seen how to install packet tracer in Linux distribution, Hope you have find a way to get install your favorite Simulator in Linux.


Advertise here with BSA

---------------------------------------------------------------------
Installing Cisco Packet tracer in Linux


How To Install Zoneminder On Ubuntu

$
0
0

ZoneMinder is a free, open source Closed-circuit television (CCTV) software application developed for Linux. ZoneMinder is an integrated set of applications which provide a complete surveillance solution allowing capture, analysis, recording and monitoring of any CCTV or security cameras attached to a Linux based machine.Whether you need it for a business or in your own home, CCTV cameras can be an excellent deterrent for anything untoward.

Zoneminder Installation In Ubuntu Server 12.04 64&32 bits

Note: This has also been tested with 12.04 32 BIT.

Needed to requirement for zoneminder installation and configure
:

Install Basic Server, OpenSSH Server, and LAMP Server, IP supported Camera etc.

Now start to zoneminder installation and configuration:

At first open the Terminal (Ctrl+Alt+T). Then write the command after one by one.

sudo su
sudo apt-get update
sudo apt-get upgrade

Install OpenSSH and LAMP server:

Install the tasksel.

sudo apt-get install tasksel

Run the taskel and taskesl menu will be show

sudo tasksel

Then Select OpenSSH and LAMP Server.

During the installation you will be asked to insert the mysql root password. Enter the password twice.

Install PPA Repository for Zoneminder 1.28.0:

sudo apt-get install python-software-properties

Then we need to install the following applications and libraries:

sudo apt-get install ffmpeg libarchive-tar-perl libarchive-zip-perl libdate-manip-perl libdevice-serialport-perl
sudo apt-get install libjpeg62 libmime-perl libstdc++6 libwww-perl zlib1g
sudo add-apt-repository ppa:iconnor/zoneminder
sudo apt-get update

Now Install Zoneminder:

sudo apt-get install zoneminder

Install VLC multimedia software package:

sudo apt-get install libvlc-dev libvlccore-dev vlc

Add delay to allow MySQL to start before Zoneminder:

sudo mcedit /etc/init.d/zoneminder

Add above “zmfix -a” sleep 15.

Should look like:

 start() {
 sleep 15
 echo -n "Starting $prog: "

Two times hit Esc button and select save.

Now create Link Apache to Zoneminder:

sudo ln -s /etc/zm/apache.conf /etc/apache2/conf.d/zoneminder.conf

Restart Apache:

sudo /etc/init.d/apache2 force-reload

Add video user:

sudo adduser www-data video

Install Cambozola (needed if you use Internet Explorer web browser):

cd /usr/src
sudo wget http://www.charliemouse.com:8080/code/cambozola/cambozola-latest.tar.gz
sudo tar -xzvf cambozola-latest.tar.gz

## Replace 935 with cambozola version downloaded ##
sudo cp cambozola-0.935/dist/cambozola.jar /usr/share/zoneminder

Optional Add SSL to Apache2

Create a self-signed certificate:

sudo make-ssl-cert generate-default-snakeoil --force-overwrite

Activate Apache SSL module:

sudo a2enmod ssl

Activate Apache default ssl virtual host:

sudo a2ensite default-ssl

Restart Apache:

sudo service apache2 restart

You should now be able to access the web server using http://servername.

NTP Daily Sync (optional)

sudo mcedit /etc/cron.daily/ntpdate

Copy the following into mcedit and add the line:

 !/bin/sh
 ntpdate ntp.ubuntu.com

Enter Esc button two time and select save.

sudo chmod 755 /etc/cron.daily/ntpdate

Test or start Zoneminder in web browser

http://serverip/zm (Ex. http://192.168.10.81/zm)

This is Zoneminder GUI interface.

Zoneminder GUI interface
Monitoring zoneminder with CCTV

Defining Monitors or Camera:

To use ZoneMinder properly you need to define at least one Monitor. Because A monitor is associated with a camera. So, next click ‘Add New Monitor’ to bring up the dialog. We shell see a bunch of things we have to fill in.

general option
Monitor Tab – General:

Name: The name of our monitor. We can use any name but the name did not support white space.
Source Type: Here many types of source option. IP camera support only Ffmpeg. So, must we are select Ffmpeg. But if camera capturing is noisy then select Libvlc. Otherwise must be select Ffmpeg.

Function: Here many types of function. This essentially defines what the monitor is doing:

None – The monitor is currently disabled.
Monitor - The monitor is only available for live streaming. Its only monitoring.
Modect – Modect means Motion Detection. Recorded video where motion is detected.
Record - The monitor will be continuously recorded.
Mocord - The monitor will be continuously recorded, with any motion being highlighted within those events.
Nodect – No Detection. Its currently unavailable.
Enable: The enable field indicate the monitor is active or passive mode.
Linked Monitor: Here show the whole active monitor.
Maximum FPS: This option permits you to limit the maximum capture rate to a specified value.

Monitor Tab-Source:

source tab
Source Path: At first used Real Time Streaming Protocol(rtsp) then Camera IP address. Like this ( rtsp://192.168.1.64).
Remote Method: Select RTP/Unicast. (RTP/Unicast)
Options: This field all time blank. Nothing to used.
Target Colorspace: Select 24 bit color.
Capture Width: 320 Pixel
Capture Height: 240 Pixel
Orientation: Select Normal.
Deinterlacing: Select Disabled. Then click Save button.
Monitor tab– Timestamps
Timestamps is always default. Nothing to change it.
Monitor tab – Buffers
Buffer is always default. Nothing to change it.
Monitor tab – Misc
Misc is always default. Nothing to change it.

Filters: Filter is a storage space of the application. Whole recorded event are stored in the filter.
Cycle: Cycle is showing option. When click cycle then show the only top camera display.
Montage: Montage is a showing option. When click montage then show the added all camera display.
Edit: Edit some monitoring setting.
Delete: Used this option for delete any Camera.

Live Demo

camera
E-mail or SMS setting:

Now click Option button.

Option
Then:

Email tab
First click “E-mail Tab
All check box are “true value
Enter Email address for ZM-Email address. Ex.mailofjohor@gmail.com
Enter Email address for Zm-Message address. Ex.mailofjohor@gmail.com
Enter Your SMS mobile number in ZM Message subject. Ex.00601116396839
The host address “localhost”
And next field Write “zm@localhost”
Then finally installation URL in the zoneminder. Ex.http://192.168.10.81/zm
Now set up basic Filter. Click on “Filter”

Filter

That’s it. Enjoy!!


Advertise here with BSA

---------------------------------------------------------------------
How To Install Zoneminder On Ubuntu

LinSSID – A Graphical Wi-Fi Scanner for Linux

$
0
0

Introduction

As you may know, LinSSID is a simple graphical software that can be used to find the wireless networks available.It is completely open source, written in C++ using Linux wireless tools, Qt5, and Qwt 6.1., and is similar to Inssider (MS Windows) in terms of look and functionality.

Installation

You can install it either using source, or using a PPA if you use DEB based systems such as Ubuntu, and LinuxMint etc.

You can download and install LinSSID using source packages from this link.

Here, we will install and test this software on Ubuntu 14.04 LTS using PPA.

Add the LinSSID PPA, and install it by typing.

sudo add-apt-repository ppa:wseverin/ppa
sudo apt-get update
sudo apt-get install linssid

Usage

Once you installed, launch it either from menu or unity.

You”ll be asked to enter the administrative user password of your system.

Password required for iwlist scan_001

This is how LinSSID interface looks.

LinSSID_002

Now, select the network interface you used to connect to the Wireless networks, for example wlan0 in my case. Click the Play button to search the list of available wi-fi networks.

After a new seconds, LinSSID will display the wi-fi networks.

LinSSID_003

As you see in the above screenshot, LinSSID displays the details of SSID names, MAC Id, Channel, Privacy, Cipher, Signal, and Protocol etc. Ofcourse, you can make LinSSID to display more options such as Security, bandwidth details etc. To do that, go to View menu, and select the desired option. Also, it displays the graphs of signal strength by channel and over time. Additionally, It works both on 2.4Ghz, and 5Ghz channels.

That’s it. Hope this tool will useful for you.

Cheers!!

Reference Links:


Advertise here with BSA

---------------------------------------------------------------------
LinSSID – A Graphical Wi-Fi Scanner for Linux

How To Install Nikto Web Scanner To Check Vulnerabilities

$
0
0

What is Nikto web scanner and it’s use ?

Nikto Web-scanner is a open source web-server scanner which can be used to scan the web-servers for malicious programs and files. Nikto can be used to scan the outdated versions of programs too. Nikto will provide us a quick and easy scan to find out the dangerous files and programs in server, At the end of scan result with a log file. Using nikto we can scan http, https, httpd traffics too.

To run the Nikto we don’t need any hard resource using software’s, If our server installed with Perl it’s fine to run the nikto. It’s available for every Operating systems such as Linux, Unix like RedHat, Centos, Debian, Ubuntu, Solaris, BackTrack, MacOSX. Supports SSL, http proxy, Scan multiple ports on a server, Check for outdated server components etc.. We can get the output of result in following formats TXT, CSV, HTML, XML.

Newly released version of Nikto Web scanner:

Nikto released it’s version 2.1.5 in 2012 but it’s under updates for each and every new vulnerabilities till date.

vulnerabilities Database:

We can find each and every vulnerabilities database in following URL.

http://osvdb.org/

My Environment Setup:

  • Hostname                   :      prodsrv.unixmen.com
  • IP address                  :      192.168.0.166
  • Operating system        :      Ubuntu 14.04 LTS

Run the following commands to check the hostname, IP address, and OS version.

hostname
ifconfig | grep inet
lsb_release -a

Nikto host info

Step by Step Installation

First we need to download and install nikto web scanner from Official website.

https://cirt.net/Nikto2

Let we download the package which in .bz2 or gz format using wget in our production server.

https://cirt.net/nikto/nikto-2.1.5.tar.bz2

https://cirt.net/nikto/nikto-2.1.5.tar.gz

Step 1: Download the package

wget https://cirt.net/nikto/nikto-2.1.5.tar.gz

nikto download
Step 2: Extract the package using below command

tar -zxvf nikto-2.1.5.tar.gz

Extract Nikto

Step 3: Navigate to the home directory

Then move the extracted nikto package to /usr/local/bin/:

cd ~
sudo cp -apvf nikto-2.1.5/* /usr/local/bin/
ls -l /usr/local/bin/

nikto copy
* Nikto config file need to be in /etc/, But now it’s currently under /usr/local/bin/ While having a look into conf we can find that nikto will skip the scan for ports 21 & 111, And from were it want to download it’s update and much more.

sudo vim /usr/local/bin/nikto-2.1.5/nikto.conf

Step 4: Creating Symlink & Permission.

Now we need to create a symlink for our conf file to /etc/ because nikto look for conf file under /etc/. Then make our nikto script as executable using chmod.

sudo ln -s /usr/local/bin/nikto.conf /etc/nikto.conf
ls -l /etc/nikto.conf
sudo chmod 755 /usr/local/bin/nikto.pl
ls -l /usr/local/bin/nikto.pl

nikto symlink

Step 5: Update the nikto Database.

Before performing any scan we need to update the nikto database packages using.

/usr/local/bin/nikto.pl -update

nikto update
To list the available Plugins for nikto we can use the below command.

nikto.pl -list-plugins // To list the installed plugins //

nikto plugins

Step 6: Scan for vulnerabilities:

To Scan for a website using hostname we can use the option -h followed by niktop command.

nikto.pl -h www.unixmen.com // To scan a website //

nikto scan host
Scan for a hostname using multiple ports we can use -p option followed by nikto.pl

nikto.pl -h www.google.com -p 80,443

nikto scan port
While scanning for vulnerabilities we can see the process, If we need to see the live process we need to use option Display.

nikto.pl -D v -h www.google.com

Where,

  • -D = Display
  • v = Verbose
  • -h = hostname

niktop verbose scan

Scan Only using specific check using tuning option:

While Tuning options used we can specify which test need to made, Using x option we can exclude the tests which we don’t need.
Below Options are available for specific scan’s.

0 – File Upload

1 – Interesting File // we will get in logs

2 – Misconfiguration / Default File

3 – Information Disclosure

4 – Injection (XSS/Script/HTML)

5 – Remote File Retrieval – Inside Web Root

6 – Denial of Service // Scan for DDOS

7 – Remote File Retrieval – Server Wide

8 – Command Execution // Remote Shell

9 – SQL Injection // Scan for mysql vulnerabilities

a – Authentication Bypass

b – Software Identification

c – Remote Source Inclusion

x – Reverse Tuning Options
Now here let me scan for SQL vulnerabilities for a website. A single test will finish in short time if we not specified for a single scan it will take the full scan and take hours to complete.

nikto.pl -Tuning 9 -h www.isanalytics.com

nikto sql inj scan
Scan for multiple test using:

nikto.pl -Tuning 69 -h www.isanalytics.com

Scan and save the result to a file using below command to find the vulnerabilities.

nikto.pl -Display V -o nikto_scan_result.html -Format html -h 192.168.0.166

nikto result command
After scan completes we will get the result in html format in current directory as show below.

nikto result file
We will get a decent format of output as show below in html format to find the vulnerabilities.

Nikto result file in html format
That’s it, Here we have seen how to protect our website from several vulnerabilities. To know the up to date vulnerabilities we need to keep the nikto package update before scanning.

Resources:

Conclusion:

To those who searching for web scanner nikto will be one of powerful tool to end your web scanner search. Hope this will will bring you a good idea to scan vulnerbalites for you site even your site are well harden in several settings.


Advertise here with BSA

---------------------------------------------------------------------
How To Install Nikto Web Scanner To Check Vulnerabilities

Linux Basics: How To Check If A Package Is Installed Or Not In Ubuntu

$
0
0

If you’re managing Debian or Ubuntu servers, probably, you may use dpkg or apt-get commands often. These two commands are used to install, remove, update packages.

In this brief tutorial, let us see how to check if a package is installed or not in DEB based systems.

To check whether a particular package for example firefox, is installed or not using command:

dpkg -s firefox

Sample output:

 Package: firefox
 Status: install ok installed
 Priority: optional
 Section: web
 Installed-Size: 93339
 Maintainer: Ubuntu Mozilla Team <ubuntu-mozillateam@lists.ubuntu.com>
 Architecture: amd64
 Version: 35.0+build3-0ubuntu0.14.04.2
 Replaces: kubuntu-firefox-installer
 Provides: gnome-www-browser, iceweasel, www-browser
 Depends: lsb-release, libasound2 (>= 1.0.16), libatk1.0-0 (>= 1.12.4), libc6 (>= 2.17), libcairo2 (>= 1.2.4), libdbus-1-3 (>= 1.0.2), libdbus-glib-1-2 (>= 0.78), libfontconfig1 (>= 2.9.0), libfreetype6 (>= 2.2.1), libgcc1 (>= 1:4.1.1), libgdk-pixbuf2.0-0 (>= 2.22.0), libglib2.0-0 (>= 2.37.3), libgtk2.0-0 (>= 2.24.0), libpango-1.0-0 (>= 1.22.0), libpangocairo-1.0-0 (>= 1.14.0), libstartup-notification0 (>= 0.8), libstdc++6 (>= 4.6), libx11-6, libxcomposite1 (>= 1:0.3-1), libxdamage1 (>= 1:1.1), libxext6, libxfixes3, libxrender1, libxt6
 Recommends: xul-ext-ubufox, libcanberra0, libdbusmenu-glib4, libdbusmenu-gtk4
 Suggests: ttf-lyx
 Conffiles:
 /etc/firefox/syspref.js 09e457e65435a1a043521f2bd19cd2a1
 /etc/apport/blacklist.d/firefox ee63264f847e671832d42255912ce144
 /etc/apport/native-origins.d/firefox 7c26b75c7c2b715c89cc6d85338252a4
 /etc/apparmor.d/usr.bin.firefox f54f7a43361c7ecfa3874abca2f292cf
 Description: Safe and easy web browser from Mozilla
 Firefox delivers safe, easy web browsing. A familiar user interface,
 enhanced security features including protection from online identity theft,
 and integrated search let you get the most out of the web.
 Xul-Appid: {ec8030f7-c20a-464f-9b0e-13a3a9e97384}

As you see in the above output, the firefox is installed.

Also, you can do the same using dpkg-query command. This command displays the decent output, and ofcourse, you can wild cards too.

dpkg-query -l firefox

Sample output:

Desired=Unknown/Install/Remove/Purge/Hold
| Status=Not/Inst/Conf-files/Unpacked/halF-conf/Half-inst/trig-aWait/Trig-pend
|/ Err?=(none)/Reinst-required (Status,Err: uppercase=bad)
||/ Name                                 Version                 Architecture            Description
+++-====================================-=======================-=======================-=============================================================================
ii  firefox                              35.0+build3-0ubuntu0.14 amd64                   Safe and easy web browser from Mozilla

To list all installed package in your system, enter the following command

dpkg --get-selections

Sample output:

abiword                        install
abiword-common                    install
accountsservice                    install
acl                        install
adduser                        install
alsa-base                    install
alsa-utils                    install
anacron                        install
app-install-data                install
apparmor                    install
.
.
.
zeitgeist                    install
zeitgeist-core                    install
zeitgeist-datahub                install
zenity                        install
zenity-common                    install
zip                        install
zlib1g:amd64                    install
zlib1g:i386                    install

The above might be very long depending upon the number of packages you have installed on your system.

You can also filter through grep to get results for the exact package you need. For example, I want to see which gcc packages are already installed on my system using dpkg command:

dpkg --get-selections | grep gcc

Sample output:

gcc                        install
gcc-4.8                        install
gcc-4.8-base:amd64                install
gcc-4.8-base:i386                install
gcc-4.9-base:amd64                install
gcc-4.9-base:i386                install
libgcc-4.8-dev:amd64                install
libgcc1:amd64                    install
libgcc1:i386                    install

Additionally, you can find location of the files within a package using the parameter “-L”.

dpkg -L gcc-4.8

Sample output:

/.
/usr
/usr/share
/usr/share/doc
/usr/share/doc/gcc-4.8-base
/usr/share/doc/gcc-4.8-base/README.Bugs
/usr/share/doc/gcc-4.8-base/NEWS.html
/usr/share/doc/gcc-4.8-base/quadmath
/usr/share/doc/gcc-4.8-base/quadmath/changelog.gz
/usr/share/doc/gcc-4.8-base/gcc
.
.
.
/usr/bin/x86_64-linux-gnu-gcc-4.8
/usr/bin/x86_64-linux-gnu-gcc-ar-4.8
/usr/bin/x86_64-linux-gnu-gcov-4.8

That’s all for now. Hope this short tutorial will useful for you.

Good day!


Advertise here with BSA

---------------------------------------------------------------------
Linux Basics: How To Check If A Package Is Installed Or Not In Ubuntu

MEGASync: Easy Automated Syncing Between Your Computers And Your MEGA Cloud Drive

$
0
0

In our previous article, we discussed how to setup and use an encrypted chat with one another using MegaChat. Today we will discuss about Mega Sync Client that can be used to sync files/folder between your system and your Mega cloud. It is very secure, so that your data is encrypted end to end. Nobody can intercept it while in storage or in transit. Mega Sync is more flexible. You can sync any folder from your PC to any folder in the cloud, and ofcourse you can sync any number of folders in parallel. It is very fast, and you can store up to 50 GB for free!

MegaSync client is available for Linux, Windows and Mac OS X.

Download and install MegaSync client on your computer. You can download the client from here. As I use Ubuntu 14.04 64bit, I downloaded and installed the 64bit version.

Usage

Launch MegaSync client either from Menu or Unity dash. As I have created the account already, I select the first option.

Setup Wizard - MEGAsync_001

Enter your Mega account details.

Setup Wizard - MEGAsync_002

Select the type of sync: Full sync or Selective sync. I go with full sync.

Setup Wizard - MEGAsync_003

Browse the path of folder that you want to sync with Mega cloud.

Setup Wizard - MEGAsync_004

That’s it. Now your local drive and your Mega cloud drive will be automatically synchronized.

Setup Wizard - MEGAsync_005

You can see the progress from the taskbar.

Menu_006

Happy sync’ing! Cheers!!


Advertise here with BSA

---------------------------------------------------------------------
MEGASync: Easy Automated Syncing Between Your Computers And Your MEGA Cloud Drive

How To Install Icinga On Ubuntu

$
0
0

Icinga is an open source network monitoring system which checks the availability of your network resources, notifies users of outages, and generates performance data for reporting. Its Scalable and extensible, Icinga2 can monitor large, complex environments across multiple locations.

Installation

Open Terminal (Ctrl+Alt+T). Enter the following commands.

sudo su
sudo apt-get update
sudo apt-get upgrade

Now add the Icinga repository:

sudo add-apt-repository ppa:formorer/icinga
sudo apt-get update

Install Icinga2:

sudo apt-get install icinga2

Now Install Icinga2 ClassicUI:

sudo apt-get install icinga2-classicui

Adding password for user icingaadmin. Here, I use password=password.

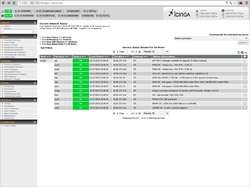
When Installation is finished then open your browser and type http://localhost/icinga2-classicui or IP address of the installing machine. Ex.http://192.168.10.81/icinga2-classicui.
GUI interface Icinga 2

Now install Mysql server.

sudo apt-get update
sudo apt-get install mysql-server icinga2-ido-mysql
Database configuration select Yes
sudo icinga2-enable-feature ido-mysql
sudo service icinga2 restart

Icinga2 Configuration

Open Terminal, and then;

sudo su
sudo apt-get update

Now go to Icinga2 dicrectory:

cd /etc/icinga2/conf.d/
ls -l

Now define Host or add the host in icinga2:

sudo mcedit hosts.conf

Replace the line:

object Host NodeName {

And type:

object Host "localhost"{

Add New host

object Host "Meeting-Room-Camera"{
import "generic-host"
address="192.168.10.199"
display_name="Meeting-Room-Camera"
vars.os="Camera"
}

add host
Live Demo on Host:

live host

Now we need to save this configuration. Press Esc button two time and select save then press Enter.

Every host and service add after that restart the icinga2 server.

sudo service icinga2 restart

Note: Here, Meeting-Room-Camera is host name, and vars.os=”Camera” is the host group name.

Now you can add one more host after one by one.

Add the service for the host

sudo mcedit services.conf

Do the changes as shown below.

service
Live demo:

live demo

Restart the icinga 2:

sudo service icinga2 restart

Create HostGroup

sudo mcedit groups.conf

Enter the following:

object HostGroup "PC" {
display_name="PC"
assign where host.vars.os=="PC"
}

groups
live demo:

live demo g

Note: Here PC means group name. vars.os==”PC” indicates the host.

Example:

object Host "Johor-Computer"{
import "generic-host"
address="192.168.10.54"
vars.os=="PC"
}

E-mail Notification

Open Terminal, and;

sudo su
cd /etc/icinga2/conf.d/
ls -l
sudo cp apt.conf Email.conf
sudo mcedit Email.conf

Now delete all text, and enter the email id.

Email

Here, sita is a user group you can use any name and email add your own email address.

Be mindful that, after any changes in the configuration you should restart icinga2 server.

That’s all now. Happy monitoring!


Advertise here with BSA

---------------------------------------------------------------------
How To Install Icinga On Ubuntu

Backup Files From Ubuntu Or Debian Server’s To Amazon s3

$
0
0

Backup Files From Ubuntu Or Debian Server’s To Amazon s3

Every Organization need the data’s well protected than anything else, In IT field data’s are the only precious gem we can’t get back if we loose it in any case. So there will be more need to protect the data’s with high availability. If we have several VPS and we need to backup those data’s to Amazon S3 we can Use a Command line tool to copy the files from VPS server’s to Amazon s3 using copy command or using sync option. Instead of making copy we can take incremental backups in s3cmd command line too. Let we see how to setup s3 command line tool and backup our data’s to Amazon S3.

Note : Here My Bucket name is srvdata_backups

My Server Setup:

Hostname : devsrv.unixmen.com
IP Address : 192.168.0.129

hostnamectl
ip addr show | grep inet

S3_hostname

Step By Step Installation

Step 1: Add the Key for S3 command line tool.file.

First we need to install the S3 tool package. For that we have to install the key.

sudo wget -O- -q http://s3tools.org/repo/deb-all/stable/s3tools.key | sudo apt-key add -
S3 adding key

Step 2: Add the Repository:

After adding the key let we add the repository to get the s3cmd.

sudo wget http://s3tools.org/repo/deb-all/stable/s3tools.list -O /etc/apt/sources.list.d/s3tools.list

S3 adding repo

Step 3: Install the s3cmd command line tool.

After adding the repository we have to Update the Repository cache and get Install the s3cmd Package.

sudo apt-get update && apt-get install s3cmd

 S3 install package

Step 4: configure the s3 storage setting in Server:

After installing the package we need to configure the amazon s3 Bucket configuration as below.

s3cmd --configure

S3 configure
While run the configure option with s3cmd we need to provide the username and password.

* access secret
* access secret key
* Choose a encryption password & Confirm too
* choose if you have http or https

Step 5: Create S3 Bucket in Amazon from Command line:

Here we can Create a Bucket to upload our files using s3cmd.

mb = Make Bucket.

s3cmd mb s3://srvdata_backups

S3_make bucket

If we need to list the Created Directory use command

s3cmd ls

S3_ls

Step 6: Uploading files to S3 Storage.

Now we can upload a file to our above created Bucket.

s3cmd put test.tar.gz s3://srvdata_backups

S3_put file

Step 7: List the file in create Bucket:

If we need to list the file which we have uploaded now Use command

s3cmd ls s3://srvdata_backups/

S3_file list

Step 8: Download from the S3 bucket.

To get the file from S3 Bucket use get command

s3cmd get s3://srvdata_backups/test.tar.gz

S3_get file from s3
To delete the file in bucket use the below command.

s3cmd del s3://srvdata_backups/test.tar.gz

S3_del file from s3

Step 9: Sync file’s instead of Copying:

s3cmd  sync ~/* s3://srvdata_backups

S3_s3 sync

Step 10: To remove a Amazon S3 Bucket:

rb = Remove Bucket

s3cmd rb s3://srvdata_backups

S3_remove bucket

Instead of Copying files from Server to S3 we can use sync command, This will provide us incremental backup. Thus we can copy a file from ubuntu or Debian Server’s to S3 bucket. Hope you have found a way to store your files in Amazon S3 Storage.


Advertise here with BSA

---------------------------------------------------------------------
Backup Files From Ubuntu Or Debian Server’s To Amazon s3


How To Find The Fastest Mirror In Debian And Derivatives

$
0
0

Having trouble while updating or installing packages in your system? No worries. This brief tutorial will show you how to find the fastest mirror in Debian and it’s derivatives Ubuntu, Linux Mint etc. We can do this either from GUI or command line mode. Pick any one of your preferred method.

Find The Fastest Mirror In Debian And Derivatives

Method 1: Using Synaptic package manager

Finding fastest mirror from the graphical mode is very easy. All you to do is open Synaptic package Manager, go to Settings -> Repositories. From the Ubuntu Software section, Select “Other” in the “Download From” drop-down box, and click on Select Best Mirror.

Software & Updates_002

This will automatically find and select the best mirror for your Debian systems.

_003

After finding your best mirror, select Choose Server.

Choose a Download Server_004

Finally, reload the repositories list. Now, you’ll notice that the downloading speed is significantly increased a bit.

Method 2: Using netselect-apt

A command line tool called “netselect-apt” is available to find the fastest debian mirror. It automatically creates a sources.list file for using with apt for the specified distribution by downloading the list of Debian mirrors using wget and choosing the fastest servers (both US and non- US) using netselect. The output file is written to OUTFILE.

Install netselect-apt

Simply, run the following command to install it,

sudo apt-get install netselect-apt

Unfortunately, netselect-apt is not available in Ubuntu 14.04 and recent versions in the default repositories. But, we can download and install the .deb package from here. Go to the download location and install it as shown below.

sudo gdebi netselect_0.3.ds1-25_amd64.deb

If you any dependencies error like below,

Dependency is not satisfiable: netselect (>= 0.3.ds1-17)

Then, download and install the netselect package first. Download netselect from here.

sudo gdebi netselect_0.3.ds1-25_amd64.deb

Finally, install netselect-apt package again.

Usage

Syntax

netselect-apt [OPTIONS] [stable|testing|unstable|experimental|release_codename|sid]

OPTIONS

stable|testing|unstable|experimental|release_codename|sid

Specify which distribution of Debian to use.  By default  stable is used.

-a, –arch ARCH

Use  mirrors containing ARCH. By default the architecture of the current machine is used as reported by dpkg.

-s, –sources

While generating OUTFILE include also deb-src lines to use  with “apt-get source” to obtain Debian source packages.

-i, –infile INFILE

Use INFILE instead of downloading the mirror list to a temporary file. The file must be in the same format as mirrors_full.

-o, –outfile OUTFILE

Use OUTFILE instead of sources.list.

-n, –nonfree

Include also non-free section while generating OUTFILE.

-f, –ftp

Use FTP mirrors instead of HTTP  and  generate  OUTFILE  accordingly.

-O OPTIONS

The  OPTIONS  provided are added, verbatim, to netselect when it is run. Here you can provide a (quoted) list of options for net‐select.

-t, –tests hosts

Make a short list with the number of hosts provided and use that list to test for mirror validity. By  default  10  hosts  are tested.

-c, –country COUNTRY

Only  test  the sites found under the country COUNTRY (the value can either be an ISO-3166 value or the full  name  of  the  language,  in  English).  When this value is set the mirror list or the INFILE will be filtered and only the sites that  are  listed under  the  given  country will be tested. Note that restricting the search might not give the best  results,  as  the  “fastest”
mirror  might  not even be in the same country as the system the program is running in.

Find Fastest Debian Mirror

Enter the following command to find fastest debian mirror list.

sudo netselect-apt

Sample output:

sk@sk: ~_005

At the end, you might have an output like below.

sk@sk: ~_006

This command will automatically select the fastest mirror according to your geographical location and it will save the output in sources.list file in your current directory.

Update Sources.list file

Append or move the sources.list file contents generated by netselect-apt command to /etc/apt/sources.list file as shown below.

First backup the current sources.list file.

sudo mv /etc/apt/sources.list /etc/apt/sources.list.bak

Then, append the new sources.list.

sudo mv sources.list /etc/apt/sources.list

Now update or upgrade or install software’s in your debian system. You will notice the speed difference.

Find Mirrors Depending Upon Your Distribution Version

We will find fastest mirror depending upon our distribution. For example, to find the fastest mirror for Debian 7 Wheezy, run the following command:

sudo netselect-apt wheezy

Suppose if you want to find only the fastest ftp mirrors instead of http, then the command should be:

sudo netselect-apt -f wheezy

If you want to include non-free repositories, enter the following command:

sudo netselect-apt -n wheezy

You can also include parameters for stable, non-stable and testing etc. If you didn’t include any parameters, then this command will list the fastest http mirror list for the stable version.

Please note that the speed of this mirrors may vary often, so I suggest you to run this command atleast once in a week and update the sources.list accordingly.

For more information about ‘netselect-apt’ command, please refer the man pages.

man netselect-apt
That’s it. Cheers!

Advertise here with BSA

---------------------------------------------------------------------
How To Find The Fastest Mirror In Debian And Derivatives

Linux basics: How To Reset Forgotten Password In Ubuntu

$
0
0

We have already showed you how to reset a forgotten password in CentOS. In this brief tutorial, we will see how to reset the lost or forgotten password in Ubuntu and derivatives.

Here, we will reset the lost/forgotten password of Ubuntu 14.10 server.

Power on the system. You should see the grub menu when booting your system.

Ubuntu 14.10 server [Running] - Oracle VM VirtualBox_007

Press “e” to edit the grub menu. The following screen should appear.

Ubuntu 14.10 server [Running] - Oracle VM VirtualBox_008

Find the line that starts with: linux     /boot/vmlinuz….

Ubuntu 14.10 server [Running] - Oracle VM VirtualBox_009

Go to the end of the line and type: init=/bin/bash

Ubuntu 14.10 server [Running] - Oracle VM VirtualBox_010

Now, press CTRL+X or F10 to boot your Ubuntu system.

Once you reached the bash prompt, type the following commands to mount the file system in rw mode.

mount -o remount,rw /

Now, change the password using command:

passwd

The above command will reset your root user password. If you want to change the password of a specific user, for example sk, use the following command instead.

passwd sk

Reboot your system.

reboot -f

That’s it. Now, you can login using your new password.


Advertise here with BSA

---------------------------------------------------------------------
Linux basics: How To Reset Forgotten Password In Ubuntu

Inxi: Find System And Hardware Information On Linux

$
0
0

We already have shown different applications and ways to find the system and hardware information on Linux. In that series, today we will see how to find such details using inxi. It can be used for forum technical support, as a debugging tool, to quickly ascertain user system configuration and hardware.

Inxi is a command line tool that can be used to find the complete system and hardware details such as;

  • Hardware,
  • CPU,
  • Drivers,
  • Xorg,
  • Desktop,
  • Kernel,
  • GCC version,
  • Processes,
  • RAM usage,
  • and other useful information.

Installation

Inxi is available in the default repositories of most modern GNU/Linux operating systems. So, we can simply install it by running the following commands.

On Debian based system:

sudo apt-get install inxi

On Fedora:

sudo yum install inxi

On RHEL based systems:

Install EPEL repository:

sudo yum install epel-release

Then, install inxi using command:

sudo yum install inxi

Usage

To find the quick view of the system information, run the following command from Terminal.

inxi

Sample output:

CPU~Dual core Intel Core i3-2350M CPU (-HT-MCP-) clocked at Min:800.000Mhz Max:1200.000Mhz Kernel~3.13.0-45-generic x86_64 Up~6:41 Mem~1537.7/3861.3MB HDD~500.1GB(52.5% used) Procs~183 Client~Shell inxi~1.9.17

Ofcourse, we can retrieve a particular hardware details. For example to retrieve the Audio/Sound hardware details, run the following command:

inxi -A

Sample output:

Audio:     Card: Intel 6 Series/C200 Series Family High Definition Audio Controller driver: snd_hda_intel 
           Sound: Advanced Linux Sound Architecture ver: k3.13.0-45-generic

Cool, isn’t it?

Likewise, you can retrieve the details of Graphic card information.

inxi -G

Sample output:

Graphics:  Card: Intel 2nd Generation Core Processor Family Integrated Graphics Controller 
           X.Org: 1.15.1 drivers: intel (unloaded: fbdev,vesa) Resolution: 1366x768@60.0hz 
           GLX Renderer: Mesa DRI Intel Sandybridge Mobile GLX Version: 3.0 Mesa 10.3.0

What about harddisk information? That’s also possible. To view the full harddisk information, run the following command.

inxi -D

Sample Output:

Drives:    HDD Total Size: 500.1GB (52.5% used) 1: id: /dev/sda model: ST9601325BD size: 500.1GB

To display the Bios and Motherboard details:

inxi -M

Sample output:

Machine:   System: Dell (portable) product: Inspiron N5050
           Mobo: Dell model: 01HXXJ version: A05 Bios: Dell version: A05 date: 08/03/2012

Not only hardware details, it can also displays the list of available repositories in our system.

inxi -r

Sample output:

Repos:     Active apt sources in file: /etc/apt/sources.list
           deb http://ubuntu.excellmedia.net/archive/ trusty main restricted
           deb-src http://ubuntu.excellmedia.net/archive/ trusty main restricted
           deb http://ubuntu.excellmedia.net/archive/ trusty-updates main restricted
           deb-src http://ubuntu.excellmedia.net/archive/ trusty-updates main restricted
           deb http://ubuntu.excellmedia.net/archive/ trusty universe
           .
           .
           Active apt sources in file: /etc/apt/sources.list.d/intellinuxgraphics.list
           deb https://download.01.org/gfx/ubuntu/14.04/main trusty main #Intel Graphics drivers
           Active apt sources in file: /etc/apt/sources.list.d/linrunner-tlp-trusty.list
           Active apt sources in file: /etc/apt/sources.list.d/wseverin-ppa-trusty.list
           deb http://ppa.launchpad.net/wseverin/ppa/ubuntu trusty main

Inxi will also display the Weather details of your location. Surprised? Yes, It should.

inxi -W Erode,Tamilnadu

Here Erode is the District and Tamilnadu is a state in India.

Sample output:

Weather:   Conditions: 79 F (26 C) - Clear Time: February 4, 6:00 PM IST

Viewing Complete Hardware details

Tired of finding each hardware details? Well, you can list all details at once using command:

inxi -F

Sample output:

System:    Host: sk Kernel: 3.13.0-45-generic x86_64 (64 bit) Desktop: LXDE (Openbox 3.5.2) Distro: Ubuntu 14.04 trusty
Machine:   System: Dell (portable) product: Inspiron N5050
           Mobo: Dell model: 01HXXJ version: A05 Bios: Dell version: A05 date: 08/03/2012
CPU:       Dual core Intel Core i3-2350M CPU (-HT-MCP-) cache: 3072 KB flags: (lm nx sse sse2 sse3 sse4_1 sse4_2 ssse3 vmx) 
           Clock Speeds: 1: 800.00 MHz 2: 1000.00 MHz 3: 800.00 MHz 4: 800.00 MHz
Graphics:  Card: Intel 2nd Generation Core Processor Family Integrated Graphics Controller 
           X.Org: 1.15.1 drivers: intel (unloaded: fbdev,vesa) Resolution: 1366x768@60.0hz 
           GLX Renderer: Mesa DRI Intel Sandybridge Mobile GLX Version: 3.0 Mesa 10.3.0
Audio:     Card: Intel 6 Series/C200 Series Family High Definition Audio Controller driver: snd_hda_intel 
           Sound: Advanced Linux Sound Architecture ver: k3.13.0-45-generic
Network:   Card-1: Qualcomm Atheros AR9285 Wireless Network Adapter (PCI-Express) driver: ath9k 
           IF: wlan0 state: up mac: 
           Card-2: Realtek RTL8101E/RTL8102E PCI Express Fast Ethernet controller driver: r8169 
           IF: eth0 state: down mac: 
Drives:    HDD Total Size: 500.1GB (52.5% used) 1: id: /dev/sda model: ST9500325AS size: 500.1GB 
Partition: ID: / size: 455G used: 245G (57%) fs: ext4 ID: /boot size: 236M used: 159M (72%) fs: ext2 
           ID: swap-1 size: 4.19GB used: 0.00GB (0%) fs: swap 
RAID:      No RAID devices detected - /proc/mdstat and md_mod kernel raid module present
Sensors:   System Temperatures: cpu: 64.5C mobo: N/A 
           Fan Speeds (in rpm): cpu: N/A 
Info:      Processes: 186 Uptime: 6:52 Memory: 1547.2/3861.3MB Client: Shell (bash) inxi: 1.9.17

As you see in the above, inxi displays the complete hardware details.

For more details, refer the man pages.

man inxi

Conclusion

Are you searching for a simple tool which displays your complete system and hardware details? Then, don’t look anywhere, inxi will give you what actually want. And, it is light weight tool available in your default repositories. What else you want more? Give it a try, you won’t be disappointed.

Cheers!


Advertise here with BSA

---------------------------------------------------------------------
Inxi: Find System And Hardware Information On Linux

Installing And Configuring Logwatch In Ubuntu 14.04

$
0
0

What is Logwatch?

Logwatch is a customizable log analysis system. Logwatch collects the system’s logs and create a good format of report, We can get the log reports in our mail from any Linux distribution based Server’s. Let we see how to install and configure Logwatch in our VPS server.

My Server Setup:

IP Address   :   104.xxx.xxx.8
Hostname    :   log.unixmenlocal.com
ifconfig | grep inet
hostnamectl

logwatch_ip

Step 1: Installing Package:

First step we have to get the package, Let we start to Install Logwatch Package using

sudo apt-get install logwatch -y

log installing package

While installation we have to choose Which type of mail delivery need to be configured Continue by choosing OK.

log mail select

Choose Internet Site and continue using OK.

log hostname

Choose a System mail name how it want to be mentioned in mail Subject which we used to receive from logwatch.

log grep

sudo dpkg -l | grep logwatch

At last we can see the package was installed.

Step 2: Make changes to the configuration:

After installation we need to make changes to the conf file under

vim /usr/share/logwatch/default.conf/logwatch.conf

log edit conf

We need to make changes to the following options, How we need to get the Output. By default it will be stdio, Change it to mail, format which we need to get in mail, By default it will be text. Then provide the email ID where we need to get the logwatch information about your server.

 Output = mail
 Format = html
 MailTo = baxxxxxxxxx@live.com

log conf changesIf we need to get the logs of today we can assign Range to Today, By default it will be Yesterday, If the range is Yesterday we used to get the logs one-day back logs in mail.

Range = Today

After making changes save and close the file using wq!

Step 3: E-mail Setup to Receive Emails

Then edit the file 00logwatch to append the mail were we need to get the Logs, Logwatch logs will get delivered to the below Email.

vim /etc/cron.daily/00logwatch

log cron setupAdd the following line with email ID. By default there will be /us/sbin/logwatcg –mailto comment it using # And add the below content.

/usr/sbin/logwatch --mailto baxxxxxxxxxxx@live.com
/usr/sbin/logwatch --mailto webmaster@unixmen.com

log mail settings

After making changes Save and exit using wq!

Step 4: Test the Logwatch:

To test the Logwatch just simple run the logwatch command:

logwatch

 log mail

We will get the email as above shown.. If we get the E-mail Successfully we have did it… Cool let we see how to send mail everyday.

Step 5: Schedule Cron Jobs

If we need get log in specific time add cronjob as below, Create a Cronjob using

crontab -e

Append the Below Content or add the own scheduler.

# m h dom mon dow command
0 10 * * * /usr/sbin/logwatch

log cron entry

That’s it we have done, Successfully installed and configured logwatch, By now on-wards we used to get the Logwatch information’s with package modification’s, logs, any Suspicious log-in etc in mail everyday. Hope you came to know how to get the log information periodically through mail in text or html format using logwatch package.


Advertise here with BSA

---------------------------------------------------------------------
Installing And Configuring Logwatch In Ubuntu 14.04

Install OpenQRM Cloud Computing Platform In Debian

$
0
0

Introduction

openQRM is a web-based open source Cloud computing and datacenter management platform that integrates flexibly with existing components in enterprise data centers.

It supports the following virtualization technologies:

  • KVM,
  • XEN,
  • Citrix XenServer,
  • VMWare ESX,
  • LXC,
  • OpenVZ.

The Hybrid Cloud Connector in openQRM supports a range of private or public cloud providers to extend your infrastructure on demand via Amazon AWS, Eucalyptus or OpenStack. It, also, automates provisioning, virtualization, storage and configuration management, and it takes care of high-availability. A self-service cloud portal with integrated billing system enables end-users to request new servers and application stacks on-demand.

openQRM is available in two different flavours such as:

  • Enterprise Edition
  • Community Edition

You can view the difference between both editions here.

Features

  • Private/Hybrid Cloud Computing Platform;
  • Manages physical and virtualized server systems;
  • Integrates with all major open and commercial storage technologies;
  • Cross-platform: Linux, Windows, OpenSolaris, and *BSD;
  • Supports KVM, XEN, Citrix XenServer, VMWare ESX(i), lxc, OpenVZ and VirtualBox;
  • Support for Hybrid Cloud setups using additional Amazon AWS, Eucalyptus, Ubuntu UEC cloud resources;
  • Supports P2V, P2P, V2P, V2V Migrations and High-Availability;
  • Integrates with the best Open Source management tools – like puppet, nagios/Icinga or collectd;
  • Over 50 plugins for extended features and integration with your infrastructure;
  • Self-Service Portal for end-users;
  • Integrated billing system.

Installation

Here, we will install openQRM in Ubuntu 14.04 LTS. Your server must atleast meet the following requirements.

  • 1 GB RAM;
  • 100 GB Hdd;
  • Optional: Virtualization enabled (VT for Intel CPUs or AMD-V for AMD CPUs) in Bios.

First, install make package to compile openQRM source package.

sudo apt-get update
sudo apt-get upgrade
sudo apt-get install make

Then, run the following commands one by one to install openQRM.

Download the latest available version from here.

wget http://sourceforge.net/projects/openqrm/files/openQRM-Community-5.1/openqrm-community-5.1.tgz
tar -xvzf openqrm-community-5.1.tgz
cd openqrm-community-5.1/src/
sudo make
sudo make install
sudo make start

During installation, you’ll be asked to update the php.ini file.

sk@server: ~-openqrm-community-5.1-src_001

Enter mysql root user password.

sk@server: ~-openqrm-community-5.1-src_002

Re-enter password:

sk@server: ~-openqrm-community-5.1-src_003

Select the mail server configuration type.

sk@server: ~-openqrm-community-5.1-src_004

If you’re not sure, select Local only. In our case, I go with Local only option.

sk@server: ~-openqrm-community-5.1-src_005

Enter your system mail name, and finally enter the Nagios administration password.

sk@server: ~-openqrm-community-5.1-src_007

The above commands will take long time depending upon your Internet connection to download all packages required to run openQRM. Be patient.

Finally, you’ll get the openQRM configuration URL along with username and password.

sk@debian: ~_002

Configuration

After installing openQRM, open up your web browser and navigate to the URL: http://ip-address/openqrm.

For example, in my case http://192.168.1.100/openqrm.

The default username and password is: openqrm/openqrm.

Mozilla Firefox_003

Select a network card to use for the openQRM management network.

openQRM Server - Mozilla Firefox_004

Select a database type. In our case, I selected mysql.

openQRM Server - Mozilla Firefox_006

Now, configure the database connection and initialize openQRM. Here, I use openQRM as database name, and user as root and debian as password for the database. Be mindful that you should enter the mysql root user password that you have created while installing openQRM.

openQRM Server - Mozilla Firefox_012Congratulations!! openQRM has been installed and configured.
openQRM Server - Mozilla Firefox_013

Update openQRM

To update openQRM at any time run the following command:

cd openqrm/src/
make update

What we have done so far is just installed and configured openQRM in our Ubuntu server. For creating, running Virtual Machines, managing Storage, integrating additional systems and running your own private Cloud, I suggest you to read the openQRM Administrator Guide.

That’s all now. Cheers! Happy weekend!!


Advertise here with BSA

---------------------------------------------------------------------
Install OpenQRM Cloud Computing Platform In Debian

Viewing all 457 articles
Browse latest View live